LG HMC030KD1 Service Manual - Page 41
evaporator clamp.
 |
View all LG HMC030KD1 manuals
Add to My Manuals
Save this manual to your list of manuals |
Page 41 highlights
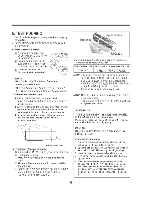
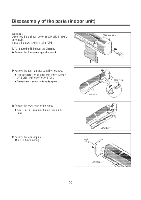
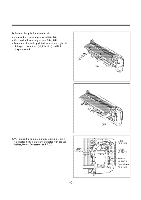
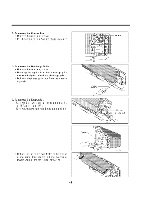
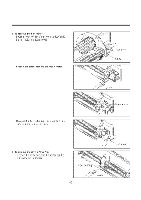
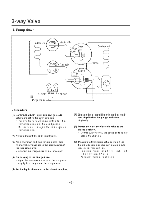
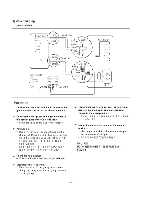
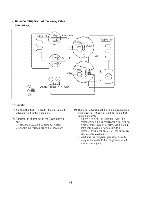
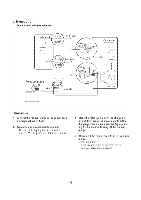
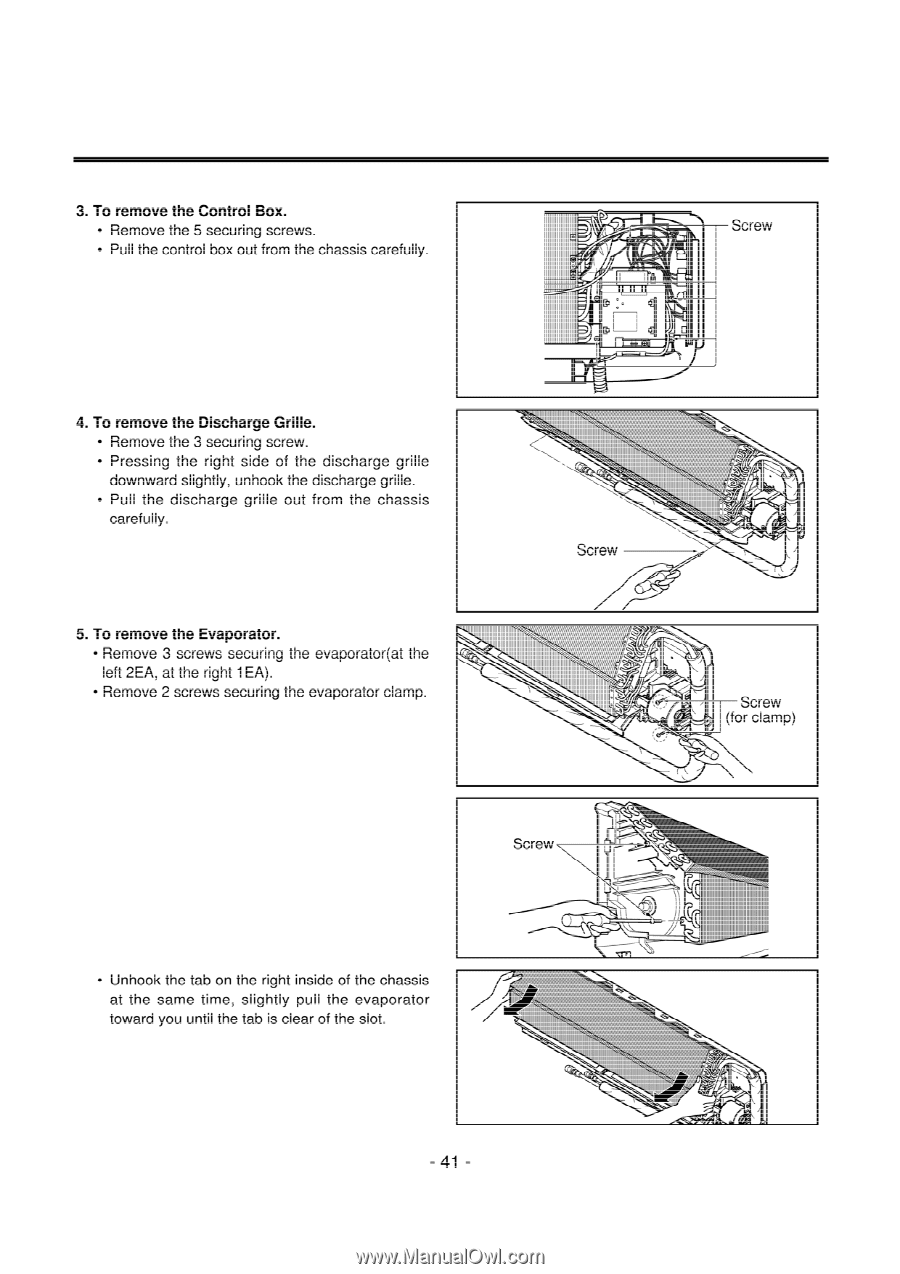
3. To remove the Control Box. • Remove the 5 securing screws. • Pull the control box out from the chassis carefully. 4. To remove the Discharge Grille. • Remove the 3 securing screw. • Pressing the right side of the discharge grille downward slightly, unhook the discharge grille. • Pull the discharge grille out from the chassis carefully. 5. To remove the Evaporator. • Remove 3 screws securing the evaporator(at the left 2EA, at the right 1EA). • Remove 2 screws securing the evaporator clamp. Screw lb Screw Screw (for clamp) I r Screw • Unhook the tab on the right inside of the chassis at the same time, slightly pull the evaporator toward you until the tab is clear of the slot. -41 -
-
 1
1 -
2
-
3
-
4
-
5
-
6
-
7
-
8
-
9
-
10
-
11
-
12
-
13
-
14
-
15
-
16
-
17
-
18
-
19
-
20
-
21
-
22
-
23
-
24
-
25
-
26
-
27
-
28
-
29
-
30
-
31
-
32
-
33
-
34
-
35
-
 36
36 -
 37
37 -
 38
38 -
 39
39 -
 40
40 -
 41
41 -
 42
42 -
 43
43 -
 44
44 -
 45
45 -
 46
46 -
47
-
48
-
49
-
50
-
51
-
52
-
53
-
54
-
55
-
56
-
57
-
58
-
59
-
60
-
61
-
62
-
63
-
64
 |
 |
3.
To
remove
the
Control
Box.
•
Remove
the
5
securing
screws.
•
Pull
the
control
box
out
from
the
chassis
carefully.
4.
To
remove
the
Discharge
Grille.
•
Remove
the
3
securing
screw.
•
Pressing
the
right
side
of
the
discharge
grille
downward
slightly,
unhook
the
discharge
grille.
•
Pull
the
discharge
grille
out
from
the
chassis
carefully.
5.
To
remove
the
Evaporator.
•
Remove
3
screws
securing
the
evaporator(at
the
left
2EA,
at
the
right
1EA).
•
Remove
2
screws
securing
the
evaporator clamp.
•
Unhook
the
tab
on
the
right
inside
of
the
chassis
at
the
same
time,
slightly
pull
the
evaporator
toward
you
until
the
tab
is
clear
of
the
slot.
lb
Screw
Screw
Screw
(for
clamp)
Screw
I
r
-41
-