Lacie LaCinema Classic HD User Manual - Page 18
STEP 2: Connect the USB cable - supply
 |
View all Lacie LaCinema Classic HD manuals
Add to My Manuals
Save this manual to your list of manuals |
Page 18 highlights
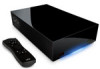
LaCinema Classic HD User Manual 3.2. STEP 2: Connect the USB cable 1. Make sure the power cable is connected as described in section 3.1. STEP 1: Connect the Power Supply. 2. Connect one end of the USB cable to your computer (Fig. 14) and the other end to the small USB port on the rear of the LaCinema Classic HD (Fig. 15). Windows Users a. The drive will mount in My Computer/Computer (Windows users) (Fig. 16). b. Copy multimedia files to the mounted volume normally. Mac Users a. As the drive is preformatted in NTFS for immediate use with Windows, you will need to reformat the drive into HFS+ in order for the drive to mount on your Mac. Follow the steps in section 9.2. Reformatting: Mac Users, then proceed to step b below. b. The drive will mount on your Desktop. c. Copy multimedia files to the mounted volume normally. 3. Unmount the drive and unplug the USB cable before connecting the drive to your television (see 3.3. STEP 3: Unmounting Your Drive). TECHNICAL NOTE: The LaCinema Classic HD operating system features a file database that will detect the type of file (movie, music, etc.) and display it automatically on your TV in the correct media space. If you create folders on the mounted volume and want to browse the files according to this structure on your TV, your can choose to view files by Folder from within each media space. IMPORTANT INFO: To avoid data corruption, make sure to unmount your drive before disconnecting the USB cable. See section 3.3. STEP 3: Unmounting Your Drive for details. IMPORTANT INFO: The drive cannot be connected to your computer via USB and to the television simultaneously. Fig. 14 Fig. 15 Fig. 16 Setting Up: Transferring Files page 18
-
 1
1 -
2
-
3
-
4
-
5
-
6
-
7
-
8
-
9
-
10
-
11
-
12
-
 13
13 -
 14
14 -
 15
15 -
 16
16 -
 17
17 -
 18
18 -
 19
19 -
 20
20 -
 21
21 -
 22
22 -
 23
23 -
24
-
25
-
26
-
27
-
28
-
29
-
30
-
31
-
32
-
33
-
34
-
35
-
36
-
37
-
38
-
39
-
40
-
41
-
42
-
43
-
44
-
45
-
46
-
47
-
48
-
49
-
50
-
51
-
52
-
53
-
54
-
55
-
56
-
57
-
58
-
59
-
60
-
61
-
62
-
63
-
64
-
65
-
66
-
67
-
68
-
69
-
70
-
71
-
72
-
73
-
74
-
75
-
76
-
77
-
78
-
79
-
80
-
81
 |
 |
