Lenovo ThinkPad 600E User's Reference Guide for TP 600 - Page 73
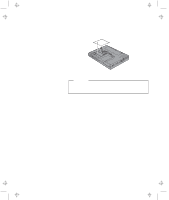
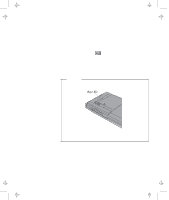
Upgrading the Hard Disk Drive, upside down.
 |
View all Lenovo ThinkPad 600E manuals
Add to My Manuals
Save this manual to your list of manuals |
Page 73 highlights
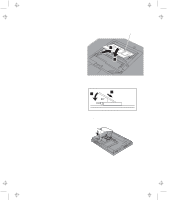
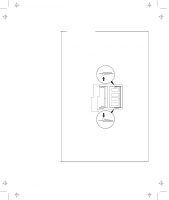
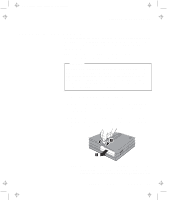
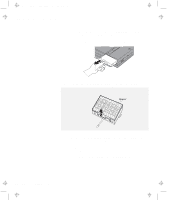
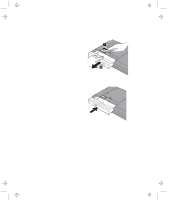
Title: C79EGMST CreationDate: 02/10/98 09:24:42 Upgrading the Hard Disk Drive Upgrading the Hard Disk Drive You can increase the storage capacity of your computer by replacing the original, built-in hard disk drive with an optional one. You can purchase the option from your IBM reseller or IBM marketing representative. Note: Replace the hard disk drive only if you upgrade it or have it repaired. You should not replace it often. Attention Do not drop or apply any shock to the hard disk drive. The drive is sensitive to physical shock. Incorrect handling can cause damage and permanent loss of data on the hard disk. Before removing the hard disk drive, make a backup copy of all the information on the hard disk. Never remove the drive while the system is operating or in suspend mode. To replace the hard disk drive, do the following: 1 Power off the computer; then disconnect the AC Adapter and all cables from the computer, and turn the computer upside down. 2 Remove the coin screw by rotating it counterclockwise with a coin, as shown 1 ; then remove the hard disk drive cover 2 . Note: You can replace the coin screw with the security screw shipped with your computer. With the security screw installed, the hard disk drive in your computer cannot be Chapter 2. Extending the Features of Your Computer 55
-
 1
1 -
2
-
3
-
4
-
5
-
6
-
7
-
8
-
9
-
10
-
11
-
12
-
13
-
14
-
15
-
16
-
17
-
18
-
19
-
20
-
21
-
22
-
23
-
24
-
25
-
26
-
27
-
28
-
29
-
30
-
31
-
32
-
33
-
34
-
35
-
36
-
37
-
38
-
39
-
40
-
41
-
42
-
43
-
44
-
45
-
46
-
47
-
48
-
49
-
50
-
51
-
52
-
53
-
54
-
55
-
56
-
57
-
58
-
59
-
60
-
61
-
62
-
63
-
64
-
65
-
66
-
67
-
 68
68 -
 69
69 -
 70
70 -
 71
71 -
 72
72 -
 73
73 -
 74
74 -
 75
75 -
 76
76 -
 77
77 -
 78
78 -
79
-
80
-
81
-
82
-
83
-
84
-
85
-
86
-
87
-
88
-
89
-
90
-
91
-
92
-
93
-
94
-
95
-
96
-
97
-
98
-
99
-
100
-
101
-
102
-
103
-
104
-
105
-
106
-
107
-
108
-
109
-
110
-
111
-
112
-
113
-
114
-
115
-
116
-
117
-
118
-
119
-
120
-
121
-
122
-
123
-
124
-
125
-
126
-
127
-
128
-
129
-
130
-
131
-
132
-
133
-
134
-
135
-
136
-
137
-
138
-
139
-
140
-
141
-
142
-
143
-
144
-
145
-
146
-
147
-
148
-
149
-
150
-
151
-
152
-
153
-
154
-
155
-
156
-
157
-
158
-
159
-
160
-
161
-
162
-
163
-
164
-
165
-
166
-
167
-
168
-
169
-
170
-
171
-
172
-
173
-
174
-
175
-
176
-
177
-
178
-
179
-
180
-
181
-
182
-
183
-
184
-
185
-
186
-
187
-
188
-
189
-
190
-
191
-
192
-
193
-
194
-
195
-
196
-
197
-
198
-
199
-
200
-
201
-
202
-
203
-
204
-
205
-
206
-
207
-
208
 |
 |
