Lexmark 12N0009 Setup Guide - Page 36
Installing a hard disk, Remove the system board access
 |
UPC - 734646560092
View all Lexmark 12N0009 manuals
Add to My Manuals
Save this manual to your list of manuals |
Page 36 highlights
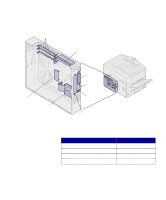
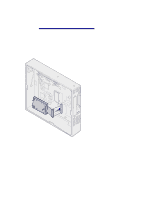
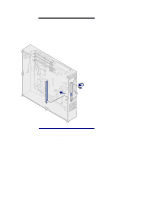
Installing a hard disk Follow the instructions in this section to install an optional hard disk. Warning! Hard disks are easily damaged by static electricity. Touch something metal such as the printer frame before you touch the hard disk. If an option card has been installed, you need to remove the option card before installing the hard disk. 1 Remove the system board access cover (see page 24). 2 Align and press the ribbon cable connector into the connector on the system board. 30 Install memory and option cards
-
 1
1 -
2
-
3
-
4
-
5
-
6
-
7
-
8
-
9
-
10
-
11
-
12
-
13
-
14
-
15
-
16
-
17
-
18
-
19
-
20
-
21
-
22
-
23
-
24
-
25
-
26
-
27
-
28
-
29
-
30
-
 31
31 -
 32
32 -
 33
33 -
 34
34 -
 35
35 -
 36
36 -
 37
37 -
 38
38 -
 39
39 -
 40
40 -
 41
41 -
42
-
43
-
44
-
45
-
46
-
47
-
48
-
49
-
50
-
51
-
52
-
53
-
54
-
55
-
56
-
57
-
58
-
59
-
60
-
61
-
62
-
63
-
64
-
65
-
66
-
67
-
68
-
69
-
70
-
71
-
72
-
73
-
74
-
75
-
76
-
77
-
78
-
79
-
80
-
81
-
82
-
83
-
84
-
85
-
86
-
87
-
88
-
89
-
90
-
91
-
92
 |
 |

30
Install memory and option cards
Installing a hard disk
Follow the instructions in this section to
install an optional hard disk.
Warning!
Hard disks are easily
damaged by static electricity. Touch
something metal such as the printer
frame before you touch the hard disk.
If an option card has been installed, you
need to remove the option card before
installing the hard disk.
1
Remove the system board access
cover (see page 24).
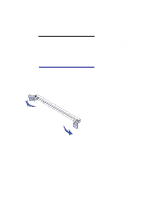
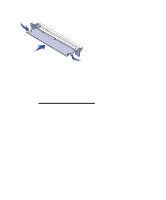
2
Align and press the ribbon cable
connector into the connector on
the system board.