Lexmark 12N0009 Setup Guide - Page 8
Unpack your printer, terms throughout this book and on
 |
UPC - 734646560092
View all Lexmark 12N0009 manuals
Add to My Manuals
Save this manual to your list of manuals |
Page 8 highlights
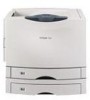
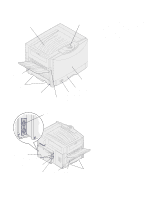
Top cover and standard output bin Operator panel Familiarize yourself with the names and locations of items on the front and rear of your new printer. This will help you during printer setup. We use the same terms throughout this book and on the publications CD. Exit tray (bin 1) Handholds Power switch Front door Paper tray Paper size dial Door release latch High-capacity feeder connector Rear cover Parallel or Ethernet connector Option slot cover USB connector Power cord Duplex unit Handholds socket cover 2 Unpack your printer
-
 1
1 -
2
-
 3
3 -
 4
4 -
 5
5 -
 6
6 -
 7
7 -
 8
8 -
 9
9 -
 10
10 -
 11
11 -
 12
12 -
 13
13 -
14
-
15
-
16
-
17
-
18
-
19
-
20
-
21
-
22
-
23
-
24
-
25
-
26
-
27
-
28
-
29
-
30
-
31
-
32
-
33
-
34
-
35
-
36
-
37
-
38
-
39
-
40
-
41
-
42
-
43
-
44
-
45
-
46
-
47
-
48
-
49
-
50
-
51
-
52
-
53
-
54
-
55
-
56
-
57
-
58
-
59
-
60
-
61
-
62
-
63
-
64
-
65
-
66
-
67
-
68
-
69
-
70
-
71
-
72
-
73
-
74
-
75
-
76
-
77
-
78
-
79
-
80
-
81
-
82
-
83
-
84
-
85
-
86
-
87
-
88
-
89
-
90
-
91
-
92
 |
 |

2
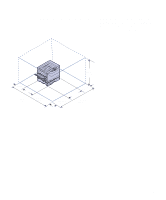
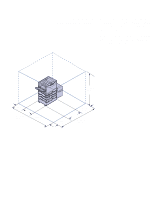
Unpack your printer
Familiarize yourself with the names and
locations of items on the front and rear of
your new printer. This will help you
during printer setup. We use the same
terms throughout this book and on the
publications CD.
Power switch
Door release latch
Operator panel
Handholds
Top cover and standard output bin
Front door
Paper tray
Paper size dial
Exit tray
(bin 1)
Power cord
socket
Rear cover
Parallel or Ethernet
connector
Handholds
Duplex unit
cover
High-capacity feeder
connector
USB connector
Option slot cover