Lexmark E323 Setup Guide - Page 12
Install the optional 250-sheet drawer, printer, print a menu settings
 |
UPC - 734646384216
View all Lexmark E323 manuals
Add to My Manuals
Save this manual to your list of manuals |
Page 12 highlights
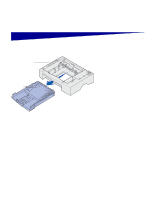
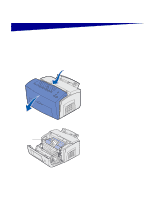
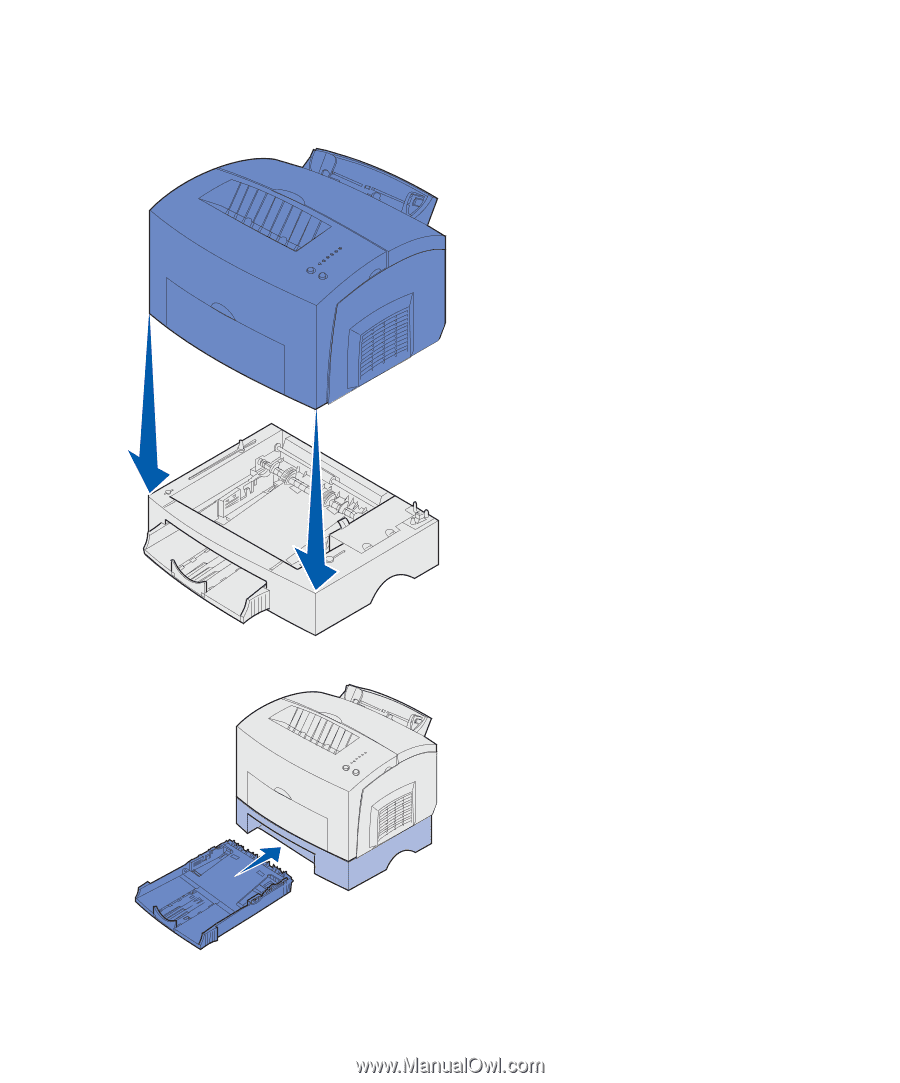
Note: If you install the optional 250-sheet drawer at a later time, be sure to turn off the printer before installing it. 4 Align the printer with the front of the support unit and place it on top of the support unit. Make sure the support unit is firmly in place. When you complete setting up the printer, print a menu settings page to verify the 250-sheet drawer is listed under Installed Features (see page 35). 5 Insert the tray. Install the optional 250-sheet drawer 4
-
 1
1 -
2
-
3
-
4
-
5
-
6
-
 7
7 -
 8
8 -
 9
9 -
 10
10 -
 11
11 -
 12
12 -
 13
13 -
 14
14 -
 15
15 -
 16
16 -
 17
17 -
18
-
19
-
20
-
21
-
22
-
23
-
24
-
25
-
26
-
27
-
28
-
29
-
30
-
31
-
32
-
33
-
34
-
35
-
36
-
37
-
38
-
39
-
40
-
41
-
42
-
43
-
44
-
45
-
46
-
47
-
48
-
49
-
50
-
51
-
52
-
53
-
54
-
55
-
56
-
57
-
58
-
59
-
60
-
61
-
62
-
63
 |
 |
4
Install the optional 250-sheet drawer
Note:
If you install the optional 250-sheet drawer at a
later time, be sure to turn off the printer before installing it.
4
Align the printer with the front of
the support unit and place it on top
of the support unit.
Make sure the support unit is
firmly in place.
When you complete setting up the
printer, print a menu settings page
to verify the 250-sheet drawer is
listed under Installed Features
(see page 35).
5
Insert the tray.