Lexmark E323 Setup Guide - Page 30
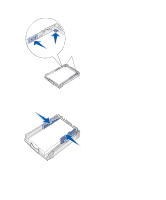
Slide the paper guides flush, when the flap is in the sealed
 |
UPC - 734646384216
View all Lexmark E323 manuals
Add to My Manuals
Save this manual to your list of manuals |
Page 30 highlights
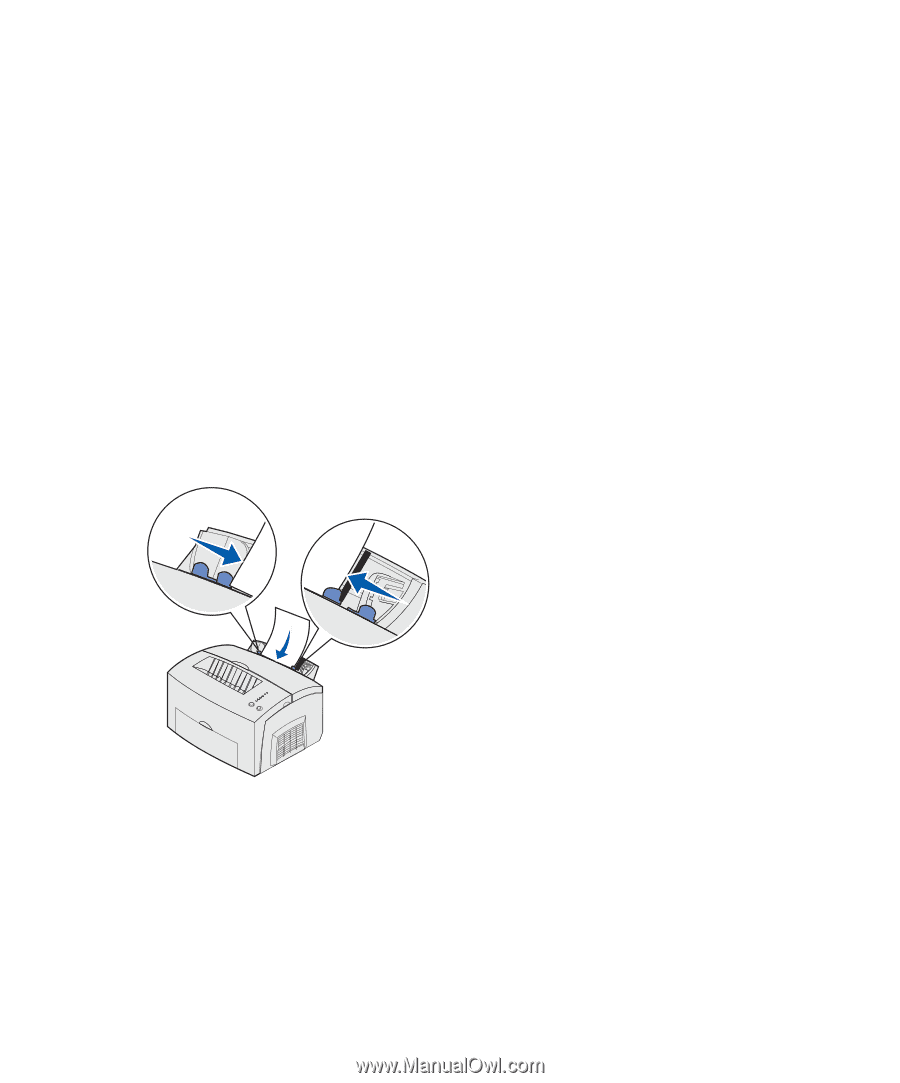
• envelopes, insert one envelope vertically, flap side down with the stamp area in the top left corner To reduce paper jams, do not use envelopes that: - Have excessive curl - Are stuck together - Are damaged in any way - Contain windows, holes, perforations, cutouts, or embossing - Use metal clasps, string ties, or metal folding bars - Have postage stamps attached - Have any exposed adhesive when the flap is in the sealed position 5 Slide the paper guides flush against the edges of the paper or envelope. 6 Select the paper size and type from your software application. 7 Start your print job. 8 Press and release Continue to start printing. Load paper 22
-
 1
1 -
2
-
3
-
4
-
5
-
6
-
7
-
8
-
9
-
10
-
11
-
12
-
13
-
14
-
15
-
16
-
17
-
18
-
19
-
20
-
21
-
22
-
23
-
24
-
 25
25 -
 26
26 -
 27
27 -
 28
28 -
 29
29 -
 30
30 -
 31
31 -
 32
32 -
 33
33 -
 34
34 -
 35
35 -
36
-
37
-
38
-
39
-
40
-
41
-
42
-
43
-
44
-
45
-
46
-
47
-
48
-
49
-
50
-
51
-
52
-
53
-
54
-
55
-
56
-
57
-
58
-
59
-
60
-
61
-
62
-
63
 |
 |
22
Load paper
•
envelopes, insert one envelope
vertically, flap side down with the
stamp area in the top left corner
To reduce paper jams, do not use
envelopes that:
–
Have excessive curl
–
Are stuck together
–
Are damaged in any way
–
Contain windows, holes,
perforations, cutouts, or
embossing
–
Use metal clasps, string ties, or
metal folding bars
–
Have postage stamps attached
–
Have any exposed adhesive
when the flap is in the sealed
position
5
Slide the paper guides flush
against the edges of the paper or
envelope.
6
Select the paper size and type
from your software application.
7
Start your print job.
8
Press and release
Continue
to
start printing.