Lexmark S315 User's Guide
Lexmark S315 Manual
 |
View all Lexmark S315 manuals
Add to My Manuals
Save this manual to your list of manuals |
Lexmark S315 manual content summary:
- Lexmark S315 | User's Guide - Page 1
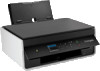
S310 Series User's Guide October 2011 Machine type(s): 4448 Model(s): S310 Series: 301, 30E www.lexmark.com - Lexmark S315 | User's Guide - Page 2
...19 Using the Windows printer software...19 Using the Macintosh printer software...21 Finding and installing optional software 22 Updating the printer software...23 Downloading PCL and PS drivers (Windows only 23 Reinstalling the printer software...23 Loading paper and original documents - Lexmark S315 | User's Guide - Page 3
to a local computer...51 Scanning to a network computer...52 Scanning to a flash drive or memory card 52 Scanning photos for editing...53 Scanning documents for editing...53 Scanning directly to e‑mail using the printer software 54 Scanning to a PDF...55 Scanning FAQ...56 Canceling scan jobs...56 - Lexmark S315 | User's Guide - Page 4
60 Installing the printer on a wireless network 60 Advanced wireless setup...67 Networking FAQ...77 Maintaining the printer 91 Maintaining ink cartridges...91 Cleaning the exterior of the printer...92 Cleaning the scanner glass...93 Moving the printer to another location 93 Troubleshooting 95 - Lexmark S315 | User's Guide - Page 5
's instructions and local regulations. Use only the power supply and power cord provided with this product or the manufacturer's authorized replacements. CAUTION-SHOCK HAZARD: Make sure that all external connections (such as Ethernet and telephone system connections) are properly installed in - Lexmark S315 | User's Guide - Page 6
‑power standby mode after the printer has been idle for a set amount of time (the Sleep timeout). • Share your printer. Wireless/network printers allow you to share a single printer among multiple computers, thus conserving energy and other resources. Conserving paper • Print more than one page - Lexmark S315 | User's Guide - Page 7
about the printer Publications What are you looking for? Initial setup instructions: • Connecting the printer • Installing the printer software Find it here Setup documentation The setup documentation came with the printer and is also available on the Lexmark Web site at http://support.lexmark.com - Lexmark S315 | User's Guide - Page 8
technical support: • Troubleshooting hints and tips • Frequently asked questions • Documentation • Driver downloads • Live chat support • E‑mail support Find it here User's Guide The User's Guide is available on the installation software CD. For updates, check our Web site at http://support.lexmark - Lexmark S315 | User's Guide - Page 9
for your region or country can be found on the Support Web site (http://support.lexmark.com) or on the printed warranty that came with your printer. • In the US-See the Statement of Limited Warranty included with this printer, or at http://support.lexmark.com. • In other countries or regions-See the - Lexmark S315 | User's Guide - Page 10
your printer 10 Understanding the parts of the printer 9 1 8 2 7 6 5 3 4 Use the To 1 Paper support Load paper. 2 Paper guide adjustment lever Adjust the paper guides. 3 PictBridge and USB port Connect a PictBridge-enabled digital camera or a flash drive to the printer. 4 Paper exit - Lexmark S315 | User's Guide - Page 11
carrier moves to the printhead access area when no printhead is installed in the printer. 15 Jam clearance cover Access and clear paper jams. 16 Ink cartridge access area Install, replace, or remove ink cartridges. 17 Scanner unit • Access the ink cartridges and printhead. • Clear paper jams. - Lexmark S315 | User's Guide - Page 12
and replacing supplies 12 Ordering and replacing supplies Ordering ink cartridges Lexmark S310 Series models (except Lexmark S319) Item Black cartridge Return Program cartridge1 150 Regular cartridge2 Not available High‑yield black cartridge 150XL 150XLA Yellow color cartridge 150 - Lexmark S315 | User's Guide - Page 13
and replacing supplies 13 • For best results, use only genuine Lexmark ink cartridges. Using genuine Lexmark ink cartridges Lexmark printers, ink cartridges, and photo paper are designed to perform together for superior print quality, and our inks are formulated to work with your printer and - Lexmark S315 | User's Guide - Page 14
place. 3 1 2 Notes: • Insert the color cartridges first, and then the black cartridge. • Insert the new ink cartridges immediately after removing the protective cap to avoid exposing the ink to air. 3 Close the printer. Ordering paper and other supplies To order supplies or to locate a dealer - Lexmark S315 | User's Guide - Page 15
type you want to recycle, and then select your country or region from the list. 3 Follow the instructions on the computer screen. Note: Printer supplies and hardware not listed in a Lexmark collection program may be recycled through your local recycling center. Contact your local recycling center to - Lexmark S315 | User's Guide - Page 16
. Return to the home screen. 6 Color Switch to color mode. 7 Black 8 Start Switch to black‑and‑white mode. Start a job, depending on which mode is selected. 9 Cancel • Cancel a print, copy, or scan job in progress. • Clear current settings or error messages, and return to previous settings. - Lexmark S315 | User's Guide - Page 17
to: > Setup > OK > Device Setup > OK > Screen Brightness > OK 4 Press the up or down arrow button to scroll to Dim, and then press . OK Note: If you select 2‑Sided Copy, Standalone, then the printer prints on both sides of the paper (duplex) for copy and fax jobs, and for printing in Windows and - Lexmark S315 | User's Guide - Page 18
control panel buttons and menus 18 Restoring factory default settings Resetting to factory default settings will delete all the printer settings you have previously selected. 1 From the printer control panel, navigate to: > Setup > OK > Restore Factory Defaults > OK 2 Press the up or down arrow - Lexmark S315 | User's Guide - Page 19
10 and 9* • PCLinux OS 2010* * The printer driver for this operating system is available only at http://support.lexmark.com. Using the Windows printer software Software installed during printer installation When you set up the printer using the installation software CD, all the necessary software - Lexmark S315 | User's Guide - Page 20
supplies. • Maintain ink cartridges. • Register the printer. • Contact technical support. • Access the User's Guide. Manage your fax contacts. Scan a document and produce text that you can edit with a word‑processing program. • Set up the wireless printer on a wireless network. • Change the wireless - Lexmark S315 | User's Guide - Page 21
up usual tasks with your printer. Set up the printer on a wireless network. Note: This application is automatically installed with the printer software if the printer has wireless capability. Remove the printer software from your computer. Notes: • Your printer may not come with these applications - Lexmark S315 | User's Guide - Page 22
Use Customer Support Lexmark Software Updates Lexmark Online Order Supplies Online Printer Registration Visit Lexmark SmartSolutions To Contact customer support. Download and install the latest printer software. Visit the Lexmark Web site. Order ink or supplies. Register your printer. • Visit the - Lexmark S315 | User's Guide - Page 23
(Windows only) Universal Print Drivers (PCL 5 emulation, PCL XL emulation, and PS emulation) can be downloaded from our Web site. You need to search for your printer model to view compatible drivers. Reinstalling the printer software When you set up the printer using the installation software CD - Lexmark S315 | User's Guide - Page 24
minute, then click the CD icon on the desktop. 3 Double-click the software installer package, and then follow the instructions on the computer screen. Using the Internet 1 Go to the Lexmark Web site at http://support.lexmark.com. 2 Navigate to: SUPPORT & DOWNLOADS > select your printer > select your - Lexmark S315 | User's Guide - Page 25
the center of the paper support. Note: Use the indicators on the paper support when loading smaller‑size paper. 4 Adjust the paper guides so they rest against the edges of the paper. 1 2 Note: Do not force paper into the printer. The paper should be flat against the paper support, and the edges - Lexmark S315 | User's Guide - Page 26
with the printable side faceup and the top of the letterhead going into the printer first. 25 sheets of heavyweight matte paper • The printable side of the paper is faceup. • The paper guides rest against the edges of the paper. Note: Draft mode is available but is not recommended for use with - Lexmark S315 | User's Guide - Page 27
up to 10 envelopes 1 2 27 Make sure that • The printable side of the envelope is faceup and the flap is on the left. • The paper guides rest against the paper support. • You select the correct envelope size. Select the next biggest size if the exact envelope size is not listed. • You print the - Lexmark S315 | User's Guide - Page 28
is printable, then see the instructions that came with the paper. • The paper guides rest against the edges of the paper. • You do not touch or scratch the glossy surface of the unprinted paper to prevent smudges or marks that may affect the quality of your prints. Notes: - For best results, allow - Lexmark S315 | User's Guide - Page 29
Loading paper and original documents 29 Loading original documents on the scanner glass 1 Open the scanner lid and place the document facedown on the scanner glass. 2 Close the scanner lid. - Lexmark S315 | User's Guide - Page 30
For Windows users 1 With a document open, click File > Print. 2 Click Properties, Preferences, Options, or Setup. 3 Select the print quality, the number of copies to print, the type of paper to use, and how the pages should print. 4 Click OK to close any printer software dialogs. 5 Click OK or Print - Lexmark S315 | User's Guide - Page 31
of copies that you want to print, and then select Collate. 5 Click OK to close any printer software dialogs. 6 Click OK or Print. For Macintosh users 1 With a document open, choose File > Page Setup. 2 From the Page Setup dialog, set the printer, paper size, and orientation. 3 Click OK. 4 From - Lexmark S315 | User's Guide - Page 32
your printer. 6 From the print options pop-up menu, choose Paper Handling. 7 From the Page Order pop‑up menu, choose a page order: • To print the first page first, choose Normal. • To print the last page first, choose Reverse. 8 Click Print. Printing multiple pages on one sheet For Windows users - Lexmark S315 | User's Guide - Page 33
area > select an orientation 6 Click OK to close any printer software dialogs. 7 Click OK or Print. For Macintosh users 1 With a document open, choose File > Page Setup. 2 From the "Format for" pop‑up menu, choose your printer. 3 From the Paper Size pop‑up menu, choose your envelope size. If no - Lexmark S315 | User's Guide - Page 34
6 Click OK to close any printer software dialogs. 7 Click OK or Print. For Macintosh users 1 With a document open, choose File > Page Setup. 2 From the "Format for" pop‑up menu, choose your printer. 3 From the Paper Size pop‑up menu, choose your paper size. If no paper size matches the label sheet - Lexmark S315 | User's Guide - Page 35
OK. 5 Click Close, and then click OK to close any printer software dialogs. 6 Click OK or Print. For Macintosh users 1 With a document open, choose File > Page Setup. 2 From the "Format for" pop‑up menu, choose your printer. 3 From the Paper Size pop‑up menu, choose Manage Custom Sizes. 4 Adjust the - Lexmark S315 | User's Guide - Page 36
. A loss of data can occur. 2 Follow the instructions or select from available options on the printer display. Note: If the printer does not recognize the memory device, then remove and reinsert it. Printing photos from a flash drive 1 Load photo paper. 2 Insert a flash drive or digital camera set - Lexmark S315 | User's Guide - Page 37
buttons to select the paper source, paper setup, photo size, number of photos per page and print quality. You can also enhance the quality of graphics. Press OK each time you make a selection. Note: The printer will use the default print settings unless you change the print settings from the camera - Lexmark S315 | User's Guide - Page 38
along the long edge of the page. • Click Short edge for print jobs with pages that are bound along the short edge of the page. 4 Click the Paper/Finishing tab, and then select a supported paper type. 5 Click OK to close any printer software dialogs. 6 Click OK or Print. To return to single-sided - Lexmark S315 | User's Guide - Page 39
the printer software For Windows users 1 Click File > Print. 2 Click Properties, Preferences, Options, or Setup. 3 Navigate to: Layout tab > Print on Both Sides (Duplex) area > select a dry time setting Note: Under conditions of high humidity, or if the normal drying time does not allow the ink to - Lexmark S315 | User's Guide - Page 40
> select your printer 2 Navigate to: Open Print Queue > Printer Setup > Driver tab or Printer Setup > Installable Options 3 From the Two‑Sided Printing Dry Time pop‑up menu, choose a dry time setting. Note: Under conditions of high humidity, or if the normal drying time does not allow the ink to dry - Lexmark S315 | User's Guide - Page 41
. 4 Click Add. Setting your printer as the default printer Your printer should be selected automatically from the Print dialog when you send a print job. If you have to manually select your printer, then it is not the default printer. To set the default printer: For Windows users 1 Click , or click - Lexmark S315 | User's Guide - Page 42
before sending the print job. For Windows users 1 With a document open, click File > Print. 2 Click Properties, Preferences, Options, or Setup. 3 Navigate to: Quality tab > select a print quality > OK For Macintosh users 1 With a document open, choose File > Print. 2 From the printer pop‑up menu - Lexmark S315 | User's Guide - Page 43
Resume. • If you want to resume all print jobs in the queue, then click Resume Printer or Start Jobs. Canceling print jobs To cancel a print job from the printer control panel, press . To cancel a print job from the computer, do the following: For Windows users 1 Click , or click Start and then - Lexmark S315 | User's Guide - Page 44
mobile device What is LexPrint? LexPrint is a free application that lets you print easily from your iPad, iPhone, or iPod touch using any Lexmark printer connected to the same wireless network. It lets you print Web pages, photos from the photo album, or photos you recently captured using the camera - Lexmark S315 | User's Guide - Page 45
want, press to start copying. Making copies 1 Load paper. 2 Load an original document faceup into the ADF or facedown on the scanner glass. 3 From the printer control panel, navigate to: > Copy > OK > 6 Select the copy mode: • Press to switch to color mode. • Press to switch to black‑and‑white mode. - Lexmark S315 | User's Guide - Page 46
you select color or black‑only printing, the light that corresponds to your choice comes on. 7 Press . Note: The selected copy settings are reset to the factory default after two minutes of printer inactivity. Copying an ID card 1 Load plain A4‑ or letter‑size paper. 2 From the printer control panel - Lexmark S315 | User's Guide - Page 47
. 5 Press . Collating copies using the printer control panel If you print multiple copies of a document, then you can choose to print each copy as a set (collated) or to print the copies as groups of pages (not collated). Collated Not collated 1 Load paper. 2 Load the original document faceup - Lexmark S315 | User's Guide - Page 48
scanner glass. 3 From the printer control panel, navigate to: > Copy > OK > Pages per Side 4 Press the left or right arrow button to select the paper orientation and the number of pages that you want to copy on a sheet of paper. You may print up to four page images on one sheet. 5 Press . Placing an - Lexmark S315 | User's Guide - Page 49
page (top edge for portrait orientation and left edge for landscape orientation). 5 Press , and then follow the instructions on the display. Making a two‑sided (duplex) copy manually 1 Load paper. 2 Load the original document faceup into the ADF or facedown on the scanner glass. 3 From the printer - Lexmark S315 | User's Guide - Page 50
6 Select the copy mode: • Press to switch to color mode. • Press to switch to black‑and‑white mode. When you select color or black‑only printing, the light that corresponds to your choice comes on. 7 Press to print on one side of the paper. 8 Load the next page of the document. • If you are copying - Lexmark S315 | User's Guide - Page 51
edges on the scanned image. • Make sure the paper exit tray is fully extended, and the tray extension printer control panel, navigate to: > Scan > OK > Computer > USB‑Connected Computer > OK The USB‑connected computer will receive the scan by default. Note: Make sure the scan software is installed - Lexmark S315 | User's Guide - Page 52
Scanning 52 Scanning to a network computer 1 Load the original document faceup into the ADF or facedown on the scanner glass. 2 From the printer control panel, navigate to: > Scan > OK > Computer 3 Press the left or right arrow button to manually select the name of the destination computer, and - Lexmark S315 | User's Guide - Page 53
supports your printer and lets you work with photos, such as Image Capture. 3 From the list of devices, select your printer. Note: For information on finding to scan to the local computer or network computer where the OCR is installed. For Windows users 1 Load the original document faceup into - Lexmark S315 | User's Guide - Page 54
Notes: • Use any application that supports your printer and lets you work with the OCR software, ABBYY FineReader. • If the OCR software is missing, then insert the installation software CD. Reinstall the printer software using the custom install option so you can manually select all of the packages - Lexmark S315 | User's Guide - Page 55
supports both your printer and an e‑mailing option, such as Image Capture. 3 From the list of devices, select your printer. Note: For information on finding the scan job. 6 Compose your e‑mail message. Scanning to a PDF For Windows users 1 Load an original document faceup into the ADF or facedown on - Lexmark S315 | User's Guide - Page 56
. How do I scan in black and white? Color is the default for all scans. To scan in black and white, press on the printer control panel. Why am I being network computer you are scanning to requires one. To learn how PINs get assigned to network computers, see the Help for the printer software - Lexmark S315 | User's Guide - Page 57
e-mail function For Windows users 1 Click or Start. 2 Click All Programs or Programs, and then select the printer program folder from the list. 3 Navigate to: Printer Home > select your printer > Settings > Set up the printer to e‑mail The E‑mail Setup Wizard opens. 4 Follow the instructions on the - Lexmark S315 | User's Guide - Page 58
Mac wireless network before sending an e‑mail. If necessary, make sure the network is connected to the Internet for the printer to communicate with the SMTP server. If the printer cannot connect to the Internet, then contact your system support person. The printer supports only one active network - Lexmark S315 | User's Guide - Page 59
E-mailing 59 Canceling an e‑mail To cancel an e‑mail, press . - Lexmark S315 | User's Guide - Page 60
60 Networking Installing the printer on a wireless network Wireless network compatibility Your printer contains an IEEE 802.11n wireless print server. Your printer is compatible with IEEE 802.11 b/g/n routers that are Wi-Fi certified. Supported network security options The printer supports three - Lexmark S315 | User's Guide - Page 61
IP address and MAC address of the printer. 1 Load plain paper. 2 From the printer control panel, navigate to: > Setup > OK > Network Setup > OK > Print Network Setup Page > OK Information you will need to set up the printer on a wireless network To set up the printer for wireless printing, you need - Lexmark S315 | User's Guide - Page 62
. • The printer can communicate on only one wireless network at a time. Configuring the printer for an ad hoc wireless network will keep it from working on any other wireless network, either ad hoc or infrastructure. Authentication Determine if you have an infrastructure or ad hoc setup, and then - Lexmark S315 | User's Guide - Page 63
on a wireless network, make sure that: • Your wireless network is set up and working properly. • The computer you are using is connected to the same wireless network where you want to set up the printer. For Windows users 1 Close all open software programs. 2 Insert the installation software CD. If - Lexmark S315 | User's Guide - Page 64
the printer again, although you will need to run the setup software on each computer to install the driver. For Windows users 1 Close all open software programs. 2 Insert the installation software CD. If the installation dialog does not appear after a minute, then launch the CD manually: a Click - Lexmark S315 | User's Guide - Page 65
to work wirelessly, see the documentation that came with your box. • Make sure your box is turned on and that your computer is on and connected to your wireless network. Adding the printer to your wireless network 1 Set up your printer for wireless networking using the setup instructions provided - Lexmark S315 | User's Guide - Page 66
to complete installation. Assigning a static IP address The printer will be assigned an IP address automatically through DHCP on most wireless networks. 1 Complete the wireless setup, allowing the printer to receive a DHCP address from a DHCP server on the network. 2 Print a network setup page to - Lexmark S315 | User's Guide - Page 67
that came with your computer. • The printer can communicate on only one wireless network at a time. Configuring the printer for an ad hoc wireless network will keep it from working on any other wireless network, either ad hoc or infrastructure. In Windows Vista or later 1 Click > Control Panel - Lexmark S315 | User's Guide - Page 68
any remaining windows. 5 Insert the installation software CD, and then follow the directions for wireless installation. Note: Do not connect the installation or network cables until instructed to do so by the setup software. 6 When the available networks are displayed, provide the network name and - Lexmark S315 | User's Guide - Page 69
, and then click Refresh network list. 20 Insert the installation software CD, and then follow the directions for wireless installation. Note: Do not connect the installation or network cables until instructed to do so by the setup software. 21 When the available networks are displayed, provide the - Lexmark S315 | User's Guide - Page 70
Setup (WPS), it is easy to add computers or printers to your wireless network because the SSID and WPA passphrase are automatically detected and configured for you. 1 Make sure your access point (wireless router) supports WPS. 2 Insert the installation software CD and follow the instructions - Lexmark S315 | User's Guide - Page 71
that the printer drivers are installed on the computer. See related topics on troubleshooting specific connection types if you encounter difficulties during configuration. Note: The printer supports one active local connection (USB) and one active network connection (Ethernet or wireless) at a time - Lexmark S315 | User's Guide - Page 72
and that the drivers are installed on the computer. See related topics on troubleshooting specific connection types if you encounter difficulties during configuration. Note: The printer supports one active local connection (USB) and one active network connection (Ethernet or wireless) at a time. It - Lexmark S315 | User's Guide - Page 73
applications. 4 Insert the installation software CD. If the installation dialog does not appear after a minute, then click the CD icon on the desktop. 5 Double‑click Lexmark Extras > Lexmark Setup Assistant. 6 Follow the instructions on the computer screen. 7 A second print queue will be created - Lexmark S315 | User's Guide - Page 74
wireless network. If the printer is currently set up locally (using USB connection) 1 Plug an Ethernet cable into the printer and to an available port on a switch or wall jack. 2 Insert the installation software CD into the computer you want to use to configure the printer. 3 Follow the instructions - Lexmark S315 | User's Guide - Page 75
computers on the network that use Mac OS X version 10.4 or later use any printer connected to your Macintosh computer. • Sharing your printer with Windows users-Let Windows computers on the network use any printer connected to your Macintosh computer. 4 Follow the instructions on the computer - Lexmark S315 | User's Guide - Page 76
Setup Utility and follow your organization's procedures for requesting a certificate for network access. Following is the list of supported types of wireless network security and their requirements. WEP • WEP key (up to four keys may be required) • Default WEP Transmit Key (if more than one WEP - Lexmark S315 | User's Guide - Page 77
WEP key or WPA passphrase for network devices. Note: WPS supports only networks that communicate through access points (wireless routers). The printer supports the following methods in connecting to a wireless network: • Personal Identification Number (PIN)-A PIN on the printer is entered into the - Lexmark S315 | User's Guide - Page 78
or WPA/WPA2 passphrase? • Contact your system support person. - The person who set up your network usually keeps the WEP key or WPA/WPA2 passphrase. - If your wireless network was set up by your Internet Service Provider (ISP), then you might find the information in the documentation they provided - Lexmark S315 | User's Guide - Page 79
your wireless network. 3 Look for the WEP key or WPA/WPA2 passphrase. How are home networks configured? For desktop computers, laptops, and printers to communicate with each other over a network, they must be connected by cables and/or have wireless network adapters built in or installed in them - Lexmark S315 | User's Guide - Page 80
examples appear below. Note: The printers in the following diagrams represent printers with internal print servers built into them so that they can communicate over a network. Wireless network examples Scenario 1: Mixed wired and wireless connections on a network with Internet access • All computers - Lexmark S315 | User's Guide - Page 81
access • A computer is directly connected to a printer without going through a wireless router. • This configuration is referred to as an ad hoc network. • The network has no connection to the Internet. Note: Most computers can connect to only one wireless network at a time. If you access the - Lexmark S315 | User's Guide - Page 82
Networking 82 The USB port on the computer and on the printer are each marked with . Note: Do not connect the USB cable until prompted to do. 1 If the USB port at the back of the printer is covered by a sticker, then make sure to remove it. 2 Firmly plug the square end of the - Lexmark S315 | User's Guide - Page 83
one of two modes: infrastructure or ad hoc. In infrastructure mode, all devices on a wireless network communicate with each other through an access point (wireless router). In ad hoc mode, a computer with a wireless network adapter communicates directly with a printer equipped with a wireless print - Lexmark S315 | User's Guide - Page 84
1 From your computer system tray, click the wireless icon that corresponds to the software managing your wireless network adapter. 2 Check the signal quality. Checking printer connectivity • From the printer, print a network setup page. In the Wireless section, look for Quality. • View the signal - Lexmark S315 | User's Guide - Page 85
to the same wireless network? If the printer is not on the same wireless network as the computer, then you will not be able to print wirelessly. The SSID of the printer must match the SSID of the computer, if the computer is already connected to the wireless network. For Windows users 1 Obtain the - Lexmark S315 | User's Guide - Page 86
is connected to: a From the printer, print a network setup page. b In the Wireless section, look for SSID. 3 Compare the SSID of the computer and SSID of the printer. If the SSIDs are the same, then the computer and the printer are connected to the same wireless network. If the SSIDs are not the - Lexmark S315 | User's Guide - Page 87
same time? Yes, the printer supports a simultaneous USB and network connection. The printer can be configured in the following ways: • Locally attached (connected to a computer using a USB cable) • Wireless network • Wireless network and locally attached simultaneously What is a MAC address? A Media - Lexmark S315 | User's Guide - Page 88
an access point (wireless router) so that only devices with matching MAC addresses are allowed to operate on the network. This is called MAC filtering. If MAC filtering is enabled in your access point and you want to add a printer to your network, then the MAC address of the printer must be included - Lexmark S315 | User's Guide - Page 89
Apple menu, navigate to: About This Mac > More Info 2 From the Contents pane, choose Network. 3 If you are connected over a wireless network, then choose AirPort from the Active Services list. Locating the printer IP address • From the printer, print a network setup page. In the TCP/IP section, look - Lexmark S315 | User's Guide - Page 90
Networking 90 • You know your network information and want to enter it quickly. • You are configuring a printer for a wireless network that uses 802.1X authentication. - Lexmark S315 | User's Guide - Page 91
the printhead. 1 Load plain paper. 2 From the printer control panel, navigate to: > Setup > OK >Maintenance > OK > Align Printer > OK An alignment page prints. Note: Do not remove the alignment page until printing is finished. If you aligned the cartridges to improve print quality, then print your - Lexmark S315 | User's Guide - Page 92
replace the ink cartridges before you can clean the printhead nozzles. 1 Load paper. 2 From the printer control panel, navigate to: > Setup > OK > Maintenance > OK 3 Press the up or down arrow button to scroll to Clean Printhead or Deep Clean Printhead, and then press . OK A cleaning page prints - Lexmark S315 | User's Guide - Page 93
all cables have been disconnected from the printer. • Any cart used to move the printer must have a surface able to support the full footprint of the printer. • Make sure the paper exit tray is inserted back into the printer. • Make sure the printer control panel is in its vertical position. Press - Lexmark S315 | User's Guide - Page 94
Maintaining the printer 94 • Keep the printer in an upright position to prevent the ink from leaking. • Avoid severe jarring movements. - Lexmark S315 | User's Guide - Page 95
to the computer, print server, or network access point. • Check the printer for error messages, and resolve any errors. • Check for paper jam messages, and clear any jams. • Check the ink cartridges, and install new cartridges if necessary. • Turn the printer off, wait about 10 seconds, and then - Lexmark S315 | User's Guide - Page 96
the power cord into the power supply, and then plug the power cord into the wall outlet. 4 Turn on the printer. Print job does not print or is missing pages If the "Before you troubleshoot" checklist does not solve the problem, then try one or more of the following: MAKE SURE THE INK CARTRIDGES ARE - Lexmark S315 | User's Guide - Page 97
the USB cable. • For a printer that is wirelessly connected, see the Wireless troubleshooting section. MAKE SURE THE PRINT JOB IS NOT PAUSED MAKE SURE YOUR PRINTER IS SET AS THE DEFAULT PRINTER RECONNECT THE PRINTER POWER SUPPLY 1 Turn off the printer. Note: Make sure the printer is not in Sleep - Lexmark S315 | User's Guide - Page 98
Troubleshooting 98 Printer is printing blank pages Blank pages may be caused by improperly installed ink cartridges. REINSTALL THE INK CARTRIDGES AND DEEP CLEAN AND ALIGN THE PRINTHEAD 1 Reinstall the ink cartridges, see "Replacing ink cartridges" on page 13 for more information. If the cartridges - Lexmark S315 | User's Guide - Page 99
TO YOUR PRINTER Cannot print through USB If the "Before you troubleshoot" checklist does not solve the problem, then try one or more to have problems, then try another USB port on the computer. You may have connected to a defective port. MAKE SURE THE USB PORT IS ENABLED IN WINDOWS 1 Click - Lexmark S315 | User's Guide - Page 100
Troubleshooting 100 Understanding printer messages Alignment Problem Try any of the following: • Check the ink cartridges. 1 Open the printer, and then remove and reinstall the ink cartridges. 2 Load a plain and unmarked A4‑ or letter‑size paper. The printer will read any markings on used paper, - Lexmark S315 | User's Guide - Page 101
Ethernet or wireless connection. • Make sure your printer is securely connected to the host computer, print server, or other network access point. • Touch OK to clear the message. Ink Cartridge Error The printer is unable to authenticate one or more of the installed ink cartridges. Try one or more - Lexmark S315 | User's Guide - Page 102
Troubleshooting 102 Ink Cartridge Unsupported Try one or more of the following: • Replace the unrecognized ink cartridge with one that is supported by your printer. • Use only genuine Lexmark ink cartridges. • Press OK or to clear the message. • See the User's Guide or visit the Lexmark Support - Lexmark S315 | User's Guide - Page 103
printing again. Printhead Cannot Move Try one or more of the following: • Open the printer to remove any obstructions to the printhead, and then close the printer. • Press OK to clear the message. Printhead Error Remove and reinsert the printhead Warning-Potential Damage: Do not touch the cartridge - Lexmark S315 | User's Guide - Page 104
Note: If removing and reinserting the printhead does not resolve the error, then turn off the printer, and then turn it back on. If the problem persists, then contact customer support. Printhead Missing Try one or more of the following: • Install the printhead. 1 Open the printer, and then lift the - Lexmark S315 | User's Guide - Page 105
sure to install the ink cartridges into the printhead. For more information, see "Replacing ink cartridges" in the User's Guide. 3 Close the printer. • Press to clear the message. • If your printer did not come with a printhead, then visit the Lexmark support Web site at http://support.lexmark.com - Lexmark S315 | User's Guide - Page 106
sure to install the ink cartridges into the printhead. For more information, see "Replacing ink cartridges" in the User's Guide. 6 Close the printer. • Visit the Lexmark support Web site at http://support.lexmark.com or contact customer support for more information. Printhead Warning One or more - Lexmark S315 | User's Guide - Page 107
support. • Check the paper guides, and then make sure the paper is properly loaded in the tray or on the paper support. • Cancel the current print job. Standard Network Software Error Try one or more of the following: • Press OK to clear the message. • Turn the printer off and then back on to reset - Lexmark S315 | User's Guide - Page 108
Troubleshooting 108 • "Paper jam in the duplex unit" on page 110 • "Paper or specialty media misfeeds" on page 111 Paper jam in the printer Note: The parts inside the printer are sensitive. Avoid unnecessarily touching these parts while clearing jams. Check the jam clearance area 1 Lift the - Lexmark S315 | User's Guide - Page 109
Troubleshooting 109 3 Firmly grasp the paper on both sides, and then gently pull it out. Note: Make sure all paper fragments are removed. 4 Reattach the jam clearance cover until it clicks into place. 1 2 5 Close the printer. 6 Touch OK or press OK , depending on your printer model. Paper jam - Lexmark S315 | User's Guide - Page 110
Troubleshooting 110 1 Remove the paper support. 2 Firmly grasp the paper, and then gently pull it out. Note: Make sure all paper fragments are removed. 3 Reattach the paper support until it clicks into place. 4 Touch OK or press OK , depending on your printer model. Paper jam in the duplex unit - Lexmark S315 | User's Guide - Page 111
together. Try one or more of the following: CHECK PAPER CONDITION Use only new, unwrinkled paper. CHECK PAPER LOADING • Load a smaller amount of paper into the printer. • Load paper with the print side faceup. (If you are not sure which side is the printable side, see the instructions that came - Lexmark S315 | User's Guide - Page 112
loading instructions for your paper or specialty media. REMOVE EACH PAGE AS IT IS PRINTED ADJUST THE PAPER GUIDES TO FIT THE LOADED PAPER Print troubleshooting • "Poor quality at the edges of the page" on page 112 • "Streaks or lines on printed image" on page 113 • "Print speed is slow" on page 113 - Lexmark S315 | User's Guide - Page 113
"Before you troubleshoot" checklist does not solve the problem, then try one or more of the following: CHECK THE INK LEVELS Replace low or empty ink cartridges. SELECT A HIGHER PRINT QUALITY FROM THE PRINTER SOFTWARE MAKE SURE THE INK CARTRIDGES ARE PROPERLY INSTALLED ALIGN THE PRINTHEAD CLEAN OR - Lexmark S315 | User's Guide - Page 114
freezes the computer" on page 116 • "Cannot scan to a computer over a network" on page 116 Copier or scanner does not respond If the "Before you troubleshoot" checklist does not solve the problem, then try one or more of the following: SET YOUR PRINTER AS THE DEFAULT PRINTER REMOVE AND REINSTALL THE - Lexmark S315 | User's Guide - Page 115
image quality If the "Before you troubleshoot" checklist does not solve the problem, then try one or more of the following: CLEAN THE SCANNER GLASS ADJUST THE SCAN QUALITY FROM THE PRINTER SOFTWARE REVIEW THE TIPS FOR COPYING, SCANNING, AND IMPROVING PRINT QUALITY USE A CLEARER VERSION OF THE - Lexmark S315 | User's Guide - Page 116
DESTINATION COMPUTER ARE CONNECTED TO THE SAME NETWORK MAKE SURE THE PRINTER SOFTWARE IS INSTALLED ON THE DESTINATION COMPUTER Network troubleshooting • "Wireless troubleshooting checklist" on page 118 • "The Continue button is unavailable" on page 116 • "Cannot print and there is a firewall on the - Lexmark S315 | User's Guide - Page 117
outlet, and then pull out the power cord from the power supply. 3 After one minute, reconnect the power cord into the power supply, and then plug the power cord into the wall outlet. 4 Turn on the printer. RUN THE INSTALLER AGAIN 1 Close the installer. 2 Remove the CD, and then restart the computer - Lexmark S315 | User's Guide - Page 118
can interfere with wireless printing. If the printer and computer are configured correctly, and the wireless network is working, but the printer will not print wirelessly, then a firewall could be the problem. If there is a firewall (other than the Windows firewall) on the computer, try one or more - Lexmark S315 | User's Guide - Page 119
print over wireless network If you encountered problems while installing, or if your printer does not appear in the printers folder or as a printer option when sending a print job, then try uninstalling and reinstalling the software. Before you reinstall the software, check the troubleshooting - Lexmark S315 | User's Guide - Page 120
and printer no more than 100 feet apart. CHECK THE WIRELESS SIGNAL QUALITY Print a network setup page and check the signal quality. If the signal quality is listed as good or excellent, then another factor is causing the problem. CHECK YOUR ADVANCED SECURITY SETTINGS • If you are using MAC (Media - Lexmark S315 | User's Guide - Page 121
is connected to: a From the printer, print a network setup page. b In the Wireless section, look for SSID. 3 Compare the SSID of the computer and SSID of the printer. If the SSIDs are the same, then the computer and the printer are connected to the same wireless network. If the SSIDs are not the - Lexmark S315 | User's Guide - Page 122
WIRELESS PRINTING THROUGH AIRPORT The printer supports wireless printing only through AirPort base stations for Mac OS X version 10.5 or later. Wireless print server not installed You may see a message during installation indicating that the printer does not have a wireless print server installed - Lexmark S315 | User's Guide - Page 123
2 From the Contents pane, choose Network. 3 If you are connected over a wireless network, then choose AirPort from the Active Services list. The Router entry is typically the access point. Locating the printer IP address • From the printer, print a network setup page. In the TCP/IP section, look - Lexmark S315 | User's Guide - Page 124
bidirectional support if it is not already checked. 7 Click Apply > OK, and then try to print again. Resolving intermittent wireless communications issues You may notice that your printer works for a short time and then stops working, although apparently nothing has changed on your wireless network - Lexmark S315 | User's Guide - Page 125
POINT WITH A UNIQUE SSID Many wireless networks use the SSID that the router was originally configured by the manufacturer to use. Using the default SSID can cause problems when more than one network is operating in the same area with the same SSID. The printer or computer may attempt to attach - Lexmark S315 | User's Guide - Page 126
this issue. To assign a static IP address to the printer: 1 Complete the wireless setup, allowing the printer to receive a DHCP address from a DHCP server on the network. 2 Print a network setup page to see what IP address is currently assigned to the printer. 3 Open a Web browser and then type the - Lexmark S315 | User's Guide - Page 127
law: LEXMARK INTERNATIONAL, INC., PROVIDES THIS PUBLICATION "AS IS" WITHOUT WARRANTY services, except those expressly designated by the manufacturer, are the user's responsibility. For Lexmark technical support, visit support.lexmark.com. For information on supplies and downloads, visit www.lexmark - Lexmark S315 | User's Guide - Page 128
is a trademark of Lexmark International, Inc. Mac and the Mac logo are trademarks of Apple Inc., registered in the U.S. and other countries. PCL® is a registered trademark of the Hewlett-Packard Company. PCL is Hewlett-Packard Company's designation of a set of printer commands (language) and - Lexmark S315 | User's Guide - Page 129
of Lexmark Technology & Services Lexmark International, Lexmark regulatory type/model LEX-M01-004; FCC ID: IYLM01004; Industry Canada IC:2376A-M01004 Licensing notices All licensing notices associated with this product can be viewed from the CD:\LEGAL directory of the installation software CD - Lexmark S315 | User's Guide - Page 130
about recycling options, visit the Lexmark Web site at www.lexmark.com for your local sales office phone number. Product disposal Do not dispose of the printer or supplies in the same manner as normal Do not touch in the areas near these symbols without first touching the metal frame of the printer. - Lexmark S315 | User's Guide - Page 131
Protection Agency (EPA) ENERGY STAR requirements as configured when shipped by Lexmark. Temperature information Ambient temperature Shipping and storage temperature 15 to 32C apply to your product. Mode Description Power consumption (Watts) Printing The product is generating hard‑copy output - Lexmark S315 | User's Guide - Page 132
amount of power, then to completely stop product power consumption, disconnect the power supply cord from the wireless products This section contains the following regulatory information pertaining to wireless products that contain transmitters, for example, but not limited to, wireless network - Lexmark S315 | User's Guide - Page 133
to radio frequency radiation The radiated output power of this device is far below the service, this device is intended to be operated indoors and away from windows to provide maximum shielding. Equipment (or its transmit antenna) that is installed outdoors is subject to licensing. The installer - Lexmark S315 | User's Guide - Page 134
and safety requirements of EN 60950. Products equipped with 2.4GHz Wireless LAN option are in conformity with the protection requirements of EC NO PL PT RO SE SI SK TR UK Česky Dansk Deutsch Společnost Lexmark International, Inc. tímto prohlašuje, že výrobek tento výrobek je ve shod - Lexmark S315 | User's Guide - Page 135
vara er í samræmi við grunnkröfur og aðrar kröfur, sem gerðar eru í tilskipun 1999/5/EC. Italiano Con la presente Lexmark International, Inc. dichiara che questo questo prodotto è conforme ai requisiti essenziali ed alle altre disposizioni pertinenti stabilite dalla direttiva 1999/5/CE. Latviski - Lexmark S315 | User's Guide - Page 136
service, remove all print cartridges, programs, data, and removable storage media (unless directed otherwise by Lexmark). For further explanation of your warranty alternatives and the nearest Lexmark authorized servicer in your area contact Lexmark on the World Wide Web at http://support.lexmark - Lexmark S315 | User's Guide - Page 137
servicer -Operation of a product beyond the limit of its duty cycle -Use of printing media outside of Lexmark specifications -Refurbishment, repair, refilling or remanufacture by a third party of products, supplies or parts -Products, supplies, parts, materials (such as toners and inks), software - Lexmark S315 | User's Guide - Page 138
printing mode 42 changing page order 31 changing print order 31 changing Sleep timeout 17 changing wireless settings after installation (Mac) 66 changing wireless settings after installation (Windows) 66 checking ink levels 91 checking an unresponsive printer 95 checklist before you troubleshoot - Lexmark S315 | User's Guide - Page 139
finding 7 information needed for setting up printer on wireless network 61 infrastructure network 83 ink conserving 6 ink cartridge access area 11 Ink Cartridge Error 101 Ink Cartridge Missing 101 ink cartridges installing 13 ordering 12 removing 13 replacing 13 using genuine Lexmark 13 ink - Lexmark S315 | User's Guide - Page 140
finding 87 MAC address filtering 87 Macintosh installing printer on wireless network 63 USB 72 wireless 72 Macintosh printer software using 21 memory card scanning to 52 Memory Device Access Error 102 minimum system requirements 19 moving the printer 93 MSCHAPv2 77 multiple pages per sheet, printing - Lexmark S315 | User's Guide - Page 141
Replace Ink Cartridge 106 Scanned Document Too Long 107 Scanner Disabled 107 Short Paper 107 Unrecoverable Scan Error 107 Unsupported Cartridge 102 USB Device Not Supported 107 USB Hub Not Supported 107 printer printing blank pages 98 printer problems, basic solutions 95 printer software installing - Lexmark S315 | User's Guide - Page 142
98 printer printing blank pages 98 printhead error 103 software did not install 96 troubleshooting, wireless cannot print over wireless network 119 changing wireless settings after installation (Mac) 66 changing wireless settings after installation (Windows) 66 resolving communication problems 124 - Lexmark S315 | User's Guide - Page 143
wireless troubleshooting cannot print over wireless network 119 changing wireless settings after installation (Mac) 66 changing wireless settings after installation (Windows) 66 printer and computer on different networks 85 printer works intermittently on wireless network 124 Wi‑Fi Protected Setup
-
 1
1 -
 2
2 -
 3
3 -
 4
4 -
 5
5 -
 6
6 -
 7
7 -
8
-
9
-
10
-
11
-
12
-
13
-
14
-
15
-
16
-
17
-
18
-
19
-
20
-
21
-
22
-
23
-
24
-
25
-
26
-
27
-
28
-
29
-
30
-
31
-
32
-
33
-
34
-
35
-
36
-
37
-
38
-
39
-
40
-
41
-
42
-
43
-
44
-
45
-
46
-
47
-
48
-
49
-
50
-
51
-
52
-
53
-
54
-
55
-
56
-
57
-
58
-
59
-
60
-
61
-
62
-
63
-
64
-
65
-
66
-
67
-
68
-
69
-
70
-
71
-
72
-
73
-
74
-
75
-
76
-
77
-
78
-
79
-
80
-
81
-
82
-
83
-
84
-
85
-
86
-
87
-
88
-
89
-
90
-
91
-
92
-
93
-
94
-
95
-
96
-
97
-
98
-
99
-
100
-
101
-
102
-
103
-
104
-
105
-
106
-
107
-
108
-
109
-
110
-
111
-
112
-
113
-
114
-
115
-
116
-
117
-
118
-
119
-
120
-
121
-
122
-
123
-
124
-
125
-
126
-
127
-
128
-
129
-
130
-
131
-
132
-
133
-
134
-
135
-
136
-
137
-
138
-
139
-
140
-
141
-
142
-
143
 |
 |

S310 Series User's Guide
October 2011
www.lexmark.com
Machine type(s):
4448
Model(s):
S310 Series: 301, 30E