Maytag MDG17CSAWW Installation Instructions - Page 16
Changingtoa30-or, Ti Ng - commercial dryer
 |
View all Maytag MDG17CSAWW manuals
Add to My Manuals
Save this manual to your list of manuals |
Page 16 highlights
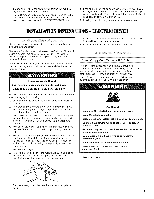
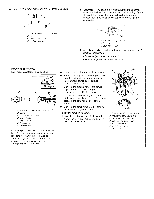
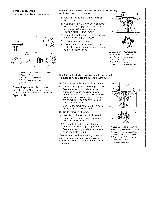
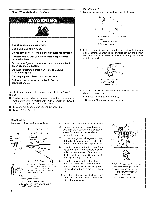
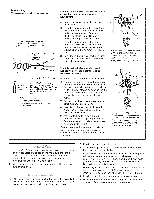
CHANGINGTOA 30-OR 60- NUTE TI NG CAM Maintenance instructions: [] Clean lint screen after each cycle. [] Removing accumulated lint: [] From inside the dryer cabinet: Lint should be removed every 2 years or more often, depending on dryer usage. Cleaning should be done by a qualified person. [] From the exhaust vent: Lint should be removed every 2 years, or more often, depending on dryer usage. Electrical Shock Hazard Disconnect power before making cam changes. Failure to follow these instructions can result in death or electrical shock. You can install the 30-minute or 60-minute timing cam (shipped with dryer) as follows: t. Unplug dryer or disconnect power. 2. Unlock meter case. 3. Turn the timing cam by hand until the V-shaped notch lines up below the ratchet tooth. .... C ....."._..' b If dryer does not operate check the following: [] Electric supply is connected. [] Circuit breaker is not tripped or house fuse is not blown. [] Door is closed. [] Controls are set in a running or "ON" position. [] START button has been pushed firmly. [] For gas dryers, check that gas supply shutoff valves are set in open position. If you need assistance: The Commercial Laundry Support Center will answer any questions about operating or maintaining your dryer not covered in the Installation instructions. The Commercial Laundry Support Center is open 24 hours a day, 7 days a week. Just dial 1-800 NO BELTS (1-800-662-3587) -- the call is toll free. When you call, you will need the dryer model number and serial number. Both numbers can be found on the serial-rating plate located in the dryer door well. A. RatchettoOtn_ B. Timingcam C. Drivelug D. V-shapednotch 4. Insert a narrow, flat-blade screwdriver under the timing cam near the clock shaft. Gently lift cam straight up and off shaft making sure that the V-shaped notch clears the ratchet tooth. 5. Place new cam (hub side down) over clock shaft. Line up flat side of shaft with flat side of cam hole. Check that drive lug is in place. 6. Turn cam until V-shaped notch lines up with ratchet tooth. 7. Press cam down in place on motor shaft. Make sure that V-shaped notch clears the ratchet tooth. 8. Close and lock the meter case. 16
-
 1
1 -
2
-
3
-
4
-
5
-
6
-
7
-
8
-
9
-
10
-
 11
11 -
 12
12 -
 13
13 -
 14
14 -
 15
15 -
 16
16 -
 17
17 -
 18
18 -
 19
19 -
 20
20 -
 21
21 -
22
-
23
-
24
-
25
-
26
-
27
-
28
-
29
-
30
-
31
-
32
-
33
-
34
-
35
-
36
 |
 |
