Maytag MEDE900VJ Use and Care Guide - Page 26
WRINKLE, PREVENT, Feature, Signal, pressing START/PAUSE, the Preset Sensor, Dryness Settings
 |
UPC - 883049144764
View all Maytag MEDE900VJ manuals
Add to My Manuals
Save this manual to your list of manuals |
Page 26 highlights
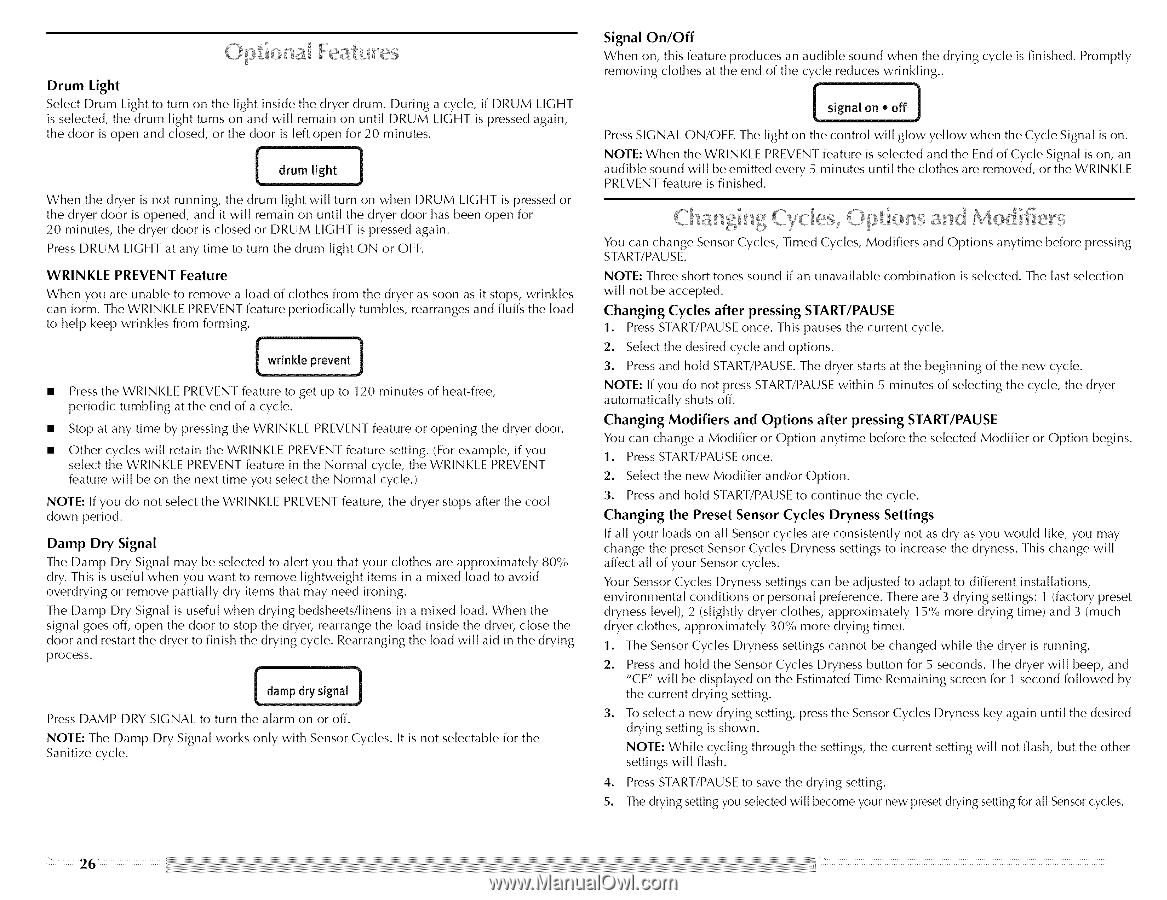
Drum Light Select I)rum I.ight to turn on the light inside the dryer drum. I)uring a cycle, if DRUM LIGHT is selected, the drum light turns on and will remain on until DRUM I.IGHT is pressed again, the door is open and closed, or the door is left open for 20 minutes. i drum[ight ] When the dryer is not running, the drum light will turn on when I)RUM LIGHT is pressed or the dryer door is opened, and it will remain on until the dryer door has been open for 20 minutes, the dryer door is closed or DRUM I.IGHT is pressed again. Press DRUM I_IGHT at any time to turn the drum light ON or OFE WRINKLE PREVENT Feature When you are unable to remove a load of clothes from the dryer as soon as it stops, wrinkles can form. The WRINKI_E PREVENT feature periodically tumbles, rearranges and fluffs the load to help keep wrinkles from forming. i wrinlde prevent I Press the WRINKI.E PREVENT feature to get up to 120 minutes of heat-free, periodic tumbling atthe end of a cycle. Stop at any time by pressing the WRINKI.E PREVENT feature or opening the dryer door. Other cycles will retails the WRINKI.E PREVENT feature setting. (For example, if you select the WRINKI.E PREVENT feature in the Normal cycle, the WRINKI.E PREVENT feature will be on the next time you select the Normal cycle.) NOTE: If you do not select the WRINKI E PREVENT feature, the dryer stops after the cool down period. Damp Dry Signal The I)amp I)ry Signal may be selected to alert you that your clothes are approximately 80% dry. This is useful when you want to remove lightweight items in a mixed load to avoid overdrying or remove partially dry items that may need ironing. The Damp Dry Signal is useful when drying bedsheets/linens in a mixed load. When the signal goes off, open the door to stop the dryer rearrange the load inside the dryer close the door and restart the dryer to finish the drying cycle. Rearranging the load will aid in the drying process. damp dry signal 1 Press DAMP DRY SIGNAl. to turn the alarm on or off. NOTE: The Damp Dry Signal works only with Sensor Cycles. It is not selectable for the Sanitize cycle. Signal On/Off When on, this feature produces an audible sound when the drying cycle is finished. Promptly removing clothes at the end of the cycle reduces wrinkling.. i signal0n- off ] Press SIGNAl. ON/OFE The light on the control will glow yellow when the Cycle Signal is on. NOTE: When the WRINKI_E PREVENT feature is selected and the End of Cycle Signal is on, an audible sound will be emitted every 5 minutes until the clothes are removed, or the WRINKI.E PREVENT feature is finished. You can change Sensor Cycles, Timed Cycles, Modifiers and Options anytime before pressing START/PAUSE. NOTE: Three short tones sound if an unavailable combination is selected. The last selection will not be accepted. Changing Cycles after pressing START/PAUSE I. Press START/PAUSE once. This pauses the current cycle. 2. Select the desired cycle and options. 3. Press and hold START/PAUSE. The dryer starts at the beginning of the new cycle. NOTE: Ifyou do not press START/PAUSE within 5 minutes of selecting the cycle, the dryer automatically shuts off. Changing Modifiers and Options after pressing START/PAUSE You can change a Modifier or Option anytime before the selected Modifier or Option begins. 1. Press START/PAUSEonce. 2. Select the new Modifier and/or Option. 3. Press and hold START/PAUSEto continue the cycle. Changing the Preset Sensor Cycles Dryness Settings If all your loads on all Sensor cycles are consistently not as dry as you would like, you may change the preset Sensor Cycles Dryness settings to increase the dryness. This change will affect all of your Sensor cycles. Your Sensor Cycles Dryness settings can be adjusted to adapt to different installations, environmental conditions or personal preference. There are 3 drying settings: 1 (factory preset dryness level), 2 (slightly dryer clothes, approximately 15% more drying time) and 3 (much dryer clothes, approximately 30% more drying time). 1. The Sensor Cycles Dryness settings cannot be changed while the dryer is running. 2. Press and hold the Sensor Cycles Dryness button for 5 seconds. The dryer will beep, and "CF" will be displayed on the Estimated Time Remaining screen for 1 second followed by the current drying setting. 3. To select a new drying setting, press the Sensor Cycles Dryness key again until the desired drying setting is shown. NOTE: While cycling through the settings, the current setting will not flash, but the other settings will flash. 4. Press START/PAUSE to save the drying setting. 5. The drying setting you selected will become your new preset drying setting for all Sensor cycles.
-
 1
1 -
2
-
3
-
4
-
5
-
6
-
7
-
8
-
9
-
10
-
11
-
12
-
13
-
14
-
15
-
16
-
17
-
18
-
19
-
20
-
 21
21 -
 22
22 -
 23
23 -
 24
24 -
 25
25 -
 26
26 -
 27
27 -
 28
28 -
 29
29 -
 30
30 -
 31
31 -
32
-
33
-
34
-
35
-
36
-
37
-
38
-
39
-
40
-
41
-
42
-
43
-
44
-
45
-
46
-
47
-
48
-
49
-
50
-
51
-
52
-
53
-
54
-
55
-
56
-
57
-
58
-
59
-
60
-
61
-
62
 |
 |