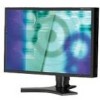
NEC LCD2490WUXI-BK User Manual - Page 30
Using the Auto Brightness function
 |
UPC - 805736016413
View all NEC LCD2490WUXI-BK manuals
Add to My Manuals
Save this manual to your list of manuals |
Page 30 highlights
Using the Auto Brightness function The brightness of the LCD screen can be set to increase or decrease depending on the amount of ambient light within the room. If the room is bright, the monitor becomes correspondingly bright. If the room is dim, then the monitor will dim accordingly. The purpose of this function is to make the viewing experience more comfortable to the eye in a variety of lighting conditions. NOTE: The Auto Brightness function is set to OFF by default. When "AUTO LUMINANCE" is ON, this function is disabled. SETUP Use the following procedure to determine the Brightness Range that the monitor will use when the Auto Brightness function is activated. 1. Set the BRIGHT level. This is the brightness level that the monitor will go up to when the ambient light level is highest. Make sure the room is at its brightest when setting this level. Select "1" in the AUTO BRIGHTNESS menu (Figure 1). Then use the front buttons to move the cursor up to the BRIGHTNESS setting. Choose the desired brightness level (Figure 2). Figure 1 2. Set the DARK level. This is the level of brightness that the monitor will go down to when the ambient light level is low. Make sure the room is at its darkest when setting this level. Then use the front buttons to move the cursor up to the BRIGHTNESS setting. Choose the desired brightness level (Figure 3). Figure 2 Figure 3 27
-
 1
1 -
2
-
3
-
4
-
5
-
6
-
7
-
8
-
9
-
10
-
11
-
12
-
13
-
14
-
15
-
16
-
17
-
18
-
19
-
20
-
21
-
22
-
23
-
24
-
 25
25 -
 26
26 -
 27
27 -
 28
28 -
 29
29 -
 30
30 -
 31
31 -
 32
32 -
 33
33 -
 34
34 -
 35
35 -
36
-
37
-
38
-
39
-
40
-
41
-
42
-
43
-
44
-
45
-
46
-
47
-
48
-
49
-
50
-
51
-
52
-
53
-
54
-
55
-
56
-
57
-
58
-
59
-
60
-
61
-
62
-
63
-
64
-
65
-
66
-
67
-
68
-
69
-
70
-
71
-
72
-
73
-
74
-
75
-
76
-
77
-
78
-
79
-
80
-
81
-
82
-
83
-
84
-
85
-
86
-
87
-
88
-
89
-
90
-
91
-
92
-
93
-
94
-
95
-
96
-
97
-
98
-
99
-
100
-
101
-
102
-
103
-
104
-
105
-
106
-
107
-
108
-
109
-
110
-
111
-
112
-
113
-
114
-
115
-
116
-
117
-
118
-
119
-
120
-
121
-
122
-
123
-
124
-
125
-
126
-
127
-
128
-
129
-
130
-
131
-
132
-
133
-
134
-
135
-
136
 |
 |
