Netgear FE516 Installation Guide - Page 20
When installation for each hub in your stack is complete, connect the power cords first
 |
UPC - 606449000177
View all Netgear FE516 manuals
Add to My Manuals
Save this manual to your list of manuals |
Page 20 highlights
Installation Guide for the Model FE508 and FE516 Fast Ethernet Hubs Figure 3-2. Installing the hub in an equipment rack 4. Connect the devices to the ports on the hub using Category 5 UTP wiring and connectors to the RJ-45 connectors. Refer to Appendix C, "Fast Ethernet and Cabling Guidelines," for wiring rules and guidelines. 5. When installation for each hub in your stack is complete, connect the power cord(s) first to the power entry receptacle on the hub rear panel and then to the wall. 6. Continue with the steps in "Verifying Your Installation" later in this chapter. 3-6 Installation
-
 1
1 -
2
-
3
-
4
-
5
-
6
-
7
-
8
-
9
-
10
-
11
-
12
-
13
-
14
-
 15
15 -
 16
16 -
 17
17 -
 18
18 -
 19
19 -
 20
20 -
 21
21 -
 22
22 -
 23
23 -
 24
24 -
 25
25 -
26
-
27
-
28
-
29
-
30
-
31
-
32
-
33
-
34
-
35
-
36
-
37
-
38
-
39
-
40
-
41
-
42
-
43
-
44
 |
 |

Installation Guide for the Model FE508 and FE516 Fast Ethernet Hubs
3-6
Installation
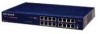
Figure 3-2.
Installing the hub in an equipment rack
4.
Connect the devices to the ports on the hub using Category 5 UTP wiring and connectors to
the RJ-45 connectors.
Refer to Appendix C, “Fast Ethernet and Cabling Guidelines,” for wiring rules and guidelines.
5.
When installation for each hub in your stack is complete, connect the power cord(s) first to
the power entry receptacle on the hub rear panel and then to the wall.
6. Continue with the steps in “Verifying Your Installation” later in this chapter.