Netgear FE516 Installation Guide - Page 22
Installing and Connecting Multiple Hubs
 |
UPC - 606449000177
View all Netgear FE516 manuals
Add to My Manuals
Save this manual to your list of manuals |
Page 22 highlights
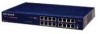
Installation Guide for the Model FE508 and FE516 Fast Ethernet Hubs Installing and Connecting Multiple Hubs Position the hub you want to be at the top of the stack. For rack installations, you should leave enough space in the rack to expand the stack to four hubs. Each hub occupies 1.0 EIA rack-mount spaces. The procedure to install and connect multiple hubs is similar for rack installations and tabletop or shelf installations. To install multiple hubs, follow these steps: 1. Install one hub at a time in the rack or on the shelf or tabletop. Refer to "Installing the Hub in a Rack" or "Installing the Hub on a Flat Surface" earlier in this chapter. 2. Disconnect the power cords from the hubs you are connecting. CAUTION: Failure to disconnect power from all the hubs prior to connecting the cascade cables could cause damage to the hub unit. 3. Connect the hubs using the cascade cables (see Figure 3-3). a. Connect one end of the cascade cable to the Cascade Down connector on the rear panel of the hub on the top. b. Connect the other end of the cascade cable to the Cascade Up connector on the rear panel of the hub on the bottom. Figure 3-3. Installing a cascade cable 4. Tighten the screw locks on the cable connectors to secure the plugs to the hubs. 3-8 Installation
-
 1
1 -
2
-
3
-
4
-
5
-
6
-
7
-
8
-
9
-
10
-
11
-
12
-
13
-
14
-
15
-
16
-
 17
17 -
 18
18 -
 19
19 -
 20
20 -
 21
21 -
 22
22 -
 23
23 -
 24
24 -
 25
25 -
 26
26 -
 27
27 -
28
-
29
-
30
-
31
-
32
-
33
-
34
-
35
-
36
-
37
-
38
-
39
-
40
-
41
-
42
-
43
-
44
 |
 |
