Netgear WPN802v2 WPN802v2 Reference Manual - Page 20
System Requirements, Prepare to Install Your Wireless Access Point, First, Connect the Wireless - login
 |
View all Netgear WPN802v2 manuals
Add to My Manuals
Save this manual to your list of manuals |
Page 20 highlights
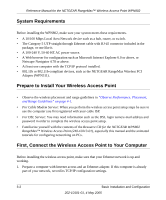
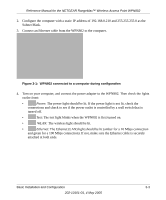
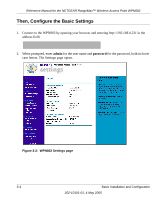
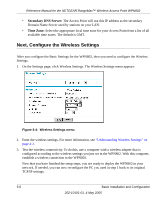
Reference Manual for the NETGEAR RangeMax™ Wireless Access Point WPN802 System Requirements Before installing the WPN802, make sure your system meets these requirements. • A 10/100 Mbps Local Area Network device such as a hub, router, or switch. • The Category 5 UTP straight through Ethernet cable with RJ-45 connector included in the package, or one like it. • A 100-240 V, 50-60 HZ AC power source. • A Web browser for configuration such as Microsoft Internet Explorer 6.0 or above, or Netscape Navigator 4.78 or above. • At least one computer with the TCP/IP protocol installed. • 802.11b or 802.11b-compliant devices, such as the NETGEAR RangeMax Wireless PCI Adapter (WPN311). Prepare to Install Your Wireless Access Point • Observe the wireless placement and range guidelines in "Observe Performance, Placement, and Range Guidelines" on page 4-1. • For Cable Modem Service: When you perform the wireless access point setup steps be sure to use the computer you first registered with your cable ISP. • For DSL Service: You may need information such as the DSL login name/e-mail address and password in order to complete the wireless access point setup. • Familiarize yourself with the contents of the Resource CD for the NETGEAR WPN802 RangeMax™ Wireless Access Point (240-10213-01), especially this manual and the animated tutorials for configuring networking on PCs. First, Connect the Wireless Access Point to Your Computer Before installing the wireless access point, make sure that your Ethernet network is up and working. 1. Prepare a computer with Internet access and an Ethernet adapter. If this computer is already part of your network, record its TCP/IP configuration settings. 3-2 Basic Installation and Configuration 202-10101-01, 4 May 2005
-
 1
1 -
2
-
3
-
4
-
5
-
6
-
7
-
8
-
9
-
10
-
11
-
12
-
13
-
14
-
 15
15 -
 16
16 -
 17
17 -
 18
18 -
 19
19 -
 20
20 -
 21
21 -
 22
22 -
 23
23 -
 24
24 -
 25
25 -
26
-
27
-
28
-
29
-
30
-
31
-
32
-
33
-
34
-
35
-
36
-
37
-
38
-
39
-
40
-
41
-
42
-
43
-
44
-
45
-
46
-
47
-
48
-
49
-
50
-
51
-
52
-
53
-
54
-
55
-
56
-
57
-
58
-
59
-
60
-
61
-
62
-
63
-
64
-
65
-
66
-
67
-
68
-
69
-
70
-
71
-
72
-
73
-
74
-
75
-
76
-
77
-
78
-
79
-
80
-
81
-
82
-
83
-
84
-
85
-
86
-
87
-
88
 |
 |
