Nokia IP290 Installation Guide - Page 54
Before You Begin, To remove or replace a hard-disk drive
 |
View all Nokia IP290 manuals
Add to My Manuals
Save this manual to your list of manuals |
Page 54 highlights
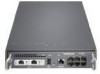
6 Installing and Replacing Components Other than Network Interface Cards Before You Begin Caution Hard-disk drives are susceptible to damage from shock. Handle them with care. Caution To help guard against electrostatic discharge damage, make sure you are properly grounded by using a grounding wrist strap and following the instructions provided with the wrist strap before you handle the components or open the appliance. If you do not have a grounding wrist strap, make sure you are properly grounded before you touch any electronic component. To install or replace a hard-disk drive, you need: „ Physical access to the appliance „ Nokia hard-disk drive kit „ A Phillips-head screwdriver The following procedure requires removing the chassis tray assembly from the chassis. Caution Make sure you perform an orderly shut down of the system before attempting to remove the chassis tray assembly. You must replace the hard-disk drive with a drive that has a capacity equal to or larger than the drive you are replacing. Back up your hard-disk drive files to a remote system on a regular basis. To remove or replace a hard-disk drive Caution If you fail to use the following procedure when you remove the hard-disk drive, the drive might become damaged or you might lose data. 1. Use Nokia Network Voyager or the command-line interface (CLI) to perform an orderly shutdown of the IP290 appliance. For information about how to access Network Voyager and the related reference materials, see "Using Nokia Network Voyager" on page 36. 2. Turn off the power to the IP290 appliance. 3. Remove the power cord. 54 Nokia IP290 Security Platform Installation Guide
-
 1
1 -
2
-
3
-
4
-
5
-
6
-
7
-
8
-
9
-
10
-
11
-
12
-
13
-
14
-
15
-
16
-
17
-
18
-
19
-
20
-
21
-
22
-
23
-
24
-
25
-
26
-
27
-
28
-
29
-
30
-
31
-
32
-
33
-
34
-
35
-
36
-
37
-
38
-
39
-
40
-
41
-
42
-
43
-
44
-
45
-
46
-
47
-
48
-
 49
49 -
 50
50 -
 51
51 -
 52
52 -
 53
53 -
 54
54 -
 55
55 -
 56
56 -
 57
57 -
 58
58 -
 59
59 -
60
-
61
-
62
-
63
-
64
-
65
-
66
-
67
-
68
-
69
-
70
-
71
-
72
-
73
-
74
-
75
-
76
-
77
-
78
-
79
-
80
-
81
 |
 |
