Oki B4600 B4400 4500 4550 4600 User Guide (English)
Oki B4600 Manual
 |
View all Oki B4600 manuals
Add to My Manuals
Save this manual to your list of manuals |
Oki B4600 manual content summary:
- Oki B4600 | B4400 4500 4550 4600 User Guide (English) - Page 1
- Oki B4600 | B4400 4500 4550 4600 User Guide (English) - Page 2
Information Copyright © 2007 by Oki Data. All Rights Reserved Document Information B4400/4500/4550/4600 User's Guide P/N 59388905, Revision 1.0 June drivers and manuals are available from the web site: http://my.okidata.com Trademark Information Oki and Microline are registered trademarks of Oki - Oki B4600 | B4400 4500 4550 4600 User Guide (English) - Page 3
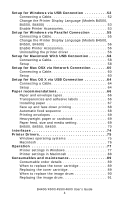
the Image Drum 14 Installing the Toner Cartridge 15 Installing paper 16 Installing Optional Accessories 18 Second Paper Feeder 18 Multi-purpose Feeder 21 Operator panels 24 B4400 24 B4400 Status Monitor 26 B4500, B4550, B4600 32 Using the Printer Menu 33 Menu functions 33 Printing menu - Oki B4600 | B4400 4500 4550 4600 User Guide (English) - Page 4
Printer settings in Windows 77 Printer settings in Macintosh 88 Consumables and maintenance 89 Consumable order details 89 When to replace the toner cartridge 89 Replacing the toner cartridge 89 When to replace the image drum 90 Replacing the image drum 91 B4400/4500/4550/4600 User's Guide - Oki B4600 | B4400 4500 4550 4600 User Guide (English) - Page 5
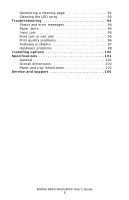
Status and error messages 94 Paper Jams 94 Input jam 95 Feed jam or exit jam 95 Print quality problems 96 Software problems 97 Hardware problems 98 Installing options 100 Specifications 101 General 101 Overall dimensions 102 Paper and tray information 102 Service and support 105 B4400 - Oki B4600 | B4400 4500 4550 4600 User Guide (English) - Page 6
. A caution provides additional information which, if ignored, may result in equipment malfunction or damage. WARNING! A warning appears in this manual like this. A warning provides additional information which, if ignored, may result in a risk of personal injury. B4400/4500/4550/4600 User's Guide 6 - Oki B4600 | B4400 4500 4550 4600 User Guide (English) - Page 7
Introduction Congratulations on purchasing this OKI monochrome page printer. Your new printer is designed with a range of advanced features to give you crisp black and white pages at high speed on a wide range of print media. C4400/4500/4550/4600 User's Guide 7 - Oki B4600 | B4400 4500 4550 4600 User Guide (English) - Page 8
subject. Printing Pages The whole manual, Individual pages, or sections may be printed. The procedure is: 1. From the toolbar, select [File], then [Print] (or press the Ctrl + P keys). 2. Choose which pages you wish to print: • [All pages], for the entire manual. B4400/4500/4550/4600 User's Guide 8 - Oki B4600 | B4400 4500 4550 4600 User Guide (English) - Page 9
per inch Dual In-line Memory Module network card installed Light Emitting Diode Manual Feed Tray Multi-purpose Feeder Tray Network Interface Card Printer Control Language PostScript (emulation) PostScript Emulation Random Access Memory Serial Impact Dot Matrix B4400/4500/4550/4600 User's Guide 9 - Oki B4600 | B4400 4500 4550 4600 User Guide (English) - Page 10
paper guide 6. Paper tray content indicator 7. ON/OFF switch 8. Rear paper exit tray (50 sheets, face up) 9. Rear paper exit tray paper guide Fig1_05.jpg 9 8 1 2 3 4 5 7 6 10. LED array 11. Image drum 12. Manual feed tray (single sheet) (shown in closed position) B4400/4500/4550/4600 User's Guide - Oki B4600 | B4400 4500 4550 4600 User Guide (English) - Page 11
13. Paper feed tray (250 sheets) 14. Toner cartridge 15. Fuser unit 16. Top cover Fig1_06a.JPG 16 10 11 15 14 17. Power cable connection 18. Cooling fan 12 13 B4400/4500/4550/4600 User's Guide 11 - Oki B4600 | B4400 4500 4550 4600 User Guide (English) - Page 12
paper tray (optional ) connection 21. Parallel interface connection 22. USB interface connection Network card (optional on non-network models) 23. Network interface connector 24. Status lamp 25. 10M lamp 26. 100M lamp 27. Test switch 23 24 25 26 27 20 21 22 B4400/4500/4550/4600 User's Guide - Oki B4600 | B4400 4500 4550 4600 User Guide (English) - Page 13
, including the black light-shield bag for storing the image drum, in the event that you need to repack the printer for shipment. Check contents: 1. Printer 2. Power cord 3. Toner cartridge 4. Black light-shield bag 5. Quick Installation Guide 6. CD ROM: Printer installation/User Guide pdf 7. Safety - Oki B4600 | B4400 4500 4550 4600 User Guide (English) - Page 14
black plastic bag to keep it away from light. 1. Press the button on the right to open the top cover. 2. Open the manual tray and lift the blue tape. 3. Carefully lift the drum cartridge and remove the tape with the protective film. Fig1_36.jpg Fig1_35.jpg B4400/4500/4550/4600 User's Guide 14 - Oki B4600 | B4400 4500 4550 4600 User Guide (English) - Page 15
Cartridge 1. Remove the toner cartridge from the packaging. 2. Shake it from side-to-side a few times to distribute the toner. 3. Carefully turn the cartridge over and remove the tape. F12_02a.JPG 4. Turn the cartridge right-side-up with the blue lever on the right. B4400/4500/4550/4600 User's Guide - Oki B4600 | B4400 4500 4550 4600 User Guide (English) - Page 16
then push the blue lever to the back of the printer as far as it will go. F12_04.jpg NOTE: If TONER LOW displays on the operator panel or the online Status Monitor after installing a toner cartridge, reinstall it. Installing paper 1. Pull the paper cassette out. B4400/4500/4550/4600 User's Guide 16 - Oki B4600 | B4400 4500 4550 4600 User Guide (English) - Page 17
the paper stopper at the back to the paper size you are using. 3. Set each side's paper guide until it clicks. F10_05.jpg 4. Place paper in the cassette (maximum 250 sheets at 20 lb. [80g/m2]. NOTE: Do not install paper over the PAPER FULL mark (a). F10_04.jpg a B4400/4500/4550/4600 User's Guide 17 - Oki B4600 | B4400 4500 4550 4600 User Guide (English) - Page 18
printing with the standard paper cassette. 1. Turn OFF the power and detach the power cord and printer cable. Fig1_22.jpg 2. Prepare the feeder: pull the front cover, then move the sheet guide in the direction of the arrow until it stops. Fig1_24.jpg Fig1_25.jpg 3. Open the manual tray. B4400 - Oki B4600 | B4400 4500 4550 4600 User Guide (English) - Page 19
manual tray must remain open when the feeder unit is installed. Fig1_26.jpg 4. Set the projections on the feeder unit to the slots at the bottom of the printer. 5. Place the printer on the feeder unit. Fig1_27.jpg 6. Close the feeder's front cover. Fig1_28.jpg B4400/4500/4550/4600 User's Guide 19 - Oki B4600 | B4400 4500 4550 4600 User Guide (English) - Page 20
in the Media Menu. Refer to "Printing menu settings" on page 31 for details. Set the feeder unit in the printer driver Windows 1. Select Start>Settings>Printers and Fax for Windows® XP, and Start>Setting>Printers for Windows 2k/NT 4.0/Me/ 98. 2. Right click your OKI printer icon to select Properties - Oki B4600 | B4400 4500 4550 4600 User Guide (English) - Page 21
Multi-purpose Feeder tray allow you to feed postcards, envelopes, labels and transparencies continuously. NOTE: Install the Second Paper Tray first when using with the Multi-purpose feeder. 1. Turn off the printer. Fig1_22.jpg 2. Open the manual tray. Fig1_26.jpg B4400/4500/4550/4600 User's Guide 21 - Oki B4600 | B4400 4500 4550 4600 User Guide (English) - Page 22
of the Multi-purpose feeder into the slots on each side of the printer. Fig1_31.jpg Connect the connecting cord. 4. Insert a flat-blade screwdriver from the printer. Fig1_32.jpg 6. Insert the connecting cord into the connector on the printer, matching the arrows. B4400/4500/4550/4600 User's Guide 22 - Oki B4600 | B4400 4500 4550 4600 User Guide (English) - Page 23
in the Media Menu. Refer to "Printing menu settings" on page 31 for details. Set the feeder unit in the printer driver Windows 1. Select Start>Settings>Printers and Fax for Windows® XP, and Start>Setting>Printers for Windows 2k/NT 4.0/Me/ 98. 2. Right click your OKI printer icon to select Properties - Oki B4600 | B4400 4500 4550 4600 User Guide (English) - Page 24
the B4500, B4550 and B4600. (See "Printer Drivers" for installation of the Status Monitor.) B4400 Operator panel NOTE: The easiest way to check the status of the B4400 is to use the online Status Monitor. We'll tell you more about the Status Monitor on page 26. The B4400 operator panel consists of - Oki B4600 | B4400 4500 4550 4600 User Guide (English) - Page 25
1 - slow blink x Paper Jam. Flash 2 - blink X Toner low/Drum near end of Flash 2 - life. blink X Drum Cartridge at end of life. Flash 3 - rapid blink X Turn the printer off and on Flash 3 - again. If this does not clear rapid blink the error, call for service. OnLine button The - Oki B4600 | B4400 4500 4550 4600 User Guide (English) - Page 26
printing has been cancelled. NOTE: To reset the printer to the factory default settings, press the OnLine button and hold it down while the printer is turned on. The LED indicators blink when the printer has reset to the default settings. B4400 Status Monitor After installing the printer driver - Oki B4600 | B4400 4500 4550 4600 User Guide (English) - Page 27
.jpg NOTE: To open the Status Monitor quickly, click on the printer icon on the Windows Task Bar. S M desktop icon.jpg 2. Click on the window maximize button (a) and the view expands to include the Printer Setup and Preferences tabs. S M Printer State tab.jpg a B4400/4500/4550/4600 User's Guide 27 - Oki B4600 | B4400 4500 4550 4600 User Guide (English) - Page 28
Printer Setup Tab Select this tab to access to the Open Configuration button. S M Printer State tab.jpg B4400/4500/4550/4600 User's Guide 28 - Oki B4600 | B4400 4500 4550 4600 User Guide (English) - Page 29
2 (if installed); MPF (if installed) Manual Tray; Custom Paper Size. System Configuration Menu: Power Save; Emulation; Clearable Warnings; Clear Errors; Manual Feed Timeout; Wait Timeout; Print Continuation at Toner Low; Jam Recovery; Status Display Language. B4400/4500/4550/4600 User's Guide 29 - Oki B4600 | B4400 4500 4550 4600 User Guide (English) - Page 30
; Transfer Setting; Darkness; Print Cleaning Page. Usage Menu: Total Sheets; Drum Life; Toner Life. Preferences Tab S M Preference Tab.jpg Selecting this tab lets you choose the information displayed by the Status Monitor and how/when the Status Monitor appears. B4400/4500/4550/4600 User's Guide 30 - Oki B4600 | B4400 4500 4550 4600 User Guide (English) - Page 31
3. The printer prints a list of the menu settings and a demo print page. From the Status Monitor 1. Select the Printer Setup tab. 2. Click the Open Configuration button. The Printer Menu displays. 3. Click Information Menu. 4. Click Print Menu Map. 5. Click Apply. Click OK. B4400/4500/4550/4600 User - Oki B4600 | B4400 4500 4550 4600 User Guide (English) - Page 32
item. Item (-) button. Press briefly to scroll backward to the previous menu item. Online button. Press to switch between online and offline status. NOTE: When pressed in Menu mode, the Online button returns the printer to online status. When pressed with DATA B4400/4500/4550/4600 User's Guide 32 - Oki B4600 | B4400 4500 4550 4600 User Guide (English) - Page 33
stored within the printer. INFORMATION MENU item PRINT MENU MAP PRINT FILE LIST PRINT PCL FONT PRINT PSE FONT PRINT IBM PPR FONT PRINT EPSON FX FONT DEMO1 Action Execute Execute Execute Execute Execute Execute Execute If PostScript Emulation kit is installed B4400/4500/4550/4600 User's Guide 33 - Oki B4600 | B4400 4500 4550 4600 User Guide (English) - Page 34
to save toner amount. Set print orientation. Sets the number of lines per page. This value is automatically adjusted when print orientation is changed. Sets paper size when not specified by the computer. If Cassette is selected, paper size in tray is selected. B4400/4500/4550/4600 User's Guide 34 - Oki B4600 | B4400 4500 4550 4600 User Guide (English) - Page 35
measure unit for custom paper. X DIMENSION 8.5* 3.5 to 8.5 Set paper width for custom paper. Value is calculated by Unit of Measure setting. Y DIMENSION 11.0* 5.8 to 14.0 Set paper length for custom paper. Value is calculated by Unit of Measure setting. B4400/4500/4550/4600 User's Guide 35 - Oki B4600 | B4400 4500 4550 4600 User Guide (English) - Page 36
when TONER LOW is displayed. When STOP is selected, the printer goes offline until ONLINE is pressed. ON*, OFF Sets whether to start to print with a jammed page after a paper jam. OFF*, ON Sets whether to print an error report when internal errors occur. B4400/4500/4550/4600 User's Guide 36 - Oki B4600 | B4400 4500 4550 4600 User Guide (English) - Page 37
operation when a CR code is received. Sets operation when a LF code is received. Sets the unprintable area of paper. NORMAL is 1/4 inch. With PEN WIDTH ADJUST set to ON, Adjusts a thin line to be more visible. When set to OFF, the line will appear as specified. B4400/4500/4550/4600 User's Guide 37 - Oki B4600 | B4400 4500 4550 4600 User Guide (English) - Page 38
start position to the right. Sets the printing mode that can fit print data, equivalent to 11 inches (66 lines), in the LETTER size printable area. Sets height of a character. SAME: Regardless of CPI, same height. DIFF: According to CPI, character heights vary. B4400/4500/4550/4600 User's Guide 38 - Oki B4600 | B4400 4500 4550 4600 User Guide (English) - Page 39
start position to the right. Sets the printing mode that can fit print data, equivalent to 11 inches (66 lines), in the LETTER size printable area. Sets height of a character. SAME: Regardless of CPI, same height. DIFF: According to CPI, character heights vary. B4400/4500/4550/4600 User's Guide 39 - Oki B4600 | B4400 4500 4550 4600 User Guide (English) - Page 40
RS232C card is installed. This menu controls the operation of the printer's optional RS232C data interface. RS232C MENU Item RS232C FLOW CONTROL Value ENABLE* DISABLE DTR HI* DTR LO XONXOFF RBST XON Remarks Sets RS-232C I/F. Selects BUSY Control Protocol. B4400/4500/4550/4600 User's Guide 40 - Oki B4600 | B4400 4500 4550 4600 User Guide (English) - Page 41
the operation of the printer's USB data interface. USB MENU Item USB SOFT RESET USB S/N OFF REC Default Reset Command. Sets USB Serial Number. Only when PSE is installed Network menu NOTE: This menu displays only when the optional Network card is installed. B4400/4500/4550/4600 User's Guide - Oki B4600 | B4400 4500 4550 4600 User Guide (English) - Page 42
the operation of the printer's 10Base-T/ 100Base-TX network DISABLE ENABLE* DISABLE ENABLE* DISABLE AUTO* 802.2, 802.3, ETHER ll SNAP AUTO* MANUAL 000 to 255 EXECUTE ENABLE ENABLE ENABLE ENABLE NORMAL* SMALL AUTO NEGOTIATE* 100 FULL Sets HUB LINK SETTING. B4400/4500/4550/4600 User's Guide 42 - Oki B4600 | B4400 4500 4550 4600 User Guide (English) - Page 43
System adjustment menu This menu provides fine adjustment of image position on the printed page in steps of 0.25mm. SYSTEM ADJUSTMENT MENU Item X ADJUST Y ADJUST PCL MANUAL ID Default 0.00 mm* +0.25 mm +2.00 source command (ESC & l # H) in PCL5e emulation. B4400/4500/4550/4600 User's Guide 43 - Oki B4600 | B4400 4500 4550 4600 User Guide (English) - Page 44
to which a print image has been horizontally shifted. Prints in hexadecimal dump. Turn OFF the power to end hexadecimal dump printing. Maintenance menu This menu provides access to various printer maintenance functions. MAINTENANCE MENU Item EEPROM RESET DRUM COUNT RESET POWER SAVE Default - Oki B4600 | B4400 4500 4550 4600 User Guide (English) - Page 45
them. USAGE MENU Item DRUM LIFE TONER Default REMAINING % 7K= % 3K= % Remarks Shows the image drum consumption. Shows the installed toner cartridge capacity and the remaining toner level. 7K = High capacity cartridge (B4550, B4600 only) 3k = Standard cartridge Printing menu settings Models B4500 - Oki B4600 | B4400 4500 4550 4600 User Guide (English) - Page 46
on the Software Installation CD. Run the CD, selecting the language you want. Select Optional Utilities>Change the Printer Display Language. Follow the on-screen instructions. When the operator panel displays DL MSG Success, turn the printer Off/On to reset. B4400/4500/4550/4600 User's Guide 46 - Oki B4600 | B4400 4500 4550 4600 User Guide (English) - Page 47
with Network interface for Ethernet • Windows XP • Windows ME/98 • Windows 2000 • Windows NT 4.0 NOTE: For information specific to a network installation, see the Network User Guide on the CD-ROM supplied with your printer. Click the Documentation/Network User's Guide buttons in the Menu Installer - Oki B4600 | B4400 4500 4550 4600 User Guide (English) - Page 48
for Windows NOTE: The following setup instructions are for Windows XP/ 2000/Server 2003. The setup procedure for Windows ME/98/ NT4.0 are similar. An IP address must be set in the computer and the printer when the printer is used on a network. If there is no DHCP, B4400/4500/4550/4600 User's Guide - Oki B4600 | B4400 4500 4550 4600 User Guide (English) - Page 49
IP address which must be set manually. The printer supports Network Plug & Play. When all connected computers are Windows XP, 2000 or Server 2003, or connected routers support Network Plug & Play, the value of the IP address. 7. Press Select to add * to the value. B4400/4500/4550/4600 User's Guide 49 - Oki B4600 | B4400 4500 4550 4600 User Guide (English) - Page 50
. It will autorun. 2. Select the language. 3. Accept the License Agreement. 4. Select Driver Setup from the menu bar. 5. Click Install Driver. (Select Install Driver and Status Monitor if your printer is a B4400). 6. Select Network Printer. 7. Select TCP/IP protocol. 8. Enter the IP address that was - Oki B4600 | B4400 4500 4550 4600 User Guide (English) - Page 51
the OKI printer icon. 3. Follow the on-screen instructions and select Delete. NOTE: Steps 4 and 5 are from Windows XP/2000/Server 2003. 4. Select File>Server Properties in the Printer (and FAX) folder. 5. Select the model name at the Drivers tab and click Delete. B4400/4500/4550/4600 User's Guide 51 - Oki B4600 | B4400 4500 4550 4600 User Guide (English) - Page 52
the USB connector of the computer. Setup NOTE: Install the printer driver before connecting the USB cable to the printer. 4. Turn the printer OFF. 1. Insert the CD in the CD-ROM drive. The CD will autorun. 2. Select the language. 3. Accept the license agreement. B4400/4500/4550/4600 User's Guide 52 - Oki B4600 | B4400 4500 4550 4600 User Guide (English) - Page 53
4. Click Install Driver (and Status Monitor for the B4400) 5. Select local printer. 6. Follow the on-screen instructions. 7. When prompted, connect the USB cable and switch the printer ON. Change the Printer Display Language (Models B4500, B4550, B4600) The default language for the printer operator - Oki B4600 | B4400 4500 4550 4600 User Guide (English) - Page 54
installation of Windows Me/98. The computer does not support USB interface. Confirm that USB controller is shown in the device manager. Interface is set to DISABLE. B4500/4550/4600: Set to ENABLE in the printer menu. See "USB menu" on page 41. B4400: Open the Status Monitor. On the Printer Setup - Oki B4600 | B4400 4500 4550 4600 User Guide (English) - Page 55
the other end of the parallel cable into the interface connector of the computer and secure it with the screws (2). Setup 1. Turn on the printer. 2. Insert the CD in the CD-ROM drive. The CD will autorun. 3. Select the language. 4. Accept the license agreement. B4400/4500/4550/4600 User's Guide 55 - Oki B4600 | B4400 4500 4550 4600 User Guide (English) - Page 56
printer driver 1. Select Start>Control Panel>Printers. Select Start>Printer and FAX for Windows Server 2003. Select Start>Setting (Printers) for Windows 2000/NT4.0/Me/ 98. 2. Right click the OKI printer icon. 3. Follow the on-screen instructions and select Delete. B4400/4500/4550/4600 User's Guide - Oki B4600 | B4400 4500 4550 4600 User Guide (English) - Page 57
B4500/B4550/B4600: Set Centronics to ENABLE on the printer menu. See page "PARALLEL MENU" on page 40. B4400: Open the Status Monitor. On the Printer Setup Tab, click the Open Configuration button. Click Parallel Menu, Parallel Enable. Connect the parallel cable B4400/4500/4550/4600 User's Guide 57 - Oki B4600 | B4400 4500 4550 4600 User Guide (English) - Page 58
the USB interface connector (1) of the printer. 3. Insert the other end of the cable into the USB interface connector of the Macintosh. Setup 1. Turn ON the printer. 2. Insert the CD in the CD-ROM drive. 3. Click the OKI CD-ROM icon. 4. Open the Driver folder. B4400/4500/4550/4600 User's Guide 58 - Oki B4600 | B4400 4500 4550 4600 User Guide (English) - Page 59
. 7. Accept the license agreement. 8. Follow the on-screen instructions. Select a printer: 9. Open the Chooser on the Apple Menu. 10. Click the Oki Printer icon. 11. Select your printer. 12. Close Chooser. A Desktop Printer icon is displayed on the desktop. B4400/4500/4550/4600 User's Guide 59 - Oki B4600 | B4400 4500 4550 4600 User Guide (English) - Page 60
internet cable and a hub (Category 5, twistedpair cable and straight type) separately. F3_1.jpg F3_2.jpg 1. Turn OFF the Macintosh and the printer. 2. Connect the printer to the Network. F3_3.jpg Setup EtherTalk Protocol 1. Turn ON the printer. 2. Start the Mac. B4400/4500/4550/4600 User's Guide 60 - Oki B4600 | B4400 4500 4550 4600 User Guide (English) - Page 61
instructions to install. Add the Printer: 1. On the hard disk select Applications>Utilities folder, and double-click Printer Setting Utility. (For Mac OS X 10.2 or earlier, select the Print Center. 2. Click Add (Add the printer . Set the IP Address in the printer: B4400/4500/4550/4600 User's Guide 61 - Oki B4600 | B4400 4500 4550 4600 User Guide (English) - Page 62
the Print Center. 2. Click Add (Add the printer, for Mac OS X 10.1.5 or earlier). 3. Click Other Printers. 4. Select OKI TCP/IP. 5. Select the printer name and click Add. 6. Make sure that the printer name is shown in the Printer List. 7. Close the Printer Setting Utility. B4400/4500/4550/4600 User - Oki B4600 | B4400 4500 4550 4600 User Guide (English) - Page 63
Types, and select a printer name to be used for Mac OS X 10.3 or earlier. Click Add. A printer name is "OKI B4500n" plus the last 6 digits of the MAC address. 10. Make sure that the printer name is shown in the Printer List. 11. Close the Printer Setting Utility. B4400/4500/4550/4600 User's Guide 63 - Oki B4600 | B4400 4500 4550 4600 User Guide (English) - Page 64
connector of the Macintosh. Setup 1. Turn ON the printer. 2. Insert the CD in the CD-ROM drive. 3. Click the OKI CD-ROM icon. 4. Open the Driver folder. 5. Double-click Installer for Mac OS X in the Driver folder. 6. Input administrator's name and click OK. B4400/4500/4550/4600 User's Guide 64 - Oki B4600 | B4400 4500 4550 4600 User Guide (English) - Page 65
Delete. 12. Click Other Printers. 13. Select OKI USB. Select USB for Mac OS 10.1.5 or earlier version. 14. Select OKI Data USB Printer displayed in Types. 15. Check that the printer name added in Printer List is displayed, and close Printer Setting Utilities. B4400/4500/4550/4600 User's Guide 65 - Oki B4600 | B4400 4500 4550 4600 User Guide (English) - Page 66
use in laser type printers. • The use of heavily laid or textured paper will seriously affect the life of the image drum. • Do not use very smooth, shiny/glossy paper. • Do not use heavily embossed letterhead paper. • Avoid printing on both sides and putting paper through the printer twice. • Avoid - Oki B4600 | B4400 4500 4550 4600 User Guide (English) - Page 67
Do not use media designed for use in color laser printers and photocopiers • Labels should cover entire carrier sheet. • Carrier sheet or adhesive must not be exposed to any part of the printer. Installing paper NOTE: If you are topping up the paper in a paper tray, it is recommended that you remove - Oki B4600 | B4400 4500 4550 4600 User Guide (English) - Page 68
the support forwards or backwards as necessary 3. Adjust the paper guides (1). It is important to adjust the paper guides correctly to ensure that the paper is not skewed in the print process. Paper jams may occur if this operation is not carried out correctly. 4. Replace the tray in the printer - Oki B4600 | B4400 4500 4550 4600 User Guide (English) - Page 69
paper to crease or curl, and corrugations in transparencies. Too little heat will cause the image not to fuse fully into heavyweight paper. NOTE: Although media properties can be set in the printer driver for particular jobs, when filling a tray with media it is B4400/4500/4550/4600 User's Guide - Oki B4600 | B4400 4500 4550 4600 User Guide (English) - Page 70
to set the printer for transparencies. NOTE: Remember to reset the printer for normal paper after printing transparencies. B4500, B4550, B4600 Using the control panel on your printer, you can choose: • which paper to use • the size of the paper you wish to use B4400/4500/4550/4600 User's Guide 70 - Oki B4600 | B4400 4500 4550 4600 User Guide (English) - Page 71
as described here. Paper feed selection The paper feed, paper size, paper weight and media type can be set manually on the printer using the control panel as follows. 1. Press the Online button to return the printer to offline status. 2. Press the Menu button repeatedly until PRINT MENU is displayed - Oki B4600 | B4400 4500 4550 4600 User Guide (English) - Page 72
printer to ONLINE status. 6. Select the correct paper settings in the printer driver before printing the file. Specifying Media type and weight You can set media weight in the Printer Menu [Media Weight] using the Operator Panel (B4500, B4550, B4600). You can also set values in the printer driver - Oki B4600 | B4400 4500 4550 4600 User Guide (English) - Page 73
is displayed, then press the Select button. A plus (+) appears next to the selected paper type or weight. 5. Press the Online button to return the printer back to online status. Select the correct paper settings in the printer driver before printing the file. B4400/4500/4550/4600 User's Guide 73 - Oki B4600 | B4400 4500 4550 4600 User Guide (English) - Page 74
printer, please refer to the User's Guide for the network interface card for further details on how to configure the network connection before installing the printer drivers. NOTE: Administrator's authority is required when installing a network connection. B4400/4500/4550/4600 User's Guide 74 - Oki B4600 | B4400 4500 4550 4600 User Guide (English) - Page 75
the CD-ROM supplied with your printer. Click the Documentation/Network User's Guide buttons in the Menu Installer. NOTE: For step by step instructions, see the Software Installation Guide included with your printer. Windows operating systems Install the printer driver using The Menu Installer on the - Oki B4600 | B4400 4500 4550 4600 User Guide (English) - Page 76
Click More Printers. 3. Select OKI USB, OKI TCP/IP, or Rendezvous/Bonjour from the drop-down menu. 4. If you are using USB, select OKI USB and disregard step 4. 5. Enter the printer's IP address. 6. Select the printer model. Click Add. 7. Quit the Print Center. B4400/4500/4550/4600 User's Guide 76 - Oki B4600 | B4400 4500 4550 4600 User Guide (English) - Page 77
in the printer driver are the same as those in the operator panel and Status Monitor menus, and you print documents from Windows, the settings in the Windows printer driver will override those settings in the operator panel and Status Monitor menus. Printing preferences in Windows applications When - Oki B4600 | B4400 4500 4550 4600 User Guide (English) - Page 78
manual, the Weight selection box becomes visible. You can leave the setting at Printer Setting or select as required. 4. A variety of document finishing options can be selected, such as normal one page per sheet, or N-up (where N can be 2 or 4) for printing scaled down pages at more than one page - Oki B4600 | B4400 4500 4550 4600 User Guide (English) - Page 79
little processing for the printer to do, although the file size may be large. In Vector mode, file sizes may be smaller and so transmission over a network, for example, may be faster. These effects are more pronounced for graphics printing than for text printing. B4400/4500/4550/4600 User's Guide 79 - Oki B4600 | B4400 4500 4550 4600 User Guide (English) - Page 80
of dots used in the halftone screen. 3. Set this control to print greyscale effects in black without dithering. 4. You can manually adjust lightness (the higher the setting the lighter the print) and contrast (the higher the setting the greater the contrast). B4400/4500/4550/4600 User's Guide 80 - Oki B4600 | B4400 4500 4550 4600 User Guide (English) - Page 81
and B4600 printers with the PostScript 3 option installed. The tabs available are the Layout Tab, the Paper/Quality Tab and the Job Options Tab. Layout tab pslayout1.jpg 1. Page orientation can be set to portrait (tall), landscape (wide) or landscape rotated by 180 degrees. 2. Printed page order - Oki B4600 | B4400 4500 4550 4600 User Guide (English) - Page 82
as follows: psadvdoc.jpg 1. Select the required printed paper size. 2. You can substitute another font for TrueType Font. 3. You can set other document options as required, including PostScript options and printer features. Paper/Quality tab pspaperqual1.jpg B4400/4500/4550/4600 User's Guide 82 - Oki B4600 | B4400 4500 4550 4600 User Guide (English) - Page 83
useful for marking documents as draft, confidential, etc. 3. You can set a degree of toner saving for particular print jobs. 4. You can select up to 999 copies to print consecutively, although you will need to top up the paper tray during such a long print run. B4400/4500/4550/4600 User's Guide 83 - Oki B4600 | B4400 4500 4550 4600 User Guide (English) - Page 84
tab general1.jpg 1. This area lists some of the main features of your printer, including optional items. 2. This button opens the same windows as described earlier for items which can be set from within application programs. Changes you make here, however, will B4400/4500/4550/4600 User's Guide 84 - Oki B4600 | B4400 4500 4550 4600 User Guide (English) - Page 85
become the new default settings for all Windows applications. 3. This button prints a test page to ensure that your printer is working. NOTE: The above features are provided by the Windows 2000 operating system and will vary with other operating systems. Advanced tab advanced1.jpg 1. You can specify - Oki B4600 | B4400 4500 4550 4600 User Guide (English) - Page 86
per sheet, are available, depending on your printer. For normal printing keep this option enabled. If compatibility problems occur you can disable the feature. However, these advanced options may then not be available, even though the hardware might support them. B4400/4500/4550/4600 User's Guide 86 - Oki B4600 | B4400 4500 4550 4600 User Guide (English) - Page 87
. Device Options tab deviceoption1.jpg In this window you can select which optional upgrades are installed on your printer. See the chapter entitled "Installing Options." PS emulation For B4500, B4550 and B4600 printers with the PostScript 3 option installed. B4400/4500/4550/4600 User's Guide 87 - Oki B4600 | B4400 4500 4550 4600 User Guide (English) - Page 88
can set the desired paper sizes in each of the available paper feed trays. 2. You printer. See the chapter entitled "Installing Options." Printer settings in Macintosh Refer to the readme file on the drivers CD, and the online help provided in the driver software. B4400/4500/4550/4600 User's Guide - Oki B4600 | B4400 4500 4550 4600 User Guide (English) - Page 89
. Toner: 4400, B4500, B4550, B4600 Toner: B4550 and B4600 only (Higher Yield) Image drum 43502301 43502001 43501901 Always use genuine OKI consumables. When to replace the toner cartridge B4400 Replace the toner cartridge after Toner Low displays in the printer Status Monitor. Also, the Error LED - Oki B4600 | B4400 4500 4550 4600 User Guide (English) - Page 90
came with the new toner cartridge or soft tissue. 5. Close the top cover and press it down to latch it closed. When to replace the image drum B4400 When the drum reaches 90% of its life, a CHANGE DRUM message is displayed in the printer Status Monitor. Also, the Error LED indicator slowly blinks - Oki B4600 | B4400 4500 4550 4600 User Guide (English) - Page 91
marks, the problem may be cleared by generating a drum cleaning page as follows. B4400 Using the printer Status Monitor 6. Start the Status Monitor for the printer. 7. Click on [Printer Setup] tab - [Printer Menu] button - [Test Print tab] - [Cleaning] button. B4400/4500/4550/4600 User's Guide 91 - Oki B4600 | B4400 4500 4550 4600 User Guide (English) - Page 92
the paper and prints a cleaning page. 5. Return the printer on line by pressing the OnLine button. 6. If subsequent printing appears faded or uneven, try replacing the toner cartridge. B4500, B4550, B4600 1. Press the Online button to return the printer to off-line status. 2. Open the manual feed - Oki B4600 | B4400 4500 4550 4600 User Guide (English) - Page 93
Wipe the LED array gently with the cleaning pad that came with the new toner cartridge or use an anti-static cleaning pad that is generally available for computer cleaning. B4400/4500/4550/4600 User's Guide 93 - Oki B4600 | B4400 4500 4550 4600 User Guide (English) - Page 94
Status Monitor. B4500, B4550, B4600 The LCD on the printer operator panel provides the selfexplanatory status and error messages in your chosen language. The Ready indicator goes out when an error message appears. Paper Jams Provided that you follow the recommendations in this guide on use of print - Oki B4600 | B4400 4500 4550 4600 User Guide (English) - Page 95
the paper path. 3. Re-install the image drum complete with toner cartridge, ensuring that it correctly locates into the slots on each side of the printer. 4. Close the top cover and press down to latch it closed. 5. The printer will warm up and commence printing when ready. The page lost through - Oki B4600 | B4400 4500 4550 4600 User Guide (English) - Page 96
, Change paper to a smoother laser generally from dry bond or use a humidifier. environments, causes toner to stick to background. Page prints all black. Hardware problem. Contact service. Page has Damaged image Generate a cleaning page, repetitive marks. drum cartridge repetitive marks - Oki B4600 | B4400 4500 4550 4600 User Guide (English) - Page 97
, or fusing unit problem. Faded print. Toner cartridge is not correctly installed. Toner low. Smeared or blotched print. Dirty rollers; toner dropped inside printer or image drum problem. Printed page is light/blurred. Is toner low? Is paper meant for laser printers? LED array is dirty - Oki B4600 | B4400 4500 4550 4600 User Guide (English) - Page 98
. Hardware problems Symptom Problem Solution Graphic image prints partly on one page, partly on the next. When you try to print nothing happens, but printer indicates it is ready to receive data. Garbage prints. Insufficient printer memory for this image at this resolution. Configuration error - Oki B4600 | B4400 4500 4550 4600 User Guide (English) - Page 99
, and provide adequate ventilation. Printer is on but must warm up before a job is printed. Power Save mode is To eliminate warm up delay, set on to conserve change Power Save setting energy. The fuser must heat up before you can begin printing the next job. B4400/4500/4550/4600 User's Guide 99 - Oki B4600 | B4400 4500 4550 4600 User Guide (English) - Page 100
printer's paper handling capacity by 500 sheets • PostScript 3 emulation DIMM: to add PostScript emulation to the B4500, B4550 and B4600. Installation procedure To install any of the above options, follow the detailed installation sheet that accompanies the option. B4400/4500/4550/4600 User's Guide - Oki B4600 | B4400 4500 4550 4600 User Guide (English) - Page 101
capacity Optional Tray 2: 500 sheets at 20 lb (80g/ m²) Paper output Face up, Face down depending on paper size, type and thickness Paper output Face up: 50 sheets capacity at 20 Face down: 150 sheets lb (80g/m²) Consumables Toner cartridge, Image drum B4400/4500/4550/4600 User's Guide 101 - Oki B4600 | B4400 4500 4550 4600 User Guide (English) - Page 102
Overall dimensions dimensions.jpg 14.0" 24.3 15.6 7.9" Paper and tray information Feed and ejection methods vary depending on the type, size and thickness of medium used. Use the chart below and the notes/symbols/terms on the following page for initial B4400/4500/4550/4600 User's Guide 102 - Oki B4600 | B4400 4500 4550 4600 User Guide (English) - Page 103
oo x oo o oo x oo x oo x oo x Notes/symbols/terms NOTE: 1. When an optional second paper tray is used, the original tray is referred to as Tray 1 and the optional tray as Tray 2. 2. It is not possible to use custom paper sizes with the PS driver. B4400/4500/4550/4600 User's Guide 103 - Oki B4600 | B4400 4500 4550 4600 User Guide (English) - Page 104
MPF FU FD W, L L ML M MH H o x Paper Tray 1 Paper Tray 2 (optional) Manual Feed Tray Multi-purpose Feeder tray Face Up printing from the rear of the printer Face Down printing from the top of the printer Width, Length in mm Light paper weight: 16 lb. (60g/m²) Medium Light paper weight: 18-19lb. (67 - Oki B4600 | B4400 4500 4550 4600 User Guide (English) - Page 105
Service and support If you need further assistance or have questions See our web site: http://my.okidata.com In the U.S. and Canada, call: 1-800-OKI-DATA (1-800-654-3282) 24 hours a day, 7 days a week Service de atendimento). e-mail: [email protected] B4400/4500/4550/4600 User's Guide 105 - Oki B4600 | B4400 4500 4550 4600 User Guide (English) - Page 106
Oki Data Americas, Inc., 2000 Bishops Gate Blvd., Mt. Laurel, NJ 08054-4620 Tel: 1-800-654-3282, (856)222-5320 http://www.okiprintingsolutions.com 59388905
-
 1
1 -
 2
2 -
 3
3 -
 4
4 -
 5
5 -
 6
6 -
 7
7 -
8
-
9
-
10
-
11
-
12
-
13
-
14
-
15
-
16
-
17
-
18
-
19
-
20
-
21
-
22
-
23
-
24
-
25
-
26
-
27
-
28
-
29
-
30
-
31
-
32
-
33
-
34
-
35
-
36
-
37
-
38
-
39
-
40
-
41
-
42
-
43
-
44
-
45
-
46
-
47
-
48
-
49
-
50
-
51
-
52
-
53
-
54
-
55
-
56
-
57
-
58
-
59
-
60
-
61
-
62
-
63
-
64
-
65
-
66
-
67
-
68
-
69
-
70
-
71
-
72
-
73
-
74
-
75
-
76
-
77
-
78
-
79
-
80
-
81
-
82
-
83
-
84
-
85
-
86
-
87
-
88
-
89
-
90
-
91
-
92
-
93
-
94
-
95
-
96
-
97
-
98
-
99
-
100
-
101
-
102
-
103
-
104
-
105
-
106
 |
 |