Oki PRO510DW Pro510DW User's Guide - Page 20
Dentifying, Major, Components
 |
View all Oki PRO510DW manuals
Add to My Manuals
Save this manual to your list of manuals |
Page 20 highlights
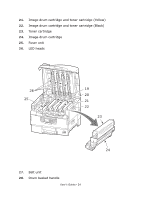
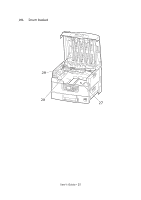
To close the top cover, push gently (1) until the cover stops midway and then push harder (2) to close the cover completely. Ensure that the cover is securely closed. 1 2 IDENTIFYING MAJOR COMPONENTS The major components of your printer are identified in the graphics below. 1. Paper holding arm 2. Top cover (face-down stacker) 3. MP Tray (multi-purpose tray)(non-functional w/ pro510DW) 4. Tray 1 side cover 5. Paper size label 6. Paper gauge 7. Tray 1 (paper tray) 8. Control panel User's Guide> 20
-
 1
1 -
2
-
3
-
4
-
5
-
6
-
7
-
8
-
9
-
10
-
11
-
12
-
13
-
14
-
 15
15 -
 16
16 -
 17
17 -
 18
18 -
 19
19 -
 20
20 -
 21
21 -
 22
22 -
 23
23 -
 24
24 -
 25
25 -
26
-
27
-
28
-
29
-
30
-
31
-
32
-
33
-
34
-
35
-
36
-
37
-
38
-
39
-
40
-
41
-
42
-
43
-
44
-
45
-
46
-
47
-
48
-
49
-
50
-
51
-
52
-
53
-
54
-
55
-
56
-
57
-
58
-
59
-
60
-
61
-
62
-
63
-
64
-
65
-
66
-
67
-
68
-
69
-
70
-
71
-
72
-
73
-
74
-
75
-
76
-
77
-
78
-
79
-
80
-
81
-
82
-
83
-
84
-
85
-
86
-
87
-
88
-
89
-
90
-
91
-
92
-
93
-
94
-
95
-
96
-
97
-
98
-
99
-
100
 |
 |
User’s Guide> 20
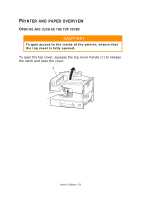
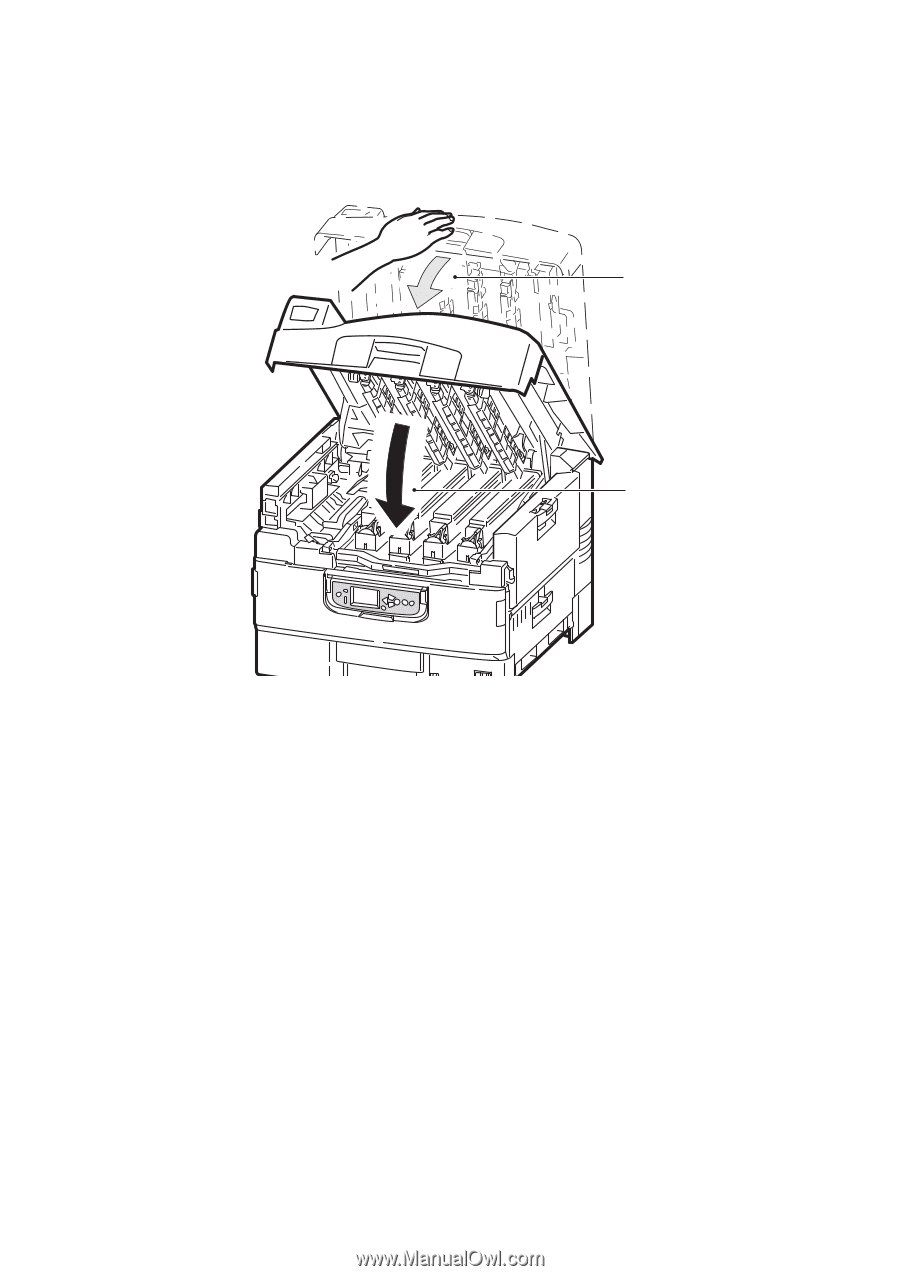
To close the top cover,
push gently (1) until the cover stops midway
and then push harder (2) to close the cover completely. Ensure that
the cover is securely closed.
I
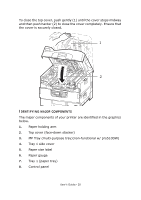
DENTIFYING
MAJOR
COMPONENTS
The major components of your printer are identified in the graphics
below.
1.
Paper holding arm
2.
Top cover (face-down stacker)
3.
MP Tray (multi-purpose tray)(non-functional w/ pro510DW)
4.
Tray 1 side cover
5.
Paper size label
6.
Paper gauge
7.
Tray 1 (paper tray)
8.
Control panel
1
2