Panasonic KX-FLM651 Laser Fax
Panasonic KX-FLM651 - Laser Fax, PC-Printer Manual
 |
UPC - 037988809844
View all Panasonic KX-FLM651 manuals
Add to My Manuals
Save this manual to your list of manuals |
Panasonic KX-FLM651 manual content summary:
- Panasonic KX-FLM651 | Laser Fax - Page 1
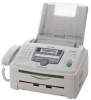
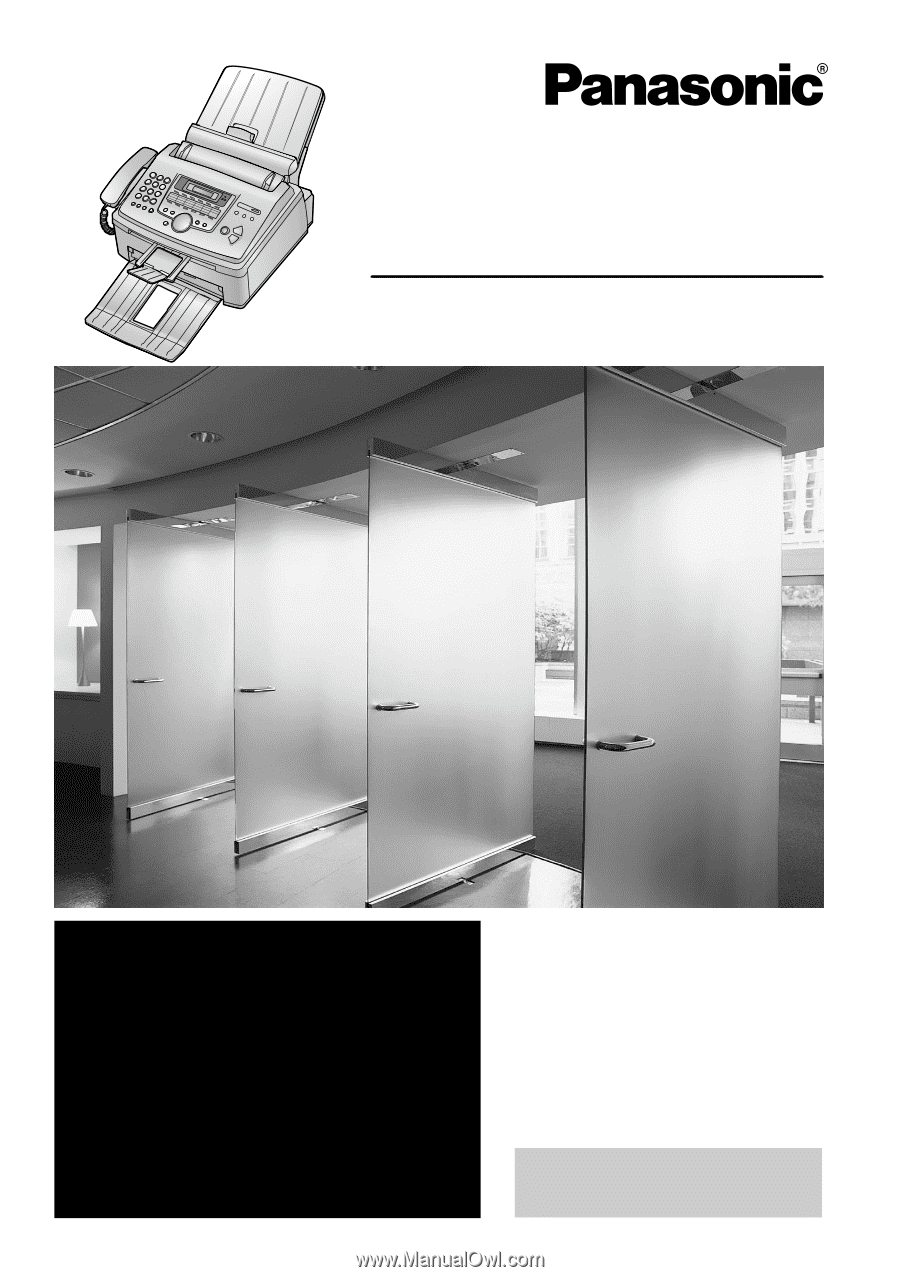
All in One Laser Fax Operating Instructions Model No. KX-FLM651 FOR FAX ADVANTAGE ASSISTANCE: - PHONE CALL 1-800-HELP-FAX (1-800-435-7329) - E-MAIL TO [email protected] for customers in the U.S.A. or Puerto Rico - REFER TO www.panasonic.com for customers in the U.S.A. or Puerto Rico - Panasonic KX-FLM651 | Laser Fax - Page 2
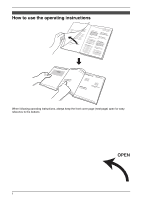
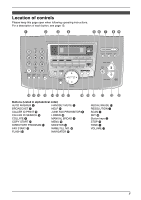
Location of Controls How to use the operating instructions When following operating instructions, always keep the front cover page (next page) open for easy reference to the buttons. OPEN i - Panasonic KX-FLM651 | Laser Fax - Page 3
operating instructions. For a description of each button, see page 10. A B CD EF G HI JKL M NO P Q R ST U V W Buttons (Listed in alphabetical order) AUTO ANSWER H HANDSET MUTE K BROADCAST C HELP N CALLER ID PRINT R JUNK FAX PROHIBITOR E CALLER ID SEARCH S LOWER T COLLATE F MANUAL - Panasonic KX-FLM651 | Laser Fax - Page 4
.) In order to program this information into your fax machine, you should complete the instructions on page 21 to page 24. L Do Panasonic has determined that this product meets the ENERGY STAR guidelines for energy efficiency. ENERGY STAR is a U.S. registered mark. Trademarks: L Microsoft, Windows - Panasonic KX-FLM651 | Laser Fax - Page 5
or water. D. If the unit does not work normally by following the operating instructions. Adjust only controls covered by the operating instructions. Improper adjustment may require extensive work by an authorized service center. E. If the unit has been dropped or physically damaged. F. If the unit - Panasonic KX-FLM651 | Laser Fax - Page 6
contact an authorized service center. For best performance Toner cartridge and drum unit L For optimal performance, genuine Panasonic toner cartridges and drum units are recommended. We cannot be responsible for problems that may be caused by a nonPanasonic toner cartridge or drum unit: - Damage to - Panasonic KX-FLM651 | Laser Fax - Page 7
outer surface of the unit with a soft cloth. Do not use benzine, thinner, or any abrasive powder. Important Information For assistance, please visit http://www.panasonic.com/consumersupport 5 - Panasonic KX-FLM651 | Laser Fax - Page 8
1.5 Toner cartridge and drum unit Multi-Function Station software Setup 7.1 Connecting to a computer 43 7.2 Installing Multi-Function Station ....... 43 7.3 Starting Multi-Function Station ......... 45 Printing 7.4 Using the fax machine as a printer ... 46 Scanning 7.5 Using the fax machine - Panasonic KX-FLM651 | Laser Fax - Page 9
Error messages - Display 60 Troubleshooting 9.3 When a function does not work, check here 62 Replacement 9.4 Replacing the toner cartridge and the drum unit 68 Jams 9.5 Recording 10.4 Limited Warranty 83 Customer Services 10.5 Customer Services directory 85 11.Index 11.1 Index 86 Table of Contents - Panasonic KX-FLM651 | Laser Fax - Page 10
PFKV1100Z1 8 Drum unit 9 Toner cartridge (starter toner cartridge) KX-FA84 ---------- j Operating instructions k Quick installation guide l CD-ROM Note: L If any items are missing or damaged, contact the place of purchase. 8 For assistance, please visit http://www.panasonic.com/consumersupport - Panasonic KX-FLM651 | Laser Fax - Page 11
1. Introduction and Installation L Save the original carton and packing materials for future shipping and transportation of the unit. For assistance, please visit http://www.panasonic.com/consumersupport 9 - Panasonic KX-FLM651 | Laser Fax - Page 12
fax, or by telephone. - Replacement toner cartridge (KX-FA83) - Replacement drum unit (KX-FA84) L To ensure that the unit operates properly, we recommend the use of Panasonic toner cartridge and drum temporarily during dialing when your line has rotary pulse service. B Station keys L To use the one- - Panasonic KX-FLM651 | Laser Fax - Page 13
guides 3 Paper tray cover 4 Tension plate 5 Paper tray 6 Paper stacker*1 7 Document stacker*1 8 Recording paper exit 9 Document exit j Front cover k Document entrance *1 The paper stacker and document stacker may not be shown in all illustrations. For assistance, please visit http://www.panasonic - Panasonic KX-FLM651 | Laser Fax - Page 14
inlet 3 Telephone line jack 4 External telephone jack 5 Speaker Removing the shipping tape Remove the shipping tape (1) before installation. 1 1 12 For assistance, please visit http://www.panasonic.com/consumersupport - Panasonic KX-FLM651 | Laser Fax - Page 15
Installation 1.5 Toner cartridge and drum unit The included toner cartridge is a starter toner cartridge. It will print about 800 letter-sized pages with a 5 % image area (page 79). L To replace the toner cartridge and the drum unit, see page 68. Caution: L Read the following instructions before you - Panasonic KX-FLM651 | Laser Fax - Page 16
#482 on page 54). The toner cartridge will last approximately 40 % longer. This feature may lower the print quality. 8 Install the drum and toner unit (1) by holding the tabs. 2 1 L Do not touch the transfer roller (2). 14 For assistance, please visit http://www.panasonic.com/consumersupport - Panasonic KX-FLM651 | Laser Fax - Page 17
cover (2), then push the tension plate back (3). 2 1 4 3 When you use legal paper, do not attach the paper tray cover. For assistance, please visit http://www.panasonic.com/consumersupport 15 - Panasonic KX-FLM651 | Laser Fax - Page 18
up to approximately 100 sheets of printed paper. Remove the printed paper before the paper stacker becomes full. 3 16 For assistance, please visit http://www.panasonic.com/consumersupport - Panasonic KX-FLM651 | Laser Fax - Page 19
). 1 Before inserting a stack of paper, fan the paper to prevent paper jams. 3 Remove the paper tray cover (1). 1 4 Pinch the right side of the recording paper guides (1), then slide it open to its full width. 1 For assistance, please visit http://www - Panasonic KX-FLM651 | Laser Fax - Page 20
jam. Correct Incorrect 8 Push the tension plate back (1). 1 6 Adjust the width to the size of the recording paper by sliding the right side of the guides (1). 1 Note: L When you use A4 or legal paper, change the recording paper size to "A4" or "LEGAL" (feature #380 on page 54). 18 For - Panasonic KX-FLM651 | Laser Fax - Page 21
pSleeatuspe visit http://www.panasonic.com/consumersupport 2.1 function properly. A filter to prevent this is provided from your service company. Please attach the filter (6) to the telephone line cord of the fax machine. 6 4 1 2 5 Note: L To avoid malfunction, do not position the fax machine - Panasonic KX-FLM651 | Laser Fax - Page 22
page 26, 30), change this setting depending on your telephone line service. {MENU} {SET} 1 Press {MENU}. SYSTEM SETUP PRESS NAVI dial them. - "FAX SND/RCV": Help with problems sending/receiving faxes. - "COPIER": How to use the copier function. - "Q and A": http://www.panasonic.com/consumersupport - Panasonic KX-FLM651 | Laser Fax - Page 23
2. Press {*} repeatedly to display "PM". M:|08/D:10/Y:05 TIME: 10:15PM 6 Press {SET}. SETUP ITEM [ ] 7 Press {MENU} to exit. For assistance, please visit http://www.panasonic.com/consumersupport 21 - Panasonic KX-FLM651 | Laser Fax - Page 24
The other party's fax machine will print the date , and make the correction. If you have subscribed to a Caller ID service The date and time will be automatically set according to the received caller information 3 GHI g h i 4 22 For assistance, please visit http://www.panasonic.com/consumersupport - Panasonic KX-FLM651 | Laser Fax - Page 25
press {A}, the order will be reversed. 2. Press {>} to insert the character. 3. Return to step 1 to enter the next character. For assistance, please visit http://www.panasonic.com/consumersupport 23 - Panasonic KX-FLM651 | Laser Fax - Page 26
enter a hyphen, press {FLASH}. 5 Press {SET}. SETUP ITEM [ ] 6 Press {MENU} to exit. Note: L Your fax number will be printed on the top of each page sent from your unit. To correct a mistake Press {} to move {STOP}. 24 For assistance, please visit http://www.panasonic.com/consumersupport - Panasonic KX-FLM651 | Laser Fax - Page 27
briefly. 3 Enter the name, up to 16 characters (see page 22 for instructions). 4 Press {SET}. 5 Enter the telephone number, up to 32 digits. hints: L For your convenience, HELP-FAX (1-800- 435-7329) has been stored in the directory. If you cannot solve a problem, call the number (page 26). If - Panasonic KX-FLM651 | Laser Fax - Page 28
3. Telephone To correct a mistake Press {} to move the cursor to the incorrect character/number, and then make the correction. To delete a character/number Press {} to move the cursor to the character/number you want to delete, and press {STOP}. L To erase all characters/numbers, - Panasonic KX-FLM651 | Laser Fax - Page 29
received and it matches a telephone number stored in the fax machine's one-touch dial or navigator directory, the stored name from an area which does not provide Caller ID service. "PRIVATE CALLER": The caller requested not to Caller ID list - To print manually, see page 28. - To print automatically after every 30 - Panasonic KX-FLM651 | Laser Fax - Page 30
reversed. 3 Lift the handset or press {MONITOR} to return the call. L The unit will start dialing automatically. L To send a fax, insert the document FACE DOWN and press {FAX START}. To change the way caller information is displayed Press {NAME/TEL NO.} repeatedly after step 2. Example: SAM LEE 11 - Panasonic KX-FLM651 | Laser Fax - Page 31
to 16 characters long. L To edit a name or number, see page 26. L If caller information does not include the caller's name, enter the name manually. See the instructions on page 25. L If you assign an item to a station key which already contains an item, the previous item will be replaced. L Station - Panasonic KX-FLM651 | Laser Fax - Page 32
Fax 4SeFnadxing Faxes 4.1 Sending a fax manually 1 {MONITOR} {STOP} {SCAN} {FAX START} {REDIAL/PAUSE} {SET} {RESOLUTION} 1 Adjust the width of the document guides is effective only when the other party has a compatible fax machines. - "PHOTO": For documents containing photographs, shaded drawings - Panasonic KX-FLM651 | Laser Fax - Page 33
of the 30 most recent faxes. To print manually, see page 77. To print automatically after every 30 new fax transmissions and receptions, make sure with a width of less than 210 mm (81/4"), we recommend using a copy machine to copy the original document onto A4 or letter-sized paper, then setting the - Panasonic KX-FLM651 | Laser Fax - Page 34
L If the document guides are not adjusted to fax L Confirm that you have entered the number correctly, and that the number is a fax number. L Confirm that the other party's fax machine function utilizes stations 1-3. The one-touch dial function (only for MANUAL BROAD): Enter the fax number and press - Panasonic KX-FLM651 | Laser Fax - Page 35
{DIRECTORY PROGRAM} to exit. Note: L When adding new items to the MANUAL BROADCAST memory, you can only select stored items. 4.4.3 Erasing a stored item repeat steps 5 to 7. 8 Press {DIRECTORY PROGRAM} to exit. 4. Fax 4.4.4 Sending the same document to pre-programmed parties 1 Insert the document - Panasonic KX-FLM651 | Laser Fax - Page 36
answer calls by yourself. If a fax call is received, you must receive the fax manually. Setup Set the fax machine to TEL mode (page 35) by pressing {AUTO ANSWER} repeatedly. How to receive phone calls and faxes You have to answer all calls manually. To receive a fax document, press {FAX START}. 34 - Panasonic KX-FLM651 | Laser Fax - Page 37
, and press {SET}. 4.7 Receiving a fax manually - Auto answer OFF 4.7.1 Activating TEL mode Set the fax machine to TEL mode by pressing {AUTO ANSWER} only receive fax documents. If you have subscribed to a Distinctive Ring service See page 39. How to receive phone calls and faxes 1. Lift the - Panasonic KX-FLM651 | Laser Fax - Page 38
for more than 4 seconds during the message. Otherwise, both machines will not function correctly. 4 Activate the answering machine. 5 Set the fax machine to the desired receiving mode (page 35). L If you set to FAX ONLY mode, change the ring setting in FAX ONLY mode to "5 EXT.TAM" (feature #210 on - Panasonic KX-FLM651 | Laser Fax - Page 39
undesired callers) If you subscribe to Caller ID service, this feature prevents fax reception from calls that do not show caller information. Additionally, the fax machine will not accept faxes originating from numbers that match a programmable junk fax prohibitor list. L Keep the front cover page - Panasonic KX-FLM651 | Laser Fax - Page 40
DISP.". 3. Press {SET}. 4. Press {A} or {B} to display the items on the list. 5. Press {STOP} to exit. To print the junk fax prohibitor list 1. Press {JUNK FAX PROHIBITOR}. 2. Press {>} repeatedly to display "JUNK LIST PRINT". 3. Press {SET}. 4. Press {STOP} to exit the list. To erase an item from - Panasonic KX-FLM651 | Laser Fax - Page 41
for. By setting up this unit for Distinctive Ring, you can make the fax machine automatically start fax reception when a call comes to the fax number. To use this service, you must subscribe to the Distinctive Ring service offered by your local telephone company. 5.2 Using two or more phone numbers - Panasonic KX-FLM651 | Laser Fax - Page 42
431 "D" 1st ring 2nd ring 5.4 Programming the ring pattern assigned for fax L Keep the front cover page open for button locations. 1 Set then {4}{3}{1}. 4 Press {1} to {5} repeatedly to select the ring pattern assigned for fax. {1} "A": Standard ring (one long ring) {2} "B": Double ring (two - Panasonic KX-FLM651 | Laser Fax - Page 43
single beep is heard and the unit grasps the document. L If the document guides are not adjusted to fit the document, re-adjust them. 3 Press {COPY The unit will start copying. Note: L Any document which can be sent as a fax can also be copied (page 31). To stop copying Press {STOP}. To select the - Panasonic KX-FLM651 | Laser Fax - Page 44
6. Copy 1. Insert the document, then press {COLLATE} repeatedly to display "COLLATE=ON". 2. Enter the number of copies (up to 99). 3. Press {COPY START}. Example: Making 2 copies of a 4-page original document 4 3 2 1 4 3 2 1 4 4 3 3 2 2 1 1 Collated pages Uncollated pages Note: L The unit will - Panasonic KX-FLM651 | Laser Fax - Page 45
OCR software - Scanning from other applications for Microsoft® Windows® that support TWAIN scanning - Storing, editing or erasing items in directories using your computer - Programming the features using your computer - Sending, receiving fax documents using your computer To use Multi-Function - Panasonic KX-FLM651 | Laser Fax - Page 46
follow the on-screen instructions. To uninstall the software For Windows XP and Windows 2000 users, you must be logged in as an administrator in order to uninstall Multi-Function Station. 1. Click [Start], then select [All Programs] or [Programs] → [Panasonic] → [KXFLB800_FLM650 Series] → [Uninstall - Panasonic KX-FLM651 | Laser Fax - Page 47
] or [Programs] → [Panasonic] → [KXFLB800_FLM650 Series] → [Multi-Function Station]. L Multi-Function Station will appear. 7. Multi-Function Station software Help L For detailed instructions on Multi-Function Station. Usage Tips L To display usage tips. Note: L You can confirm if the fax machine is - Panasonic KX-FLM651 | Laser Fax - Page 48
will be printed in grayscale. 3 Select [Panasonic KX-FLM651] as the active printer. L If you have changed the name of the fax machine when installing, select that name from the list. L To change the printer settings, proceed as follows. For Windows 98/Windows Me: Click [Properties], then click the - Panasonic KX-FLM651 | Laser Fax - Page 49
Multi-Function Station software L Insert envelopes, print-side down (1), then adjust the recording paper guides (2). 1 2 7.4.4 Envelopes Use envelopes designed for laser RH). High humidity may cause the envelope to curl, pick up excess toner or seal the envelope. L Avoid printing below 10 °C (50 °F) - Panasonic KX-FLM651 | Laser Fax - Page 50
is heard and the unit grasps the document. 2 Start Multi-Function Station. 3 Select [Viewer (Scan)]. L [Multi-Function Viewer] will appear. 48 4 Click the [Scan] icon in the [Multi-Function Viewer] window. L The [Panasonic KX-FLM651] (default name) dialog box will appear. 5 If necessary, change - Panasonic KX-FLM651 | Laser Fax - Page 51
. To use this software, click the [OCR] icon in the [Multi-Function Viewer] window or select [Readiris (OCR)] from Multi-Function Station. For detailed instructions about OCR, select [Help]. 7.5.2 Using other applications Multi-Function Station includes a TWAIN compliant scanner driver. You can also - Panasonic KX-FLM651 | Laser Fax - Page 52
fax function from a Windows application using Multi-Function Station. For example, to send a document created from WordPad, proceed as follows. 1 Open the document you want to send. 2 Select [Print...] from the [File] menu. L The [Print] dialog box will appear. 3 Select [PCFAX Panasonic KX-FLM651 - Panasonic KX-FLM651 | Laser Fax - Page 53
current status of the fax machine from your computer. 1 Start Multi-Function Station. 2 Select [Device Monitor]. L The [Device Monitor] window will appear. 3 You can confirm the status of the fax unit. Status: Current status of the fax unit Note: L Additional information (toner and recording paper - Panasonic KX-FLM651 | Laser Fax - Page 54
8. Programmable Features 8FePartougrerasmSmumabmlearFyeatures 8.1 Programming Note: L To exit programming, press {MENU} at any time. {MENU} {}{A}{B} {SET} 1 Press {MENU}. 2 Press {#} and the 3-digit code (page 53 to page 58). 3 Press the desired selection to display the desired setting. L - Panasonic KX-FLM651 | Laser Fax - Page 55
out the quick fax setup guide and select the desired receiving mode depending on your situation. {1} "FAX ONLY" (default): Use only as a fax (page 35). {2} "DIST. RING": With the Distinctive Ring service (page 39). {3} "EXT. TAM": With an external telephone answering machine (page 36). {4} "TEL - Panasonic KX-FLM651 | Laser Fax - Page 56
toner save feature {#}{4}{8}{2} Selection To change the number of rings before the unit answers a call in FAX ONLY mode. {1} "1" {2} "2" {3} "3" (default) {4} "4" {5} "5 EXT.TAM" (External Telephone Answering Machine this feature. {1} "ON": The toner cartridge will last longer. Note: L This - Panasonic KX-FLM651 | Laser Fax - Page 57
reports will not be printed. {1} "ON": A confirmation report will be printed after every transmission. {2} "ERROR" (default): A confirmation report will be printed only when fax transmission fails. {0} "OFF": The unit will not print a journal report, but will keep a record of the last 30 - Panasonic KX-FLM651 | Laser Fax - Page 58
this feature. {1} "ON" (default): If there is an error during fax transmission / reception, the fax machine will support the communication. If you often have trouble when sending faxes, this feature allows you to hear connecting tones: fax tone, ring back tone and busy tone. You can use these tones - Panasonic KX-FLM651 | Laser Fax - Page 59
activation code. Important: L The fax activation code must be different from the code that you programmed on the answering machine. {0} "OFF" {1} "ON a received fax document is stored into memory due to some existing problem. The slow beeps will continue until you clear the printing problem and make - Panasonic KX-FLM651 | Laser Fax - Page 60
8. Programmable Features Feature/Code Resetting advanced features to their default settings {#}{4}{5}{9} Selection {0} "NO" (default) {1} "YES" To reset the advanced features: 1. Press {MENU}. 2. Press {#}, then {4}{5}{9}. 3. Press {1} to select "YES". 4. Press {SET}. 5. Press {SET} again. 6. - Panasonic KX-FLM651 | Laser Fax - Page 61
paper. Try again. L The other party's fax machine rings too many times. Send the fax manually (page 30). L The other party's machine is not a fax machine. Check with the other party. L The number you dialed is not in service. L {STOP} was pressed and fax communication was canceled. L The front cover - Panasonic KX-FLM651 | Laser Fax - Page 62
" "LOW TEMP." "MEMORY FULL" "MODEM ERROR" "NO FAX REPLY" "OUT OF PAPER" Cause & Solution L There is something wrong with the unit. Contact our service personnel. L There is something wrong with the drum unit. Replace the drum unit and the toner cartridge (page 68). L The document was not fed into - Panasonic KX-FLM651 | Laser Fax - Page 63
power cord is not connected correctly. Check the connections (page 43). L The software is not running on the computer. Restart the software and try again. L The unit is warming up. Wait for a while. L The other party's fax machine is busy or has run out of recording paper. Try again. L The document - Panasonic KX-FLM651 | Laser Fax - Page 64
9. Help Troubleshooting 9.3 When a function does not work, check here 9.3.1 Initial settings Problem I cannot hear a instructions to solve the problem. L You are probably entering {*} {#} {9}. This is the default setting for the fax activation code. If you use a voice mail service, turn the fax - Panasonic KX-FLM651 | Laser Fax - Page 65
out of recording paper. Try again. L The other party's machine is not a fax machine. Check with the other party. L The other party's fax machine failed to answer the fax automatically. Send the fax manually (page 30). I cannot send a fax overseas. L Use the overseas transmission mode (feature #411 - Panasonic KX-FLM651 | Laser Fax - Page 66
check their fax machine. L Some paper has instructions recommending which side to print on. Try turning the paper over. L You may have used paper with a cotton and/or fiber content that is over 20%, such as letterhead or resume paper. L The remaining toner is low. Replace the toner cartridge (page - Panasonic KX-FLM651 | Laser Fax - Page 67
the toner cartridge (page 68). L To check the drum life and quality, please print the printer test list (page 77). If printing quality is still poor, replace the toner cartridge and drum unit. L The toner save mode of feature #482 is ON (page 54). 9.3.6 Using an answering machine Problem I cannot - Panasonic KX-FLM651 | Laser Fax - Page 68
feature in Windows XP, make sure no other users are logged in to your computer. L Remove the document and re-insert it. L Please wait. It may take a while for the cancel request to be accepted. L The fax machine will be displayed after the printer driver has been installed. L The printer driver is - Panasonic KX-FLM651 | Laser Fax - Page 69
of your CD-ROM drive). 4. Double-click the [MfsCleaner] icon. L The [MfsCleaner for KX-FLB800/FLM650 Series] window will appear. 5. Click [Clean], then click [Yes] to restart the computer. Note: L To install Multi-Function Station again, see page 43. 9.3.8 If a power failure occurs L The unit will - Panasonic KX-FLM651 | Laser Fax - Page 70
unit. To ensure that the unit operates properly, we recommend the use of Panasonic toner cartridge (Model No. KX-FA83) and drum unit (Model No. KX-FA84). See page 10 for accessory information. To maintain print quality and machine life, we recommend you to clean slots and openings (page 4) and the - Panasonic KX-FLM651 | Laser Fax - Page 71
drum surface (3). L Put the used toner cartridge into the protection bag. 7 If you replace the drum unit at the same time, remove the new drum unit from the protection bag. Place the new toner cartridge (1) into the drum unit (2) vertically. 1 2 2 For assistance, please visit http://www.panasonic - Panasonic KX-FLM651 | Laser Fax - Page 72
9. Help 8 Firmly press down the toner cartridge to snap into position. 11 Install the drum and toner unit (1) by holding the tabs. 9 Turn the two levers (1) on the toner cartridge firmly. 1 1 12 Close the front . 2 70 For assistance, please visit http://www.panasonic.com/consumersupport - Panasonic KX-FLM651 | Laser Fax - Page 73
display will show the following. PAPER JAMMED 9.5.1 When the recording paper has jammed near the drum and toner unit 1 Lift open the front cover (1), holding OPEN (2). 9. Help 3 Close the not touch the transfer roller (2). For assistance, please visit http://www.panasonic.com/consumersupport 71 - Panasonic KX-FLM651 | Laser Fax - Page 74
fuser unit by pulling it upwards carefully, then install the drum and toner unit. 1 3 Remove the recording paper (1), then remove the drum and toner unit (2) to allow the jammed paper (3) to pull the recording paper (2). 72 For assistance, please visit http://www.panasonic.com/consumersupport - Panasonic KX-FLM651 | Laser Fax - Page 75
plate (see steps 7 to 8 on page 18). L Before re-inserting, make sure to fan and straighten the recording paper. For assistance, please visit http://www.panasonic.com/consumersupport 73 - Panasonic KX-FLM651 | Laser Fax - Page 76
touch the transfer roller (3). Note: L Do not pull out the jammed document forcibly before opening the front cover. 74 For assistance, please visit http://www.panasonic.com/consumersupport - Panasonic KX-FLM651 | Laser Fax - Page 77
the original document when sending or copying. Caution: L Be careful when handling the drum and toner unit. See the caution for the drum unit on page 68 for details. L Do not use paper products, such as back the inner cover. For assistance, please visit http://www.panasonic.com/consumersupport 75 - Panasonic KX-FLM651 | Laser Fax - Page 78
sides, until locked. 1 8 Clean the lower glass (1) with a soft and dry cloth. 11 Reconnect the power cord and the telephone line cord. 1 9 Re-install the drum and toner unit (1) by holding the tabs. 1 76 For assistance, please visit http://www.panasonic.com/consumersupport - Panasonic KX-FLM651 | Laser Fax - Page 79
memory (page 32). - "PRINTER TEST": Allows you to check the print quality of your unit. If the test print has a dirty pattern, or blurred points or lines, clean the inside of the unit (page 75). If printing quality is still poor, replace the toner cartridge and drum unit. 10. General Information - Panasonic KX-FLM651 | Laser Fax - Page 80
)*2 Scanning density: Fax resolution: Horizontal: Printer type: Laser Printer machine is inferior to your unit, the transmission time may be longer. ITU-T No.1 Test Chart Note: L Design and specifications are subject to change without notice. L The pictures and illustrations in these instructions - Panasonic KX-FLM651 | Laser Fax - Page 81
use paper printed from this unit for double-sided printing with other copiers or printers. This may cause a paper jam. L To avoid curling, do not open approximate relationship between image area and toner life for replacement toner cartridge (Model No. KXFA83). Toner life varies in actual usage. 5 - Panasonic KX-FLM651 | Laser Fax - Page 82
The image area changes with the depth, thickness and size of the characters. L If you turn on the toner save feature, the toner cartridge will last approx. 40% longer. Drum life The drum unit is a consumable item and needs to be replaced regularly. There are various factors that determine the actual - Panasonic KX-FLM651 | Laser Fax - Page 83
. If trouble is experienced with this equipment, for repair or warranty information, please contact a Factory Servicenter or other Authorized Servicer. If the equipment is causing harm to the telephone network, the telephone company may request that you disconnect the equipment until the problem is - Panasonic KX-FLM651 | Laser Fax - Page 84
for help. Responsible Party: Panasonic Corporation of North America One Panasonic Way, Secaucus, NJ 07094 Technical Support: Panasonic Consumer Electronics Company Division of Panasonic Corporation of North America One Panasonic Way, Secaucus, NJ 07094 Telephone: 1-800-HELP-FAX (1-800-435-7329) 82 - Panasonic KX-FLM651 | Laser Fax - Page 85
repair or replace will be made by the warrantor. FAX categories Thermal Transfer Facsimile Laser Facsimile Parts 6 Months 1 (one) Year Labor 6 Months 1 (one) Year Batteries, antennas, ink film, toner cartridge, drum unit, and ink cartridge (as may be applicable), and cosmetic parts (cabinet) are - Panasonic KX-FLM651 | Laser Fax - Page 86
from state to state. If a problem with this product develops during or after the Limited Warranty period, troubleshooting support: Panasonic offers two value based, cost effective, solutions: 1. Panasonic Continued Services 900 fee based support: 1-900-FAX-HELP (1-900-3294357) This exceptional service - Panasonic KX-FLM651 | Laser Fax - Page 87
435-7329) For out of Limited Warranty technical and troubleshooting support: Panasonic offers two value based, cost effective, solutions: 1. Panasonic Continued Services 900 fee based support: 1 900 FAX HELP (1 900 329 4357) This exceptional service is charged directly to your telephone bill at only - Panasonic KX-FLM651 | Laser Fax - Page 88
#145): 53 Error messages: 60 Distinctive Ring service (Feature #430): 39 Document size: 31 Drum life: 80 Drum unit: 13, 68 E ECM selection (Feature 55 Junk fax prohibitor: 37 L Label: 46 Logo (Feature #102): 22 M Memory reception alert (Feature #437): 57 Multi-Function Station software Activating: - Panasonic KX-FLM651 | Laser Fax - Page 89
#410): 54 Sending faxes Broadcast: 33 From memory: 30 Manually: 30 Navigator directory: 32 One-touch dial: 32 Set default (Feature #459): 58 Storing Broadcast: 32 Navigator directory: 25 One-touch dial: 25 T TEL mode: 35 Toner cartridge Installing: 13 Replacing: 68 Toner life: 79 Toner save (Feature - Panasonic KX-FLM651 | Laser Fax - Page 90
this program or carry-in your fax to one of our Regional Service centers, where including the overnight delivery of the replacement product to the unit will be repaired and returned to you. you, shipment of the problem unit to Panasonic, shipment of Instructions: the replacement unit back to
-
 1
1 -
 2
2 -
 3
3 -
 4
4 -
 5
5 -
 6
6 -
 7
7 -
8
-
9
-
10
-
11
-
12
-
13
-
14
-
15
-
16
-
17
-
18
-
19
-
20
-
21
-
22
-
23
-
24
-
25
-
26
-
27
-
28
-
29
-
30
-
31
-
32
-
33
-
34
-
35
-
36
-
37
-
38
-
39
-
40
-
41
-
42
-
43
-
44
-
45
-
46
-
47
-
48
-
49
-
50
-
51
-
52
-
53
-
54
-
55
-
56
-
57
-
58
-
59
-
60
-
61
-
62
-
63
-
64
-
65
-
66
-
67
-
68
-
69
-
70
-
71
-
72
-
73
-
74
-
75
-
76
-
77
-
78
-
79
-
80
-
81
-
82
-
83
-
84
-
85
-
86
-
87
-
88
-
89
-
90
 |
 |
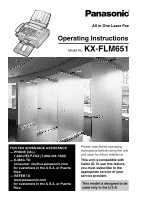
Please read these operating
instructions before using the unit
and save for future reference.
This model is designed to be
used only in the U.S.A.
All in One Laser Fax
Operating Instructions
Model No.
KX-FLM651
FOR FAX ADVANTAGE ASSISTANCE:
— PHONE CALL
1-800-HELP-FAX (1-800-435-7329)
— E-MAIL TO
for customers in the U.S.A. or Puerto
Rico
— REFER TO
www.panasonic.com
for customers in the U.S.A. or Puerto
Rico
This unit is compatible with
Caller ID. To use this feature,
you must subscribe to the
appropriate service of your
service provider.