Panasonic WJ-HDE400/3000T3 Installation Guide - Page 6
Preface, About the user manuals, Features
 |
View all Panasonic WJ-HDE400/3000T3 manuals
Add to My Manuals
Save this manual to your list of manuals |
Page 6 highlights
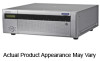
Preface The WJ-HDE400 is the extension unit for the recorder (such as Network Disk Recorder WJ-ND400K), which is sold separately. The number of extension units that are connectable varies depending on the models* of the recorders to be used. Refer to the manuals provided with the recorder. Up to 9 hard disk drives (encased in the provided HDD canister, hereinafter referred as "HDD unit") can be installed in this extension unit, and operation in the RAID (Redundant Arrays of Inexpensive Disks) mode is available. * The recorders described in this installation guide are the models that are compatible as of September, 2009. Features HDD fault-tolerance system The RAID function is available as the HDD fault-tolerance system. In addition to the RAID 5 mode that recovers data when a single hard disk drive becomes faulty, there is RAID 6 mode that can recover data even if 2 hard disk drives became faulty. Operation in the RAID mode is one of the solutions as the HDD fault-tolerance system that prevents data loss when handling a large amount of data on a large amount of storage. • To use in the RAID 5 or the RAID 6 mode, it is necessary to install 3 or more hard disk drives and 4 or more hard disk drives respectively. • Logical disk capacity when using in the RAID 5 mode Logical disk capacity = Capacity of the smallest among the hard disk drives in the recorder x (number of the hard disk drives in the recorder - 1) • Logical disk capacity when using in the RAID 6 mode Logical disk capacity = Capacity of the smallest among the hard disk drives in the recorder x (number of the hard disk drives in the recorder - 2) • Depending on the model of the hard disk drive, the available capacity may be a few percent smaller. Easy replacement of HDDs It is easy to insert/remove the HDD units to/from the HDD slots in the extension unit. When 2 or more HDD units are already installed, it is possible to replace the HDD units without stopping the current recording. When using a network disk recorder, malfunctions can be decreased and replacement/maintenance of the HDD units can easily be done by following the guidance displayed on the LCD. To install a hard disk drive in the extension unit, it is necessary to assemble an HDD unit (encase the hard disk drive in the HDD canister). The HDD units can be easily installed/removed in/from the HDD slots inside the front cover. Contact your dealer about purchasing/replacing the hard disk drives. About the user manuals This installation guide contains descriptions of how to install/connect this product, and descriptions of how to remove the HDD unit with the buttons and the LCD on the front panel, assuming that you are using a network disk recorder. Refer also to the manuals provided with the recorder. "WJ-HDE400" or "HDE400" shown in the instructions and illustrations used in these operating instructions indicate the WJ-HDE400, WJ-HDE400/G. The screens used in these operating instructions show the case of NTSC model. 6
-
 1
1 -
 2
2 -
 3
3 -
 4
4 -
 5
5 -
 6
6 -
 7
7 -
 8
8 -
 9
9 -
 10
10 -
 11
11 -
 12
12 -
13
-
14
-
15
-
16
-
17
-
18
-
19
-
20
-
21
-
22
-
23
-
24
-
25
-
26
-
27
-
28
-
29
-
30
-
31
-
32
-
33
-
34
-
35
-
36
 |
 |
