Pioneer DEHP7900BT Owner's Manual - Page 42
Adjusting loudness, Using subwoofer output, Adjusting 7-band graphic equalizer - update
 |
UPC - 012562853215
View all Pioneer DEHP7900BT manuals
Add to My Manuals
Save this manual to your list of manuals |
Page 42 highlights
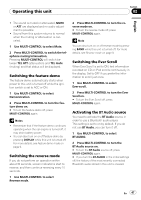
Section 02 Operating this unit +6 to -4 (or -6) is displayed as the equalizer curve is increased or decreased. # The actual range of the adjustments are different depending on which equalizer curve is selected. # The equalizer curve with all frequencies set to 0 cannot be adjusted. +6 to -6 is displayed as the level is increased or decreased. # You can then select another band and adjust the level. 5 Press BAND to cancel the 7-band graphic equalizer adjustment. Adjusting 7-band graphic equalizer For Custom 1 and Custom 2 equalizer curves, you can adjust the level of each band. ! A separate Custom 1 curve can be created for each source. (The built-in CD player and the multi-CD player are set to the same equalizer adjustment setting automatically.) If you make adjustments when a curve other than Custom 2 is selected, the equalizer curve settings will be memorized in Custom 1. ! A Custom 2 curve can be created common to all sources. If you make adjustments when the Custom 2 curve is selected, the Custom 2 curve will be updated. 1 Recall the equalizer curve you want to adjust. See Recalling equalizer curves on the previous page. 2 Use MULTI-CONTROL to select 7-band graphic equalizer adjustment. Frequency and the level (e.g., 50Hz +4) appears in the display. 3 Push MULTI-CONTROL left or right to select the equalizer band to adjust. Each time MULTI-CONTROL is pushed left or right, equalizer bands are selected in the following order: 50Hz-125Hz-315Hz-800Hz-2kHz- 5kHz-12.5kHz 4 Push MULTI-CONTROL up or down to adjust the level of the equalizer band. Each time MULTI-CONTROL is pushed up or down, the level of the equalization band increases or decreases. Adjusting loudness Loudness compensates for deficiencies in the low- and high-sound ranges at low volume. 1 Use MULTI-CONTROL to select LOUD. 2 Press MULTI-CONTROL to turn loudness on. Loudness level (e.g., Mid) appears in the display. # To turn loudness off, press MULTI-CONTROL again. 3 Push MULTI-CONTROL left or right to select a desired level. Each time MULTI-CONTROL is pushed left or right, level is selected in the following order: Low (low)-Mid (mid)-High (high) Using subwoofer output This unit is equipped with a subwoofer output which can be turned on or off. 1 Use MULTI-CONTROL to select Sub W.1. 2 Press MULTI-CONTROL to turn subwoofer output on. Normal appears in the display. Subwoofer output is now on. # To turn subwoofer output off, press MULTI-CONTROL again. 3 Push MULTI-CONTROL left or right to select the phase of subwoofer output. Push MULTI-CONTROL left to select reverse phase and Reverse appears in the display. Push MULTI-CONTROL right to select normal phase and Normal appears in the display. 42 En
-
 1
1 -
2
-
3
-
4
-
5
-
6
-
7
-
8
-
9
-
10
-
11
-
12
-
13
-
14
-
15
-
16
-
17
-
18
-
19
-
20
-
21
-
22
-
23
-
24
-
25
-
26
-
27
-
28
-
29
-
30
-
31
-
32
-
33
-
34
-
35
-
36
-
 37
37 -
 38
38 -
 39
39 -
 40
40 -
 41
41 -
 42
42 -
 43
43 -
 44
44 -
 45
45 -
 46
46 -
 47
47 -
48
-
49
-
50
-
51
-
52
-
53
-
54
-
55
-
56
-
57
-
58
-
59
-
60
-
61
-
62
-
63
-
64
-
65
-
66
-
67
-
68
-
69
-
70
-
71
-
72
-
73
-
74
-
75
-
76
-
77
-
78
-
79
-
80
-
81
-
82
-
83
-
84
-
85
-
86
-
87
-
88
-
89
-
90
-
91
-
92
-
93
-
94
-
95
-
96
-
97
-
98
-
99
-
100
-
101
-
102
-
103
-
104
-
105
-
106
-
107
-
108
-
109
-
110
-
111
-
112
-
113
-
114
-
115
-
116
-
117
-
118
-
119
-
120
-
121
-
122
-
123
-
124
-
125
-
126
-
127
-
128
-
129
-
130
-
131
-
132
-
133
-
134
-
135
-
136
-
137
-
138
-
139
-
140
-
141
-
142
-
143
-
144
-
145
-
146
-
147
-
148
-
149
-
150
 |
 |