Pioneer DEHP7900BT Owner's Manual - Page 45
Selecting the display language, Setting the date, Switching the warning tone
 |
UPC - 012562853215
View all Pioneer DEHP7900BT manuals
Add to My Manuals
Save this manual to your list of manuals |
Page 45 highlights
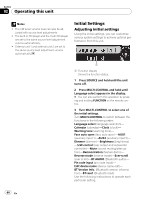
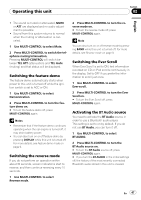
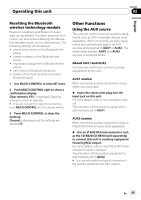
Operating this unit Section 02 English # You can also select the function by pressing FUNCTION on the remote control. # To cancel initial settings, press BAND. # You cannot select BT AUDIO when the Bluetooth audio player has been connected. Selecting the display language For your convenience, this unit equips multiple language display. You can select the language best suited to your first language. 1 Use MULTI-CONTROL to select Language select. 2 Press MULTI-CONTROL to select the language. Each press of MULTI-CONTROL selects languages in the following order: English-Français-Español 2 Push MULTI-CONTROL left or right to select the segment of the clock display you wish to set. Pushing MULTI-CONTROL left or right will select one segment of the clock display: Hour-Minute As you select segments of the clock display the segment selected will blink. 3 Push MULTI-CONTROL up or down to put a clock right. Note You can match the clock to a time signal by pressing MULTI-CONTROL. ! If the minute is 00 to 29, the minutes are rounded down. (e.g., 10:18 becomes 10:00.) ! If the minute is 30 to 59, the minutes are rounded up. (e.g., 10:36 becomes 11:00.) Setting the date The calender display adjusted in this mode appears when the telephone source is selected or sources and the feature demo are off. 1 Use MULTI-CONTROL to select Calendar. 2 Push MULTI-CONTROL left or right to select the segment of the calendar display you wish to set. Pushing MULTI-CONTROL left or right will select one segment of the calendar display: Day-Month-Year As you select segments of the calendar display the segment selected will blink. 3 Push MULTI-CONTROL up or down to set the date. Setting the clock Use these instructions to set the clock. 1 Use MULTI-CONTROL to select Clock. Switching the warning tone If the front panel is not detached from the head unit within four seconds of turning off the ignition, a warning tone will sound. You can turn off the warning tone. 1 Use MULTI-CONTROL to select Warning tone. 2 Press MULTI-CONTROL to turn warning tone on. # To turn warning tone off, press MULTI-CONTROL again. Switching the face auto open To protect against theft, this unit features detachable front panel. To detach the front panel easily, the front panel opens automatically. This function is on as a default. 1 Use MULTI-CONTROL to select Face auto open. En 45
-
 1
1 -
2
-
3
-
4
-
5
-
6
-
7
-
8
-
9
-
10
-
11
-
12
-
13
-
14
-
15
-
16
-
17
-
18
-
19
-
20
-
21
-
22
-
23
-
24
-
25
-
26
-
27
-
28
-
29
-
30
-
31
-
32
-
33
-
34
-
35
-
36
-
37
-
38
-
39
-
 40
40 -
 41
41 -
 42
42 -
 43
43 -
 44
44 -
 45
45 -
 46
46 -
 47
47 -
 48
48 -
 49
49 -
 50
50 -
51
-
52
-
53
-
54
-
55
-
56
-
57
-
58
-
59
-
60
-
61
-
62
-
63
-
64
-
65
-
66
-
67
-
68
-
69
-
70
-
71
-
72
-
73
-
74
-
75
-
76
-
77
-
78
-
79
-
80
-
81
-
82
-
83
-
84
-
85
-
86
-
87
-
88
-
89
-
90
-
91
-
92
-
93
-
94
-
95
-
96
-
97
-
98
-
99
-
100
-
101
-
102
-
103
-
104
-
105
-
106
-
107
-
108
-
109
-
110
-
111
-
112
-
113
-
114
-
115
-
116
-
117
-
118
-
119
-
120
-
121
-
122
-
123
-
124
-
125
-
126
-
127
-
128
-
129
-
130
-
131
-
132
-
133
-
134
-
135
-
136
-
137
-
138
-
139
-
140
-
141
-
142
-
143
-
144
-
145
-
146
-
147
-
148
-
149
-
150
 |
 |