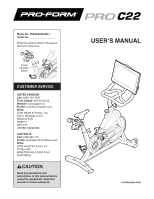
ProForm Pro C22 Instruction Manual
ProForm Pro C22 Manual
 |
View all ProForm Pro C22 manuals
Add to My Manuals
Save this manual to your list of manuals |
ProForm Pro C22 manual content summary:
- ProForm Pro C22 | Instruction Manual - Page 1
No. Write the serial number in the space above for reference. Serial Number Decal CUSTOMER SERVICE UNITED KINGDOM Call: 0330 123 1045 From Ireland: 053 92 36102 Website: iconsupport.eu 2153 AUSTRALIA CAUTION Read all precautions and instructions in this manual before using this equipment. Keep this - ProForm Pro C22 | Instruction Manual - Page 2
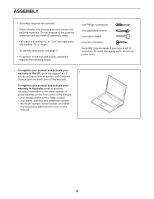
OF CONTENTS WARNING DECAL PLACEMENT 2 IMPORTANT PRECAUTIONS 3 BEFORE YOU BEGIN 4 PART IDENTIFICATION CHART 5 ASSEMBLY 6 HOW TO USE THE EXERCISE BIKE 14 HOW TO USE THE CONSOLE 17 MAINTENANCE AND TROUBLESHOOTING 29 EXERCISE GUIDELINES 31 PART LIST 32 EXPLODED DRAWING 34 ORDERING REPLACEMENT - ProForm Pro C22 | Instruction Manual - Page 3
all important precautions and instructions in this manual and all warnings on your exercise bike before using your exercise bike. ICON assumes no for persons over age 35 or persons with pre-existing health problems. 3. The exercise bike is not intended for use by persons with reduced physical, - ProForm Pro C22 | Instruction Manual - Page 4
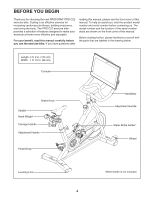
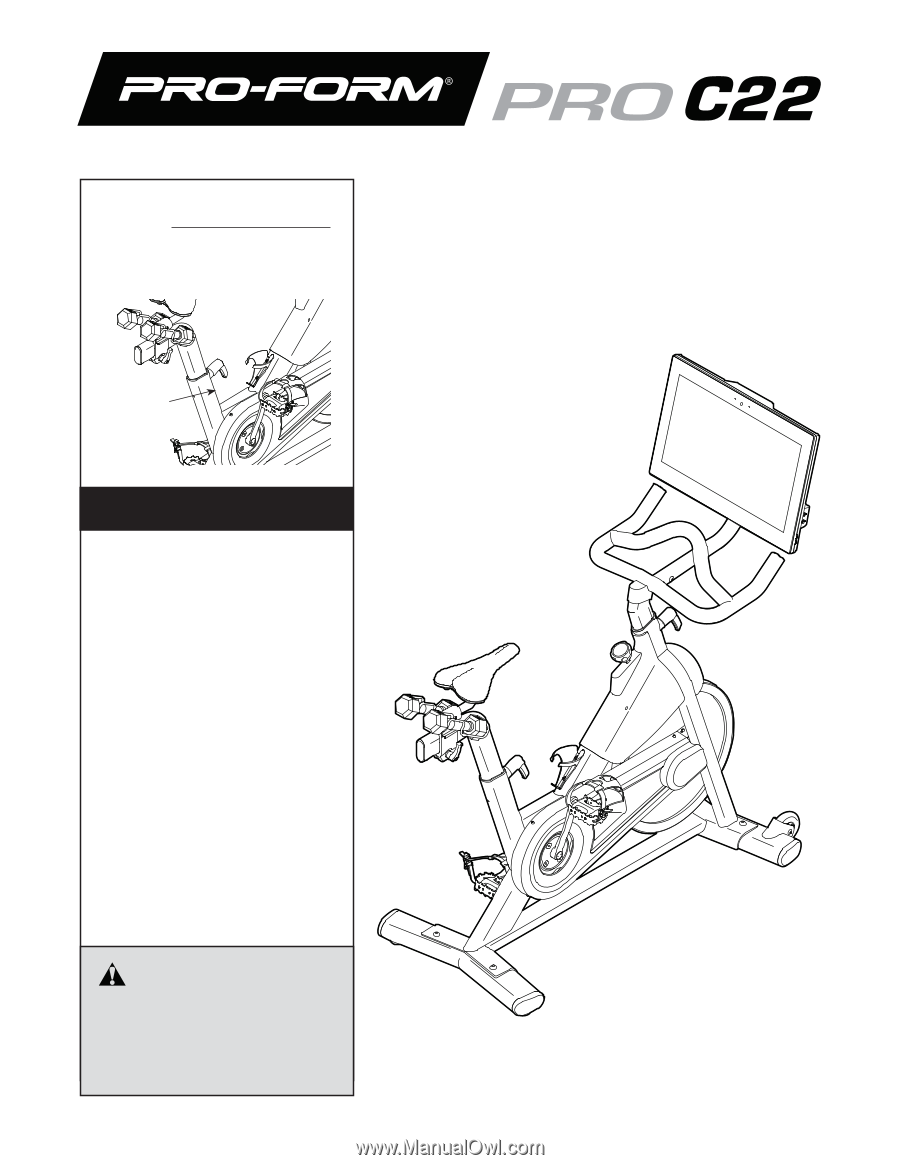
BEFORE YOU BEGIN Thank you for choosing the new PROFORM® PRO C22 exercise bike. Cycling is an effective exercise for increasing cardiovascular fitness, building endurance, and toning the body. The PRO C22 exercise bike provides a selection of features designed to make your workouts at home more - ProForm Pro C22 | Instruction Manual - Page 5
parentheses below each drawing is the key number of the part, from the PART LIST near the end of this manual. The number following the key number is the quantity needed for assembly. Note: If a part is not in the hardware kit, check to see if it has been preassembled. Extra parts - ProForm Pro C22 | Instruction Manual - Page 6
the packing materials. Do not dispose of the packing materials until you finish all assembly steps. • Left parts are marked "L" or "Left" and right parts are marked do not have internet access, call Customer Service (see the front cover of this manual). To register your product and activate your - ProForm Pro C22 | Instruction Manual - Page 7
2. If there are shipping tubes (not shown) attached to the front and rear of the Frame (1), remove 2 and discard the shipping tubes and the hardware attaching them. Orient the Front Stabilizer (2) as shown, and attach it to the Frame (1) with two M10 x 25mm Screws (69). 69 1 2 3. Attach the - ProForm Pro C22 | Instruction Manual - Page 8
4. Tip: See the inset drawing to learn how to operate the Adjustment Handle (14). 4 Locate the Adjustment Handle (14) on the rear of the Frame (1). Pull the Adjustment Handle outward, and insert the Saddle Post (7) into the Frame. Next, move the Saddle Post (7) upward or downward to the desired - ProForm Pro C22 | Instruction Manual - Page 9
6. Note: You can attach your own pedals if desired. 6 Identify the Right Pedal (16). Using the included wrench, firmly tighten the Right Pedal clockwise into the Right Crank Arm (18). Firmly tighten the Left Pedal (17) counter- clockwise into the Left Crank Arm (not shown). IMPORTANT: You must - ProForm Pro C22 | Instruction Manual - Page 10
8. See the inset drawing. Connect the connector on the Handlebar Wire (90) to the connector on 8 the Frame Wire (82). Next, tighten the zip tie (C) around the indicated mark (D) on the Handlebar Wire (90). Then, cut off the excess zip tie. C 82 90 9. Tip: Avoid pinching the wires. Press the - ProForm Pro C22 | Instruction Manual - Page 11
10. While a second person holds the Console Mount (5) near the Handlebar (4), connect the Mount Wire (91) in the Console Mount to the Handlebar Wire (90) in the Handlebar. Tip: Avoid pinching the wires. Gently pull on the wire tie (E) as you slide the Console Mount (5) onto the Handlebar (4). Make - ProForm Pro C22 | Instruction Manual - Page 12
12. Connect the connectors on the Console Wires (I) to the connectors on the Mount Wire (91). Next, 12 insert the connectors into the Console Mount (5), and then press the Wire Protector (98) into the Console Mount. Tip: It may be helpful to insert the connectors into the Console Mount one at - ProForm Pro C22 | Instruction Manual - Page 13
(86) into an outlet, see HOW TO PLUG IN THE POWER ADAPTER on page 14. 1 86 15. After the exercise bike is assembled, inspect it to make sure that it is assembled correctly, that it functions properly, and that all parts are properly tightened. Extra parts may be included. Place a mat under the - ProForm Pro C22 | Instruction Manual - Page 14
power adapter (A) into A the receptacle on the rear of the exercise bike. Then, plug the power adapter into an appropri- ate outlet that is with all local codes and ordinances. HOW TO LEVEL THE EXERCISE BIKE If the exercise bike rocks slightly on your floor during use, turn one or both - ProForm Pro C22 | Instruction Manual - Page 15
adjustment handle outward, turn it so that it points downward as shown, and then release it. To adjust the horizontal position of the handlebar, see assembly step 10 on page 11. 15 - ProForm Pro C22 | Instruction Manual - Page 16
buckles, G adjust the toe straps to the desired posi- tion, and then release the tabs. Note: You can attach your own pedals to the exercise bike if desired. HOW TO USE THE BRAKE KNOB To change the resis- tance of the pedals, press the buttons on the console (see step 3 on - ProForm Pro C22 | Instruction Manual - Page 17
your workout results, and access many other features. When you use the manual mode of the console, you can change the resistance of the pedals with . Each workout automatically controls the resistance of the pedals as it guides you through an effective exercise session. To activate the console or - ProForm Pro C22 | Instruction Manual - Page 18
CONSOLE When you are finished exercising, unplug the power adapter. IMPORTANT: If you do not do this, the electrical components on the exercise bike may wear prematurely. HOW TO USE THE TOUCH SCREEN The console features a tablet with a full-color touch screen. The following information will help - ProForm Pro C22 | Instruction Manual - Page 19
firmware updates. Before you use the exercise bike for the first time, set up the pages explain the workouts and other features that the console offers. To use the manual mode, see page 20. To use a featured workout, see page 21. presentation will guide you through the features of the console. 19 - ProForm Pro C22 | Instruction Manual - Page 20
if desired. 3. Change the resistance of the pedals as desired. Touch Manual Start and begin pedaling. To change the resistance of the pedals, press to measure your heart rate. Note: The console is compatible with all Bluetooth® Smart heart rate monitors. A compatible heart rate monitor is included - ProForm Pro C22 | Instruction Manual - Page 21
the workout. Touch Start Workout to start the workout. The workout will function in the same way as the manual mode (see page 20). During some workouts, an iFit coach will guide you through an immersive video workout. Touch the screen in any open space to view and select music, trainer voice - ProForm Pro C22 | Instruction Manual - Page 22
burn during the workout. The actual number of calories that you burn will depend on various factors, such as your weight. In addition, if you manually change the resistance level during the workout, the number of calories you burn will be affected. To pause the workout, simply touch the screen or - ProForm Pro C22 | Instruction Manual - Page 23
HOW TO CREATE A DRAW-YOUR-OWN-MAP WORKOUT If you make a mistake, touch Undo in the map options. 1. Touch the screen or press any button on the console to turn on the console. The screen will display the elevation and distance statistics for your workout. See HOW TO ACTIVATE THE CONSOLE on page - ProForm Pro C22 | Instruction Manual - Page 24
will appear on the screen after the console boots up. The workout library contains all of the iFit workouts available for your exercise bike, organized into categories. To search the workout library, touch the search button (magnifying glass symbol) and select the desired filtering options. If you - ProForm Pro C22 | Instruction Manual - Page 25
6. Create a list of favorite iFit workouts if desired. 8. Follow your progress. To mark an iFit workout as a favorite, simply view the overview or workout summary of the desired iFit workout and touch the favorites button (heart symbol). See step 4 on page 20. 9. Wear a compatible heart rate - ProForm Pro C22 | Instruction Manual - Page 26
able to view and change settings in the following settings menus: Account • My Profile • In Workout • Manage Accounts Equipment • Equipment Info • Equipment Settings the progress of the update. When the update is complete, the exercise bike will turn off and then turn back on. If it does not, press - ProForm Pro C22 | Instruction Manual - Page 27
will appear next to the wireless network name. If you are having problems connecting to an encrypted network, make sure that your password is correct. speed. Note: If you have questions after following these instructions, go to support.iFit.com for assistance. 5. Exit the wireless network menu - ProForm Pro C22 | Instruction Manual - Page 28
your personal fitness goals. To purchase an optional heart rate monitor, please see the front cover of this manual. Note: The console is compatible with all Bluetooth Smart heart rate monitors. If you need to erase all the Bluetooth-compatible devices saved in the console memory, press and hold the - ProForm Pro C22 | Instruction Manual - Page 29
console to a wireless network, or if you are having problems with your iFit account or iFit workouts, go to support.iFit.com. 81 19 If a replacement power adapter is needed, call the telephone number on the cover of this manual. IMPORTANT: To avoid damaging the console, use only a manufacturer - ProForm Pro C22 | Instruction Manual - Page 30
HOW TO ADJUST THE DRIVE BELT If the pedals slip while you are pedaling, even when the resistance is adjusted to the highest level, the drive belt may need to be adjusted. Then, tighten the M10 x 50mm Screw (65) until the Drive Belt (not shown) is tight. When the Drive Belt (not shown) is tight, - ProForm Pro C22 | Instruction Manual - Page 31
key to achieving results. You can use your heart rate as a guide to find the proper intensity level. The chart below shows recommended heart rates the flexibility of your muscles and helps to prevent post-exercise problems. EXERCISE FREQUENCY To maintain or improve your condition, complete three - ProForm Pro C22 | Instruction Manual - Page 32
PART LIST Key No. Qty. 1 1 2 1 3 1 4 1 5 1 6 1 7 1 8 1 9 1 10 1 11 1 12 1 13 1 14 2 15 1 16 1 17 1 18 1 19 1 20 1 21 1 22 1 23 1 24 1 25 1 26 1 27 1 28 1 29 1 30 2 31 1 32 1 33 1 34 1 35 1 36 1 37 1 38 1 39 1 40 1 41 - ProForm Pro C22 | Instruction Manual - Page 33
99 1 100 4 101 1 102 1 103 1 * - * - Large Pivot Spacer M4 x 12mm Machine Screw Brake Shaft End Hairpin Cotter Pin Brake Washer Assembly Tool User's Manual Note: Specifications are subject to change without notice. For information about ordering replacement parts, see the back cover of - ProForm Pro C22 | Instruction Manual - Page 34
34 93 92 6 59 8 79 9 79 10 11 79 4 7 59 81 55 13 12 40 79 94 95 100 26 96 100 97 92 64 96 98 5 70 68 83 99 56 95 94 70 89 41 91 90 82 86 Model No. PFEX92220-INT.1 R0321A EXPLODED DRAWING A - ProForm Pro C22 | Instruction Manual - Page 35
EXPLODED DRAWING B 25 78 87 67 81 102 77 81 20 30 27 103 101 30 37 32 79 87 73 28 76 84 81 23 29 31 39 21 68 81 22 42 66 81 14 65 71 43 44 15 75 85 80 50 49 38 14 87 24 74 36 69 2 64 47 48 51 49 60 85 75 46 72 35 Model No. PFEX92220-INT.1 R0321A 19 17 57 - ProForm Pro C22 | Instruction Manual - Page 36
) • the key number and description of the replacement part(s) (see the PART LIST and the EXPLODED DRAWING near the end of this manual) RECYCLING INFORMATION This electronic product must not be disposed of in municipal waste. To preserve the environment, this product must be recycled after its useful
-
 1
1 -
 2
2 -
 3
3 -
 4
4 -
 5
5 -
 6
6 -
 7
7 -
8
-
9
-
10
-
11
-
12
-
13
-
14
-
15
-
16
-
17
-
18
-
19
-
20
-
21
-
22
-
23
-
24
-
25
-
26
-
27
-
28
-
29
-
30
-
31
-
32
-
33
-
34
-
35
-
36
 |
 |
Model No. PFEX92220-INT.1
Serial No.
Write the serial number in the space
above for reference.
CAUTION
Read all precautions and
instructions in this manual before
using this equipment. Keep this
manual for future reference.
Serial
Number
Decal
USER’S MANUAL
iconeurope.com
CUSTOMER SERVICE
UNITED KINGDOM
Call:
0330 123 1045
From Ireland:
053 92 36102
Website:
iconsupport.eu
E-mail:
Write:
ICON Health & Fitness, Ltd.
Unit 4, Westgate Court
Silkwood Park
OSSETT
WF5 9TT
UNITED KINGDOM
AUSTRALIA
Call:
1800 993 770
E-mail:
Write:
ICON Health & Fitness, Inc.
PO Box 635
WINSTON HILLS NSW 2153
AUSTRALIA