Samsung FPT5894 User Manual (ENGLISH) - Page 33
Active Color, DNIe (Digital Natural Image engine), Edge Enhancement: Off/On
 |
UPC - 036725258945
View all Samsung FPT5894 manuals
Add to My Manuals
Save this manual to your list of manuals |
Page 33 highlights
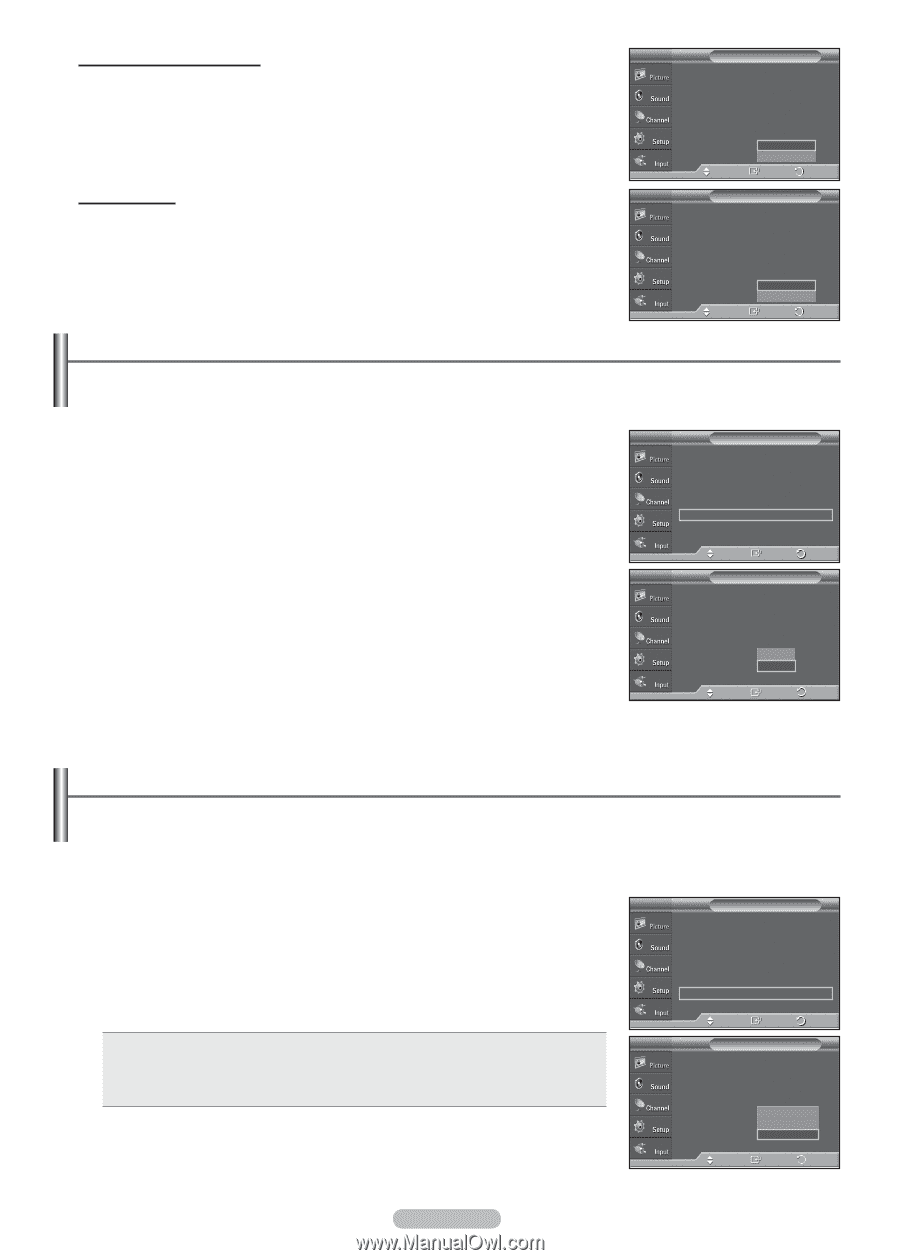
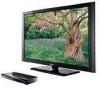
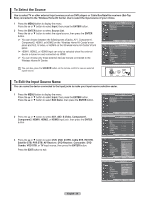
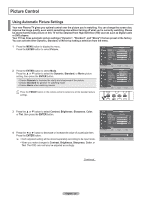
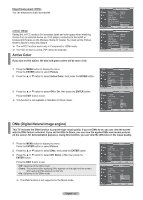
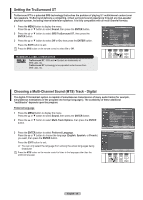
Edge Enhancement: Off/On You can emphasize object boundaries. xvYCC: Off/On Setting the xvYCC mode to On increases detail and color space when watching movies from an external device (ie. DVD player) connected to the HDMI or Component IN jacks on the Wireless Home AV Center. You must set the Picture Mode to Movie to enjoy this feature. ➢ The xvYCC function works only in Component or HDMI mode. ➢ If xvYCC function is active, PIP cannot be selected. Active Color If you turn on this option, the blue and green colors will be more vivid. 1 Press the MENU button to display the menu. Press the ENTER button to select Picture. 2 Press the ▲ or ▼ button to select Active Color, then press the ENTER button. 3 Press the ▲ or ▼ button to select Off or On, then press the ENTER button. Press the EXIT button to exit. ➢ This function is not available in Standard or Movie mode. T V Detailed Settings Black Adjust : Medium Dynamic Contrast : Medium Gamma : 0 Color Space : Auto White Balance My Color Control Edge Enhancement : OOffff xvYCC : OOffn Move Enter Return T V Detailed Settings Black Adjust : Medium Dynamic Contrast : Medium Gamma : 0 Color Space : Auto White Balance My Color Control Edge Enhancement : OOffff xvYCC : OOffn Move Enter Return T V Picture ▲ More Color Tone : Cool1 ► Detailed Settings ► Size : 16:9 ► Digital NR : Auto ► Active Color : On ► DNIe : On ► Reset : OK ► Move Enter Return T V Picture ▲ More Color Tone : Cool1 Detailed Settings Size : 16:9 Digital NR : Auto Active Color : OOnff DNIe : OOnn Reset : OK Move Enter Return DNIe (Digital Natural Image engine) This TV includes the DNIe function to provide high visual quality. If you set DNIe to on, you can view the screen with the DNIe feature activated. If you set the DNIe to Demo, you can view the applied DNIe and normal pictures on the screen, for demonstration purposes. Using this function, you can view the difference in the visual quality. 1 Press the MENU button to display the menu. Press the ENTER button to select Picture. 2 Press the ▲ or ▼ button to select DNIe, then press the ENTER button. 3 Press the ▲ or ▼ button to select Off, Demo or On, then press the ENTER button. Press the EXIT button to exit. • Off: Switches off the DNIe mode. • Demo: The screen before applying DNIe appears on the right and the screen after applying DNIe appears on the left. • On: Switches on the DNIe mode. ➢ The DNle function is not supported in the Movie mode. T V Picture ▲ More Color Tone : Cool1 ► Detailed Settings ► Size : 16:9 ► Digital NR : Auto ► Active Color : On ► DNIe : On ► Reset : OK ► Move Enter Return T V Picture ▲ More Color Tone : Cool1 Detailed Settings Size : 16:9 Digital NR Active Color DNIe : AOuftfo : ODnemo : OOnn Reset : Move Enter Return English - 33
-
 1
1 -
2
-
3
-
4
-
5
-
6
-
7
-
8
-
9
-
10
-
11
-
12
-
13
-
14
-
15
-
16
-
17
-
18
-
19
-
20
-
21
-
22
-
23
-
24
-
25
-
26
-
27
-
 28
28 -
 29
29 -
 30
30 -
 31
31 -
 32
32 -
 33
33 -
 34
34 -
 35
35 -
 36
36 -
 37
37 -
 38
38 -
39
-
40
-
41
-
42
-
43
-
44
-
45
-
46
-
47
-
48
-
49
-
50
-
51
-
52
-
53
-
54
-
55
-
56
-
57
-
58
-
59
-
60
-
61
-
62
-
63
-
64
-
65
-
66
-
67
-
68
-
69
-
70
-
71
-
72
-
73
-
74
-
75
-
76
-
77
-
78
-
79
-
80
 |
 |