Sanyo SYSZ5LMP PLV-Z5 Owners Manual
Sanyo SYSZ5LMP PLV-Z5 - PLV Z5 - LCD Projector Manual
 |
UPC - 017133340781
View all Sanyo SYSZ5LMP PLV-Z5 manuals
Add to My Manuals
Save this manual to your list of manuals |
Sanyo SYSZ5LMP PLV-Z5 manual content summary:
- Sanyo SYSZ5LMP PLV-Z5 | Owners Manual - Page 1
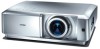
Multimedia Projector MODEL PLV-Z5 PLV-Z5BK Owner's Manual - Sanyo SYSZ5LMP PLV-Z5 | Owners Manual - Page 2
integration of the lens aperture and lamp aperture enhances the contrast and depth of the projected image. ◆ Compatibility The projector accepts signals from multiple sources: and figures in this manual may differ slightly from the actual product. • The contents of this manual are subject to change - Sanyo SYSZ5LMP PLV-Z5 | Owners Manual - Page 3
Instructions 5 Air Circulation 6 Installing the Projector in Proper Position 6 Moving the Projector Projector Cabinet 46 Lamp Replacement 47 Lamp Replacement Counter 48 Appendix 49 Troubleshooting 49 Indicators and Projector owner's manual is either a trademark or a registered - Sanyo SYSZ5LMP PLV-Z5 | Owners Manual - Page 4
of this manual. If the problem still persists, contact the dealer where you purchased the projector or the service center. CAUTION RISK OF ELECTRIC SHOCK DO NOT OPEN CAUTION: TO REDUCE THE RISK OF ELECTRIC SHOCK, DO NOT REMOVE COVER (OR BACK). NO USER-SERVICEABLE PARTS INSIDE EXCEPT LAMP REPLACEMENT - Sanyo SYSZ5LMP PLV-Z5 | Owners Manual - Page 5
Follow all warnings and instructions marked on the projector. For added protection to the projector during lightning storm, projector exhibits a distinct change in performance, this indicates a need for service. When replacement parts are required, be sure the service technician has used replacement - Sanyo SYSZ5LMP PLV-Z5 | Owners Manual - Page 6
a suitable carrying case. - Do not transport the projector by courier or any other transport service in an unsuitable transport case. This may cause damage to the projector. For information about transporting the projector by courier or any other transport service, consult your dealer. - Do not put - Sanyo SYSZ5LMP PLV-Z5 | Owners Manual - Page 7
instructions. If such changes or modifications should be made, you could be required to stop operation of the equipment. Model Number(s) Trade Name Responsible party Address Telephone No. : PLV-Z5, PLV-Z5BK : Sanyo : SANYO . Should the fuse need to be replaced, an ASTA approved BS 1362 fuse must - Sanyo SYSZ5LMP PLV-Z5 | Owners Manual - Page 8
!3 Main On/Off Switch !4 Air Intake Vents/Air Filters ✽ Kensington Security Slot This slot is for a Kensington lock used to deter theft of the projector. *Kensington is a registered trademark of ACCO Brands Corporation. !5 Adjustable Feet !6 Lamp Cover !7 RGB Panel Cleaning Hole Cover !6 !7 8 - Sanyo SYSZ5LMP PLV-Z5 | Owners Manual - Page 9
to this jack (p.16). e COMPONENT 1 or COMPONENT 2 Connect the component video output signal to these jacks (p.16). r SERVICE PORT This jack is used to service the projector. t HDMI 1/HDMI 2* Connect the HDMI output signal from video equipment to these terminals (p.17). y VIDEO Connect the composite - Sanyo SYSZ5LMP PLV-Z5 | Owners Manual - Page 10
detects an abnormal condition. - Blinks red when the internal temperature of the projector exceeds the operating range (pp.42, 50). r LAMP REPLACE indicator Lights yellow light when the projection lamp reaches its end of life (pp.47, 50). t MENU button Open or close the On-Screen Menu (p.20 - Sanyo SYSZ5LMP PLV-Z5 | Owners Manual - Page 11
!1 INPUT CXVT Part Names and Functions q POWER ON/STAND-BY button Turn the projector on or off (pp.18, 19). w NO SHOW button Temporarily turn off Light up the remote control buttons for about 10 seconds (p.22). r LAMP CONTROL button Select a lamp mode (pp.22, 29). t MENU button Open or close the - Sanyo SYSZ5LMP PLV-Z5 | Owners Manual - Page 12
the remote control is about 16.4' (5 m) and 60 degrees in front of the projector. 16.4' (5 m) 60° Remote control Remote Control Battery Installation 1 Open the battery ● Risk of explosion if battery is replaced by an incorrect type. ● Dispose of used batteries according to the instructions. 12 - Sanyo SYSZ5LMP PLV-Z5 | Owners Manual - Page 13
the actual sizes. Adjustable Feet Projection angle can be adjusted up to 7.7 degrees with the adjustable feet. 1 Rotate the adjustable feet and tilt the projector to the proper height; to raise the feet, rotate the both feet clockwise. 2 To lower or to retract the adjustable feet, rotate the both - Sanyo SYSZ5LMP PLV-Z5 | Owners Manual - Page 14
into any other type of power system. If you are not sure of the type of power being supplied, consult your authorized dealer or service station. Connect the projector with all peripheral equipment before turning it on. S-VIDEO CO HDMI 1 HDMI 2 COMPUTER CO VIDEO Y Pb/Cb Pr/Cr CAUTION For safety - Sanyo SYSZ5LMP PLV-Z5 | Owners Manual - Page 15
Installation Moving the Lens The projection lens can be moved up and down or left and right manually with the Lens Shift Rings, enabling you to adjust the position of a projected image. After adjusting the position, lock the lens with the Lens Shift - Sanyo SYSZ5LMP PLV-Z5 | Owners Manual - Page 16
Component Video Output (Y, Pb/Cb, Pr/Cr) ✔Notes: • To order the optional cables, see page 55. • When connecting HDTV equipment to the projector's COMPONENT 1/2 terminals, horizontal line noise may be noted only occasionally. Then adjust the value of Fine sync. The factory default value of Fine sync - Sanyo SYSZ5LMP PLV-Z5 | Owners Manual - Page 17
RGB Scart 21-pin Output HDMI Cable HDMI S-VIDEO COMPONENT 1 SERVIC HDMI 1 HDMI 2 COMPUTER COMPONENT 2 VIDEO Y Pb/Cb order the optional cables, see page 55. Unplug the power cords of both the projector and external equipment from the AC outlet before connecting the cables. COMPUTER S-VIDEO - Sanyo SYSZ5LMP PLV-Z5 | Owners Manual - Page 18
Off switch ✔Notes: • If the automatic slide shutter does not open properly, the projector will not be turned on and the POWER indicator will blink orange. Press the POWER Slide Shutter Use this tab when handling manually. Do not touch the slide shutter while it is moving, as this could - Sanyo SYSZ5LMP PLV-Z5 | Owners Manual - Page 19
the Main On/Off switch off and unplug the AC power cord. Basic Operation "Power off?" disappears after 4 seconds. TO MAINTAIN LIFE OF LAMP, ONCE YOU TURN PROJECTOR ON, WAIT AT LEAST FIVE (5) MINUTES BEFORE TURNING IT OFF. DO NOT UNPLUG AC POWER CORD WHILE COOLING FANS ARE RUNNING OR BEFORE POWER - Sanyo SYSZ5LMP PLV-Z5 | Owners Manual - Page 20
-Screen Menu The projector can be adjusted each adjustment and setting procedure, refer to respective sections in this manual. 1 Press the MENU button on the top control or on to exit the On-Screen Menu. Top Control Remote Control LAMP NO SHOW FREEZE MENU RESET OK SCREEN IMAGE IMAGE ADJ. - Sanyo SYSZ5LMP PLV-Z5 | Owners Manual - Page 21
Adjust Brightness, Contrast, Color, Tint, Color temp., White balance (R/G/B), Sharpness, Lamp control, Gamma, Progressive, Lens iris, Advanced menu, Reset, and Store ( Input source, and the Lamp status of the projected screen as well as the Lamp Time (p.41). i Guide The key operation is displayed. - Sanyo SYSZ5LMP PLV-Z5 | Owners Manual - Page 22
the picture on the screen. To cancel, press the FREEZE button again or press any other button. LAMP CONTROL button Press the LAMP CONTROL button to select a lamp mode for changing the brightness of the screen. Normal . . . . . Normal brightness. Auto 1 . . . . . The brightness according to the - Sanyo SYSZ5LMP PLV-Z5 | Owners Manual - Page 23
✔Note: • If you press the OK button after adjusting each Image adj. Menu item, it will enter the main menu. Remote Control LAMP CONTROL LAMP NO SHOW FREEZE MENU RESET OK SCREEN button BRIGHTNESS button LENS IRIS button SCREEN IMAGE IMAGE ADJ. BRIGHTNESS CONTRAST BRIGHT CONT. COLOR LENS - Sanyo SYSZ5LMP PLV-Z5 | Owners Manual - Page 24
Input Input Source and System Selection Press the INPUT button on the top control or the INPUT buttons on the remote control (see below) to choose an input source. ✔Note: • Before selecting an input source with these buttons, each input must be set on a proper signal form via menu operation (see on - Sanyo SYSZ5LMP PLV-Z5 | Owners Manual - Page 25
and adjusts itself to optimize its performance. When the video system is PAL-M or PAL-N, select the system manually. PAL / SECAM / NTSC / NTSC4.43 / PAL-M / PAL-N If the projector cannot reproduce a proper video image, select a specific broadcast signal format from among PAL, SECAM, NTSC, NTSC 4.43 - Sanyo SYSZ5LMP PLV-Z5 | Owners Manual - Page 26
If the output signal of video equipment and the input signal of the projector do not match, you might not get an image with the best quality a DVD player connected to the COMPUTER connector, select RGB (Scart). The projector automatically tunes to various types of computers based on VGA, SVGA, XGA, - Sanyo SYSZ5LMP PLV-Z5 | Owners Manual - Page 27
For viewing images with quiet tones of color and less gradation in a dark room. Natural For viewing images faithfully reproduced without any control by the projector in a dark room. Living For viewing video sources such as sports or dramas from TV with clear and contrasty images in a bright room - Sanyo SYSZ5LMP PLV-Z5 | Owners Manual - Page 28
for each input source and the adjustment is kept until the projector is turned off or the image mode is changed. Direct Operation temp. ➜ Red ➜ Green ➜ Blue ➜ Sharpness ➜ Lamp control ➜ Gamma ➜ Progressive ➜ Lens iris ➜ Lamp iris ➜ Auto black stretch➜ Contrast enhancement ➜ Transient improvement - Sanyo SYSZ5LMP PLV-Z5 | Owners Manual - Page 29
-sound than Auto 1. Eco Lower brightness reduces the lamp power consumption. The lamp mode is automatically switched to "Eco" under no signal . Film . . . . For watching a film. With this function, the projector reproduces pictures faithful to the original film quality; it operates on 3-2 and 2-2 - Sanyo SYSZ5LMP PLV-Z5 | Owners Manual - Page 30
Advanced menu in the Setting Menu (see page 36) is set to "On." You can adjust the following items through this function. Lamp iris Adjust the lamp aperture. Select from the following options: Auto 1 . . Normal open-close speed Auto 2 . . High open-close speed Open . . . Fully open aperture Close - Sanyo SYSZ5LMP PLV-Z5 | Owners Manual - Page 31
Image Adjustment COLOR MANAGEMENT COLOR MANAGEMENT LIST Select Color management in the Advanced menu and then press the OK or Point 8 buttons. The COLOR MANAGEMENT LIST appears. You can store up to eight (8) color management data in the list. In the COLOR MANAGEMENT LIST, the adjusted color data - Sanyo SYSZ5LMP PLV-Z5 | Owners Manual - Page 32
Image Adjustment Reset To reset the adjusted data, select Reset and press the Point 8 or OK buttons. A confirmation box appears. Select [Yes] and then press the OK button. All adjustments return to their previous figures. You can also reset the adjusted data by pressing the RESET button on the - Sanyo SYSZ5LMP PLV-Z5 | Owners Manual - Page 33
signal formats which may not be tuned by the auto-tuning system of this projector. Picture Adjustment enables you to precisely adjust several parameters manually to match those signal formats. The parameters manually adjusted is stored for every input. 1 Press the Point ed buttons to select the - Sanyo SYSZ5LMP PLV-Z5 | Owners Manual - Page 34
Screen Screen Size Adjustment This projector has the picture screen resize function which enables you to customize the image size. Direct Operation Press the SCREEN button on the remote control to - Sanyo SYSZ5LMP PLV-Z5 | Owners Manual - Page 35
cannot display any resolution higher than 1920 x 1080. If your computer's resolution is higher than that, lower the resolution before connecting to the projector. • The image data other than the 1280 x 720 resolution is modified to fit the screen size in initial mode. • The Vertical adj. function - Sanyo SYSZ5LMP PLV-Z5 | Owners Manual - Page 36
Setting Setting The Setting Menu allows you to set up other various functions described below. 1 Press the Point ed buttons to select the Setting Menu and press the Point 8 or OK buttons to access the submenu items. 2 Use the Point ed buttons to select the desired item and press the Point 8 or OK - Sanyo SYSZ5LMP PLV-Z5 | Owners Manual - Page 37
Wall . . . . Project the image from a wall-hanging projector. The picture is left/right reversed. Rear When this function is set equipment vary from equipment to equipment. For details, refer to the owner's manual of video equipment. Background Select the background screen for when no input signal - Sanyo SYSZ5LMP PLV-Z5 | Owners Manual - Page 38
in this option. Countdown Off . . Show the input image instead of the countdown when turning on the projector. Use this function when you want to project the image as early as possible even when the lamp is not bright enough. Off Hide the On-Screen Displays except; ● On-Screen Menu ● "Power off - Sanyo SYSZ5LMP PLV-Z5 | Owners Manual - Page 39
as well as maintaining the lamp life, the Power management function turns off the projection lamp when the projector is not used for a operates properly. ✔Note: • When the batteries of the remote control are replaced, the remote control code automatically returns to the initial code (Code 1). - Sanyo SYSZ5LMP PLV-Z5 | Owners Manual - Page 40
the projector in high altitudes (about 1,200 meters or more above the sea level), set this function "On." Press the Point 8 or OK buttons to switch On/Off. Lamp counter reset This function resets the lamp replacement counter. When replacing the projection lamp, reset the lamp replacement counter - Sanyo SYSZ5LMP PLV-Z5 | Owners Manual - Page 41
status of the image signal being projected and the operation of the projector. Direct Operation Press the INFO. button on the remote control to displayed in Hz, or "- - - -" when no signal. Lamp Time The cumulative lamp operating time is displayed. Image The selected image mode is displayed. - Sanyo SYSZ5LMP PLV-Z5 | Owners Manual - Page 42
away from the duct or vent. - Are the air filters clean? Clean the air filters periodically or replace it with a new one. The projector is shut down and the WARNING indicator lights red. When the projector detects an abnormal condition, it is automatically shut down to protect the inside of the - Sanyo SYSZ5LMP PLV-Z5 | Owners Manual - Page 43
(model: Z5/Z5BK) to clean the other models: Z4, Z3, and Z1X. If something is wrong with the projector (such as smoke, a strange sound, or an abnormal odor) while you are cleaning, turn off and unplug the projector immediately, then call the dealer where you purchased the projector or service center - Sanyo SYSZ5LMP PLV-Z5 | Owners Manual - Page 44
position of the dust from the screen. 6 When cleaning is done, pull the blower out of the hole and replace the hole cover and secure it with the screw. 7 Set the projector back into the right position, then press any button on the top control or on the remote control to quit - Sanyo SYSZ5LMP PLV-Z5 | Owners Manual - Page 45
. When the Air Filter 1 gets dusty and dirty, replace it with a new one. For ordering the replacement filter, contact your sales dealer. 4 Put the air the projector degrading the quality of a projected image. When the symptoms above are noticed, contact your authorized dealer or service station for - Sanyo SYSZ5LMP PLV-Z5 | Owners Manual - Page 46
soft cloth. Avoid using an excessive amount of cleaner. Abrasive cleaners, solvents, or other harsh chemicals might scratch the surface of the cabinet. When the projector is not in use, put it in an appropriate carrying case to protect it from dust and scratches. 46 - Sanyo SYSZ5LMP PLV-Z5 | Owners Manual - Page 47
. Screw Lamp Cover Lamp Handle Screws ORDER REPLACEMENT LAMP Replacement lamp can be ordered through your dealer. When ordering a projection lamp, give the following information to the dealer. ● Model No. of your projector: ● Replacement Lamp Type No.: PLV-Z5/PLV-Z5BK POA-LMP94 (Service Parts - Sanyo SYSZ5LMP PLV-Z5 | Owners Manual - Page 48
the lamp should be replaced, i.e., if the LAMP REPLACE indicator lights up, replace the lamp with a new one IMMEDIATELY after the projector has cooled down. (Follow carefully the instructions in the Lamp Replacement section of this manual.) Continuous use of the lamp with the LAMP REPLACE indicator - Sanyo SYSZ5LMP PLV-Z5 | Owners Manual - Page 49
to be changed when connecting to a projector. See your computer's instruction manual for the setting. - It takes about 20 projector. Do not attempt to open the cabinet. If problems still persist after following all operating instructions, contact the dealer where you purchased the projector or service - Sanyo SYSZ5LMP PLV-Z5 | Owners Manual - Page 50
unplug the AC power cord and contact the dealer or service center for servicing and checkup. Do not leave the projector on. It may cause an electric shock or a fire hazard. The lamp does not turn on because malfunction occurs or the lamp reaches its end of life. ✽ The automatic slide shutter is - Sanyo SYSZ5LMP PLV-Z5 | Owners Manual - Page 51
adj. Brightness Contrast Color Tint Color temp. Red Green Blue Sharpness Lamp Control Gamma Progressive Lens iris Advanced menu Reset Store -31 to -7 to +7 Normal Auto 1 Auto 2 Eco -7 to +7 Off L1 L2 Film -63 to 0 Lamp iris Auto1 / Auto 2 / Open / Close Auto black stretch Off / L1 / L2 / L3 - Sanyo SYSZ5LMP PLV-Z5 | Owners Manual - Page 52
, -8 to +8. Setting Full Full through Zoom Caption in Normal Normal through Natural wide 1 Natural wide 2 Signal H-sync freq. V-sync freq. Lamp Time Image Screen Input Lamp status PAL SECAM NTSC NTSC4.43 PAL-M PAL-N 480i 480p 575i 575p 720p 1080i D-VGA D-480i D-480p D-575i D-575p D-720p D-1080i - Sanyo SYSZ5LMP PLV-Z5 | Owners Manual - Page 53
Appendix System Mode Chart PLV-Z5/PLV-Z5BK can basically accept the signal from all computers and some video equipment with V- and H-Frequency mentioned might be able to project images even when signals other than above are inputted, however the functions of the projector could be limited. 53 - Sanyo SYSZ5LMP PLV-Z5 | Owners Manual - Page 54
Lamp Video Input Jacks Computer Input Terminal HDMI Input Terminals Service Port Connector Feet Adjustment Voltage and Power Consumption Operating Temperature Storage Temperature Remote Control Multimedia Projector ) Accessories Owner's Manual (CD-ROM) Quick Reference Guide AC Power Cord Remote - Sanyo SYSZ5LMP PLV-Z5 | Owners Manual - Page 55
Configurations of Terminals Video terminal Terminal: HDMI Pin Configuration 1 3 5 7 9 11 13 15 17 19 2 4 6 8 10 12 14 16 18 19 Pin Type A 1 TMDS Data 2+ Input 11 Ground (TMDS Clock) 2 Ground (TMDS Data 2) 12 TMDS Clock- Input 3 TMDS Data 2- Input 13 ----- 4 TMDS Data 1+ Input 14 ----- 5 - Sanyo SYSZ5LMP PLV-Z5 | Owners Manual - Page 56
Appendix Dimensions Unit: inch (mm) 7.7˚ (Max.) 15.04 (382.0) 5.23 (132.9) Lens Shift Center 2.58 (65.5) Lens Shift Center 11.98 (304.3) 5.11 (129.8) 56 - Sanyo SYSZ5LMP PLV-Z5 | Owners Manual - Page 57
SANYO Electric Co., Ltd.
-
 1
1 -
 2
2 -
 3
3 -
 4
4 -
 5
5 -
 6
6 -
 7
7 -
8
-
9
-
10
-
11
-
12
-
13
-
14
-
15
-
16
-
17
-
18
-
19
-
20
-
21
-
22
-
23
-
24
-
25
-
26
-
27
-
28
-
29
-
30
-
31
-
32
-
33
-
34
-
35
-
36
-
37
-
38
-
39
-
40
-
41
-
42
-
43
-
44
-
45
-
46
-
47
-
48
-
49
-
50
-
51
-
52
-
53
-
54
-
55
-
56
-
57
 |
 |
Multimedia Projector
MODEL
PLV-Z5
PLV-Z5BK
Owner’s Manual