Sanyo SYSZ5LMP PLV-Z5 Owners Manual - Page 40
Lamp counter reset, Factory default, Panel adjustment, Highland, Cleaning
 |
UPC - 017133340781
View all Sanyo SYSZ5LMP PLV-Z5 manuals
Add to My Manuals
Save this manual to your list of manuals |
Page 40 highlights
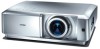
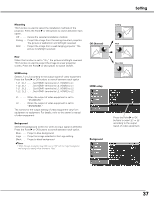
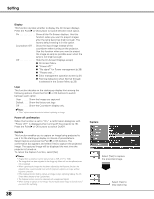
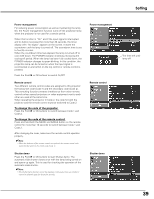
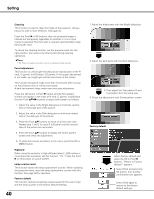
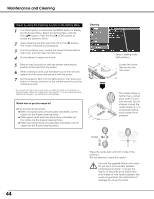
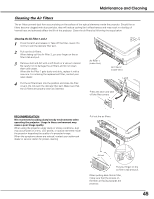
Setting Cleaning This function is used to clean the inside of the projector. Using a blower as well is more effective. See page 44. Press the Point 8 or OK buttons, then the projected image is blacked out temporarily regardless of whether or not an input source is selected. The fans start to operate automatically to help blowing the dust. To cancel the cleaning function, set the projector back into the right position, then press any other button during cleaning operations. ✔Note: • The Power management function cannot be operated during cleaning. Panel adjustment This function is used to get the best picture reproduction of the R (red), G (green), and B (blue) LCD panels. If the proper adjustment is not made, you might get vertical noise lines on the screen. This function should be made more than 10 minutes after turning on the projector with or without any signal. A dark environment helps make more accurate adjustment. Press the OK button or Point 8 button and the Test pattern screens will appear in the order of R (red), G (green), and B (blue). Use the Point ed7 8 buttons to adjust each pattern as follows: 1. Adjust the value in the Bright dialog box to minimize vertical lines in the bright part of the picture. 2. Adjust the value in the Dark dialog box to minimize vertical lines in the dark part of the picture. 3. Press the Point ed buttons to move on to the next color. Repeat step 1 and 2 for each R,G,B panel until the vertical lines of the picture are minimized. 4. Press the Point ed buttons to display the Check pattern screen and check the adjustment. 5. To close this screen and return to the menu, press the OK or MENU button. Highland When using the projector in high altitudes (about 1,200 meters or more above the sea level), set this function "On." Press the Point 8 or OK buttons to switch On/Off. Lamp counter reset This function resets the lamp replacement counter. When replacing the projection lamp, reset the lamp replacement counter with this function. See page 48 for operation. Factory default This function restores all setting values except for the user's logo and the lamp counter to the factory default settings. 40 1. Adjust the bright parts with the Bright dialog box. 2. Adjust the dark parts with the Dark dialog box. 3. Then adjust the Test pattern G and Test pattern B in the same way. 4. Check the adjustment with Check pattern screen. Factory default Select Factory default and press the OK or Point 8 buttons. "Return to Factory default?" appears. Select [Yes] and press the OK button, then another confirmation box appears. Select [Yes] again to restore to the factory default settings.
-
 1
1 -
2
-
3
-
4
-
5
-
6
-
7
-
8
-
9
-
10
-
11
-
12
-
13
-
14
-
15
-
16
-
17
-
18
-
19
-
20
-
21
-
22
-
23
-
24
-
25
-
26
-
27
-
28
-
29
-
30
-
31
-
32
-
33
-
34
-
 35
35 -
 36
36 -
 37
37 -
 38
38 -
 39
39 -
 40
40 -
 41
41 -
 42
42 -
 43
43 -
 44
44 -
 45
45 -
46
-
47
-
48
-
49
-
50
-
51
-
52
-
53
-
54
-
55
-
56
-
57
 |
 |
