Sanyo SYSZ5LMP PLV-Z5 Owners Manual - Page 29
Lamp control, Gamma, Sharpness, Progressive, Lens iris, White balance Red, Press the Point
 |
UPC - 017133340781
View all Sanyo SYSZ5LMP PLV-Z5 manuals
Add to My Manuals
Save this manual to your list of manuals |
Page 29 highlights
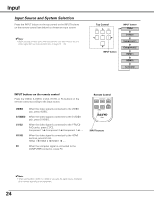
Image Adjustment White balance (Red) Press the Point 7 button to lighten red tone; press the Point 8 button to deepen red tone (from -31 to +31). White balance (Green) Press the Point 7 button to lighten green tone; press the Point 8 button to deepen green tone (from -31 to +31). White balance (Blue) Press the Point 7 button to lighten blue tone; press the Point 8 button to deepen blue tone (from -31 to +31). Sharpness Press the Point 7 button to decrease the sharpness of the image; press the Point 8 button to increase the sharpness of the image (from -7 to +7). Lamp control This function allows you to change the brightness of the screen. Use the Point 7 8 buttons to select the desired lamp mode. You can also select the lamp mode by pressing the LAMP CONTROL button on the remote control. Normal . . . . . Normal brightness. Auto 1 . . . . . The brightness according to the input signal. Auto 2 . . . . . Less bright and lower-sound than Auto 1. Eco Lower brightness reduces the lamp power consumption. The lamp mode is automatically switched to "Eco" under no signal input. Gamma Use the Point 7 8 buttons to adjust the gamma value to obtain a better balance of contrast (from -7 to +7). Progressive An interlaced video signal can be displayed in progressive. Use the Point 7 8 buttons to select the desired options. Off . . . . . Disabled. L1 . . . . . For moving pictures. L2 . . . . . For still pictures. Film . . . . For watching a film. With this function, the projector reproduces pictures faithful to the original film quality; it operates on 3-2 and 2-2 pulldown video sources. Lens iris Use the Point 7 8 buttons to adjust the lens aperture. It can be stopped down from zero (from 0 to -63). ✔Notes: • If any one of the White balance (Red, Green, or Blue) are adjusted, the Color temp. level changes to "User." • Progressive cannot be selected with the computer input and when the video signal format is 480p, 575p, or 720p. • The "Film" option in the Progressive function cannot be selected when the video signal format is 1080i. If you select "Film" when the video signal format is 480i, and then input the 1080i signal, it switches to "L1." Press the Point 8 or OK buttons to display the Advanced menu. Go on to the next page.... 29
-
 1
1 -
2
-
3
-
4
-
5
-
6
-
7
-
8
-
9
-
10
-
11
-
12
-
13
-
14
-
15
-
16
-
17
-
18
-
19
-
20
-
21
-
22
-
23
-
 24
24 -
 25
25 -
 26
26 -
 27
27 -
 28
28 -
 29
29 -
 30
30 -
 31
31 -
 32
32 -
 33
33 -
 34
34 -
35
-
36
-
37
-
38
-
39
-
40
-
41
-
42
-
43
-
44
-
45
-
46
-
47
-
48
-
49
-
50
-
51
-
52
-
53
-
54
-
55
-
56
-
57
 |
 |
