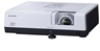
Sharp XR-50S XR-55S XR-55X Operation Manual - Page 37
Auto Sync, Auto Sync Adjustment, Freezing a Moving Image, Selecting the Picture Mode, Displaying an
 |
View all Sharp XR-50S manuals
Add to My Manuals
Save this manual to your list of manuals |
Page 37 highlights
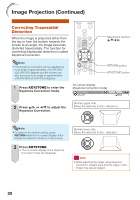
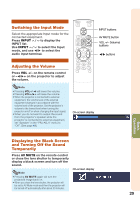
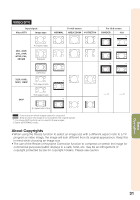
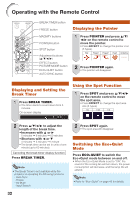
Auto Sync (Auto Sync Adjustment) Displaying an Enlarged Portion of an Image Auto Sync function works when detecting input signal after the projector turns on. Press AUTO SYNC to manually adjust with Auto Sync function. Note • When the optimum image cannot be achieved with Auto Sync adjustment, use manual adjustments. (See page 44.) Graphs, tables and other portions of projected images can be enlarged. This is helpful when providing more detailed explanations. 1 Press MAGNIFY on the remote control. • Enlarges the image. • Pressing or MAGNIFY enlarges or reduces the projected image. Note Press . Freezing a Moving Image 1 Press FREEZE. • The projected image is frozen. 2 Press FREEZE again to return to the moving image from the currently connected device. ×1 ×2 ×3 ×4 Press . • You can change the location of the enlarged image using P, R, O and Q. 2 Press RETURN on the remote control to cancel the operation. • The magnification then returns to ×1. Selecting the Picture Mode You can select the appropriate Picture mode for the projected image, such as movie or video game. Press PICTURE MODE. • When pressing PICTURE MODE, the Picture mode changes in the following order: STANDARD PRESENTATION MOVIE GAME sRGB* Note • The selectable magnifications differ depending on the input signal. • In the following cases, the image will return to the normal size (×1). - When switching the Input mode. - When RETURN has been pressed. - When the input signal is changed. - When the input signal resolution and refresh rate (vertical frequency) change. - When the Resize mode is changed. Useful Features Note • See page 41 for details on the Picture mode. * "sRGB" is displayed only when RGB signal is input. 33
-
 1
1 -
2
-
3
-
4
-
5
-
6
-
7
-
8
-
9
-
10
-
11
-
12
-
13
-
14
-
15
-
16
-
17
-
18
-
19
-
20
-
21
-
22
-
23
-
24
-
25
-
26
-
27
-
28
-
29
-
30
-
31
-
 32
32 -
 33
33 -
 34
34 -
 35
35 -
 36
36 -
 37
37 -
 38
38 -
 39
39 -
 40
40 -
 41
41 -
 42
42 -
43
-
44
-
45
-
46
-
47
-
48
-
49
-
50
-
51
-
52
-
53
-
54
-
55
-
56
-
57
-
58
-
59
-
60
-
61
-
62
-
63
-
64
-
65
-
66
-
67
-
68
-
69
-
70
-
71
-
72
-
73
-
74
-
75
-
76
-
77
-
78
 |
 |
