Singer One Instruction Manual 2 - Page 41
adjustable
 |
View all Singer One manuals
Add to My Manuals
Save this manual to your list of manuals |
Page 41 highlights
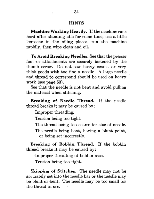
39 straight, and taking the edges nearsthe beginning of the seam in the right hand, and the ends of the threads in the left hand, draw the edges into the hemmer, which will turn them as in hemming. Guide the second row of stitching by following the first row with the inside of the projecting front of the foot hemmer (see Fig. 37, page 38). ADJUSTABLE HEMMER-Hemming Remove the presser foot and attach the adjustable hemmer in its place as shown in Fig. 38. This FIG. 38 E '3 +4 hemmer will turn hems from 26 in. to s in. wide. The adjustment is made by loosening the thumb screw on the hemmer and moving the scale to the right or left until the hem turned is of the desired width. Place the cloth under the hemmer and draw the edge toward the left under the scale, as shown in Fig. 38. Draw the edge of the cloth back and forth until the hem is formed, stopping with the end under the needle. Lower the presser bar and commence to sew, being careful to so guide cloth as to keep hemmer full.
-
 1
1 -
2
-
3
-
4
-
5
-
6
-
7
-
8
-
9
-
10
-
11
-
12
-
13
-
14
-
15
-
16
-
17
-
18
-
19
-
20
-
21
-
22
-
23
-
24
-
25
-
26
-
27
-
28
-
29
-
30
-
31
-
32
-
33
-
34
-
35
-
 36
36 -
 37
37 -
 38
38 -
 39
39 -
 40
40 -
 41
41 -
 42
42 -
 43
43 -
 44
44 -
 45
45 -
 46
46 -
47
-
48
-
49
-
50
-
51
-
52
-
53
-
54
 |
 |
