Singer One Instruction Manual 2 - Page 8
supporting
 |
View all Singer One manuals
Add to My Manuals
Save this manual to your list of manuals |
Page 8 highlights
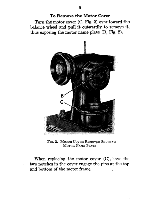
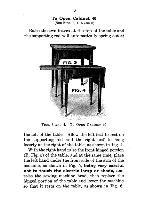
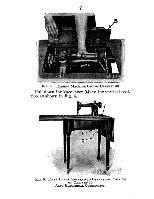
6 To Open Cabinet 40 (SEE FIGS. 3, 4, 5 AND 6) Raise the two leaves at the top of the table and the supporting rod will automatically spring out at ir*Nalla ter FIG. 4 vs- FIGS. 3 AND 4. To OPEN CABINET 40 the left of the table. Allow the left leaf to rest on the supporting rod and the right leaf to hang loosely at the right of the table, as shown in Fig. 4. With the right hand raise the front hinged portion (B, Fig. 5) of the table, and at the same time, place the left hand under the front side of the arm of the machine, as shown in Fig. 5, being very careful not to touch the electric lamp or shade, and raise the sewing machine head, then replace the hinged portion of the table and lower the machine so that it rests on the table, as shown in Fig. 6.
-
 1
1 -
2
-
 3
3 -
 4
4 -
 5
5 -
 6
6 -
 7
7 -
 8
8 -
 9
9 -
 10
10 -
 11
11 -
 12
12 -
 13
13 -
14
-
15
-
16
-
17
-
18
-
19
-
20
-
21
-
22
-
23
-
24
-
25
-
26
-
27
-
28
-
29
-
30
-
31
-
32
-
33
-
34
-
35
-
36
-
37
-
38
-
39
-
40
-
41
-
42
-
43
-
44
-
45
-
46
-
47
-
48
-
49
-
50
-
51
-
52
-
53
-
54
 |
 |
