Singer Pixie Plus the crafting machine by SINGER Instruction Manual - Page 17
Needle Replacement
 |
View all Singer Pixie Plus the crafting machine by SINGER manuals
Add to My Manuals
Save this manual to your list of manuals |
Page 17 highlights
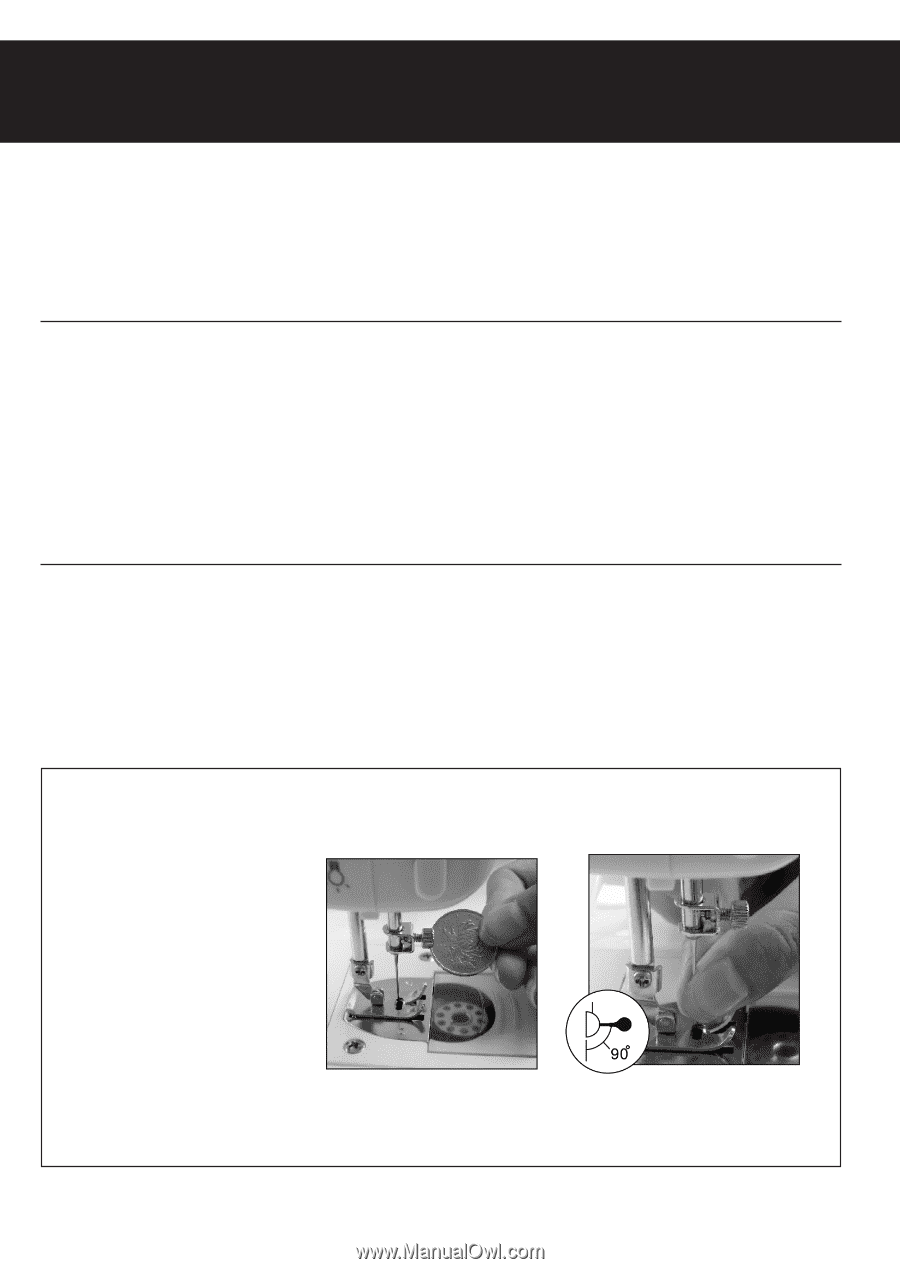
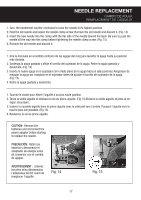
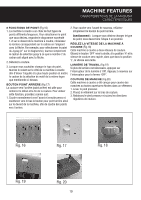
NEEDLE REPLACEMENT CAMBIO DE AGUJA REMPLACEMENT DE L'AIGUILLE 1. Turn the handwheel counter-clockwise to raise the needle to its highest position. 2. Hold the old needle and loosen the needle clamp screw. Remove the old needle and discard it. (Fig. 14) 3. Insert the new needle into the clamp with the flat side of the needle toward the back. Be sure to push the needle all the way into the clamp before tightening the needle clamp screw. (Fig. 15) 4. Remove the old needle and discard it. 1. Gire la manivela en el sentido contrario de las agujas del reloj para levantar la aguja hasta su posición más elevada. 2. Sostenga la aguja gastada y afloje el tornillo del sujetador de la aguja. Retire la aguja gastada y deséchela. (Fig. 14) 3. Inserte la nueva aguja en el sujetador con el lado plano de la aguja hacia el lado posterior. Asegúrese de empujar la aguja por completo en el sujetador antes de ajustar el tornillo del sujetador de la aguja. (Fig. 15) 4. Retire la aguja gastada y deséchela. 1. Tournez le volant pour élever l'aiguille à sa plus haute position. 2. Tenez la vieille aiguille et dévissez la vis du pince-aiguille. (Fig.14) Enlevez la vieille aiguille et jetez-là de façon sécuritaire. 3. Insérez la nouvelle aiguille dans le pince-aiguille avec le côté plat vers l'arrière. Poussez l'aiguille vers le haut le plus loin possible. (Fig.15) 4. Resserrez la vis du pince-aiguille. CAUTION: Remove the batteries and disconnect the power adaptor before starting to replace the needle. PRECAUCIÓN: Retire las baterías y desconecte el adaptador de energía antes de comenzar con el cambio de agujas. AVERTISSEMENT : Enlevez les piles et/ou déconnectez l'adaptateur AC/DC avant de remplacer l'aiguille. Fig. 14 Fig. 15 17
-
 1
1 -
2
-
3
-
4
-
5
-
6
-
7
-
8
-
9
-
10
-
11
-
 12
12 -
 13
13 -
 14
14 -
 15
15 -
 16
16 -
 17
17 -
 18
18 -
 19
19 -
 20
20 -
 21
21 -
 22
22 -
23
-
24
 |
 |