Singer The SINGER 160 Instruction Manual - Page 14
Converting To Free-arm Sewing, Spool Pins, Presser Foot Lifter, Feed Dog Control - how to thread
 |
View all Singer The SINGER 160 manuals
Add to My Manuals
Save this manual to your list of manuals |
Page 14 highlights
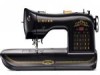
SPOOL PINS HORIZONTAL SPOOL PIN for normal thread spool Place thread spool on the pin and secure with a spool cap to ensure smooth flow of thread. If the thread spool has a thread retaining slit, it should be placed to the right. Select the correct spool pin cap according to the type and diameter of spool being used. The diameter of the spool pin cap should always be larger than that of the spool itself. VERTICAL SPOOL PIN for large thread spool Attach the spool pin. Place the felt disc over it. Place a thread spool on the spool pin. Spool Bobine Carrete Felt disc Rondelle feutre Disco del pasador carrete Vertical spool pin Porte-bobine vertical Pasador de carrete vertical Thread retaining slit Fente de retenue de fil Ranura de retención de hilo PRESSER FOOT LIFTER There are three positions for your presser foot. 1. Lower the presser foot to sew. 2. Raise the lifter to the middle position to insert or remove fabric, and to change presser foot. 3. Lift it to its highest position to insert or to remove thick fabric. NOTE: If you start the machine with presser foot raised, it will alert you with a beep sound to lower the presser foot to sew. Spool pin cap Chapeau de bobine Tapa del pasador carrete Spool Bobine Carrete Spool pin Porte-bobine Pasador carrete FEED DOG CONTROL The feed dogs control the movement of the fabric that is being sewn. They should be raised for all general sewing purposes and lowered for darning, freehand embroidery and monogramming so that you, not the feed dogs, are moving the fabric. You will see the feed dog control when you remove the extension table. Down Basse Abajo Feed dog control Levier de contrôle des griffes Control de dientes CONVERTING TO FREE-ARM SEWING Your machine can be used either as a flat-bed or as a freearm model. With the extension table in position, it provides a large working surface as a standard flat-bed model. To remove the extension table, hold it firmly with both hands and pull it off to the left as shown. To replace, slide the extension table back into place until it clicks. With the extension table removed the machine converts into a slim free-arm model for sewing children's clothes, cuffs, trouser legs, and other hard-to-reach places. 12
-
 1
1 -
2
-
3
-
4
-
5
-
6
-
7
-
8
-
 9
9 -
 10
10 -
 11
11 -
 12
12 -
 13
13 -
 14
14 -
 15
15 -
 16
16 -
 17
17 -
 18
18 -
 19
19 -
20
-
21
-
22
-
23
-
24
-
25
-
26
-
27
-
28
-
29
-
30
-
31
-
32
-
33
-
34
-
35
-
36
-
37
-
38
-
39
-
40
-
41
-
42
-
43
-
44
-
45
-
46
-
47
-
48
-
49
-
50
-
51
-
52
-
53
-
54
-
55
-
56
-
57
-
58
-
59
-
60
 |
 |
