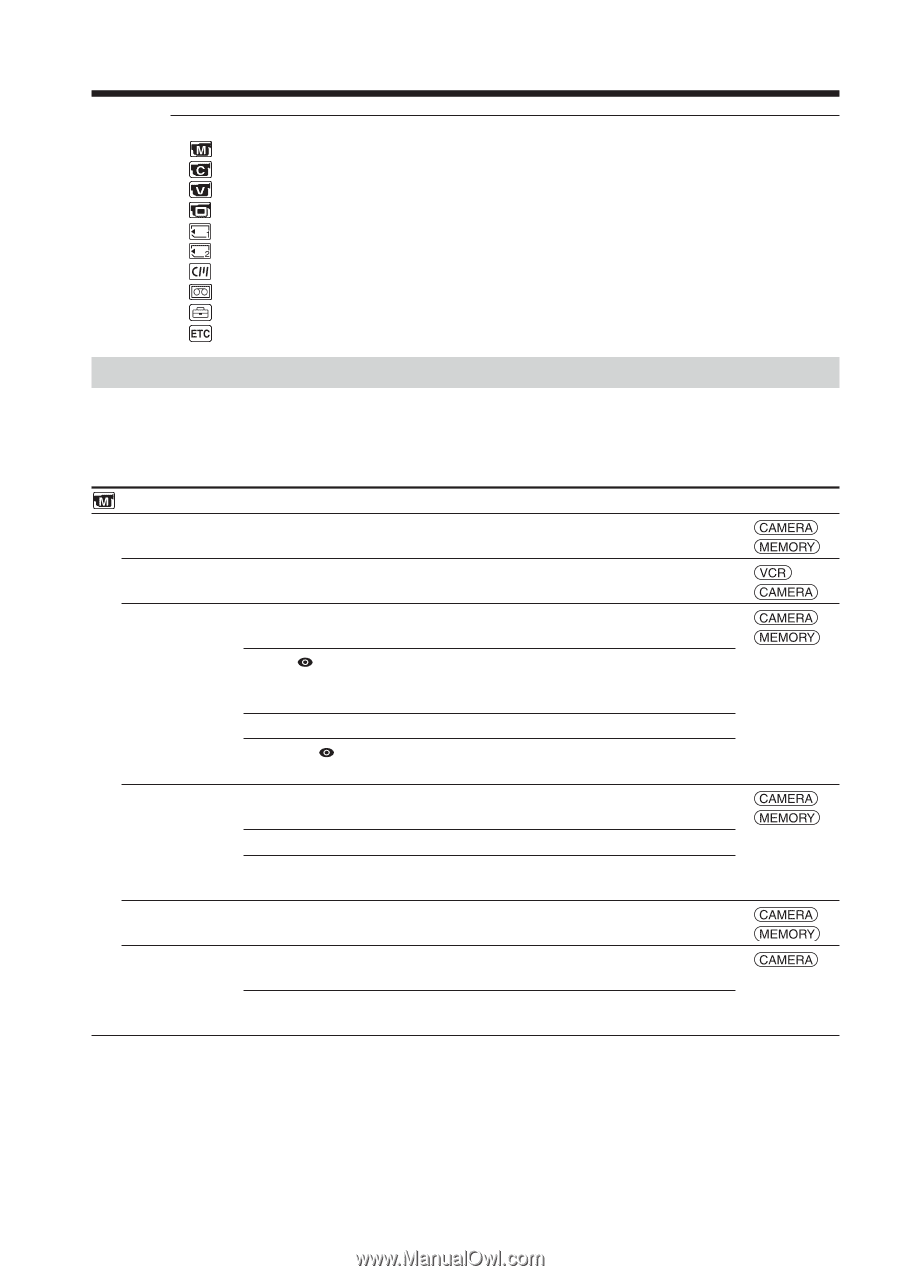
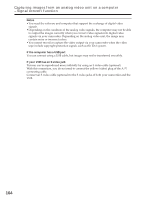
Sony DCR-TRV39 Operating Instructions (primary manual) - Page 168
Changing the menu settings, Selecting the mode setting of each item, Icon/item, MANUAL SET, PROGRAM AE
 |
View all Sony DCR-TRV39 manuals
Add to My Manuals
Save this manual to your list of manuals |
Page 168 highlights
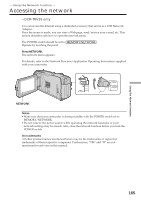
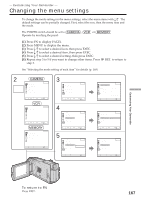
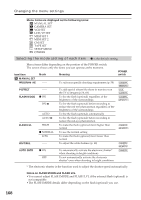
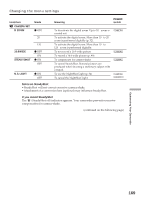
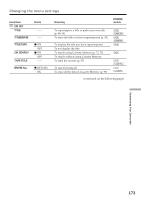
Changing the menu settings Menu items are displayed as the following icons: MANUAL SET CAMERA SET VCR SET LCD/VF SET MEM SET 1 MEM SET 2 CM SET TAPE SET SETUP MENU OTHERS Selecting the mode setting of each item z is the default setting. Menu items differ depending on the position of the POWER switch. The screen shows only the items you can operate at the moment. Icon/item MANUAL SET PROGRAM AE Mode -- Meaning To suit your specific shooting requirement (p. 58) POWER switch P EFFECT -- FLASH MODE z ON ON FLASH LVL WHT BAL AUTO AUTO HIGH z NORMAL LOW -- To add special effects like those in movies or on the TV to images (p.54, 68) To fire the flash (optional) regardless of the brightness of the surroundings To fire the flash (optional) before recording to reduce the red-eye phenomenon regardless of the brightness of the surroundings To fire the flash (optional) automatically To fire the flash (optional) before recording to reduce the red-eye phenomenon To make the flash (optional) level higher than normal To use the normal setting To make the flash (optional) level lower than normal To adjust the white balance (p. 48) AUTO SHTR z ON OFF To automatically activate the electronic shutter* when shooting in bright conditions To not automatically activate the electronic shutter* even when shooting in bright conditions * The electronic shutter is the function used to adjust the shutter speed automatically. Notes on FLASH MODE and FLASH LVL •You cannot adjust FLASH MODE and FLASH LVL if the external flash (optional) is not compatible. •The FLASH MODE details differ depending on the flash (optional) you use. 168
-
 1
1 -
2
-
3
-
4
-
5
-
6
-
7
-
8
-
9
-
10
-
11
-
12
-
13
-
14
-
15
-
16
-
17
-
18
-
19
-
20
-
21
-
22
-
23
-
24
-
25
-
26
-
27
-
28
-
29
-
30
-
31
-
32
-
33
-
34
-
35
-
36
-
37
-
38
-
39
-
40
-
41
-
42
-
43
-
44
-
45
-
46
-
47
-
48
-
49
-
50
-
51
-
52
-
53
-
54
-
55
-
56
-
57
-
58
-
59
-
60
-
61
-
62
-
63
-
64
-
65
-
66
-
67
-
68
-
69
-
70
-
71
-
72
-
73
-
74
-
75
-
76
-
77
-
78
-
79
-
80
-
81
-
82
-
83
-
84
-
85
-
86
-
87
-
88
-
89
-
90
-
91
-
92
-
93
-
94
-
95
-
96
-
97
-
98
-
99
-
100
-
101
-
102
-
103
-
104
-
105
-
106
-
107
-
108
-
109
-
110
-
111
-
112
-
113
-
114
-
115
-
116
-
117
-
118
-
119
-
120
-
121
-
122
-
123
-
124
-
125
-
126
-
127
-
128
-
129
-
130
-
131
-
132
-
133
-
134
-
135
-
136
-
137
-
138
-
139
-
140
-
141
-
142
-
143
-
144
-
145
-
146
-
147
-
148
-
149
-
150
-
151
-
152
-
153
-
154
-
155
-
156
-
157
-
158
-
159
-
160
-
161
-
162
-
 163
163 -
 164
164 -
 165
165 -
 166
166 -
 167
167 -
 168
168 -
 169
169 -
 170
170 -
 171
171 -
 172
172 -
 173
173 -
174
-
175
-
176
-
177
-
178
-
179
-
180
-
181
-
182
-
183
-
184
-
185
-
186
-
187
-
188
-
189
-
190
-
191
-
192
-
193
-
194
-
195
-
196
-
197
-
198
-
199
-
200
-
201
-
202
-
203
-
204
-
205
-
206
-
207
-
208
-
209
-
210
-
211
-
212
 |
 |