Sony DCR-TRV39 Operating Instructions (primary manual) - Page 30
Shooting with the mirror mode, Adjusting the brightness of the LCD screen, Recording a picture, BRT - features
 |
View all Sony DCR-TRV39 manuals
Add to My Manuals
Save this manual to your list of manuals |
Page 30 highlights
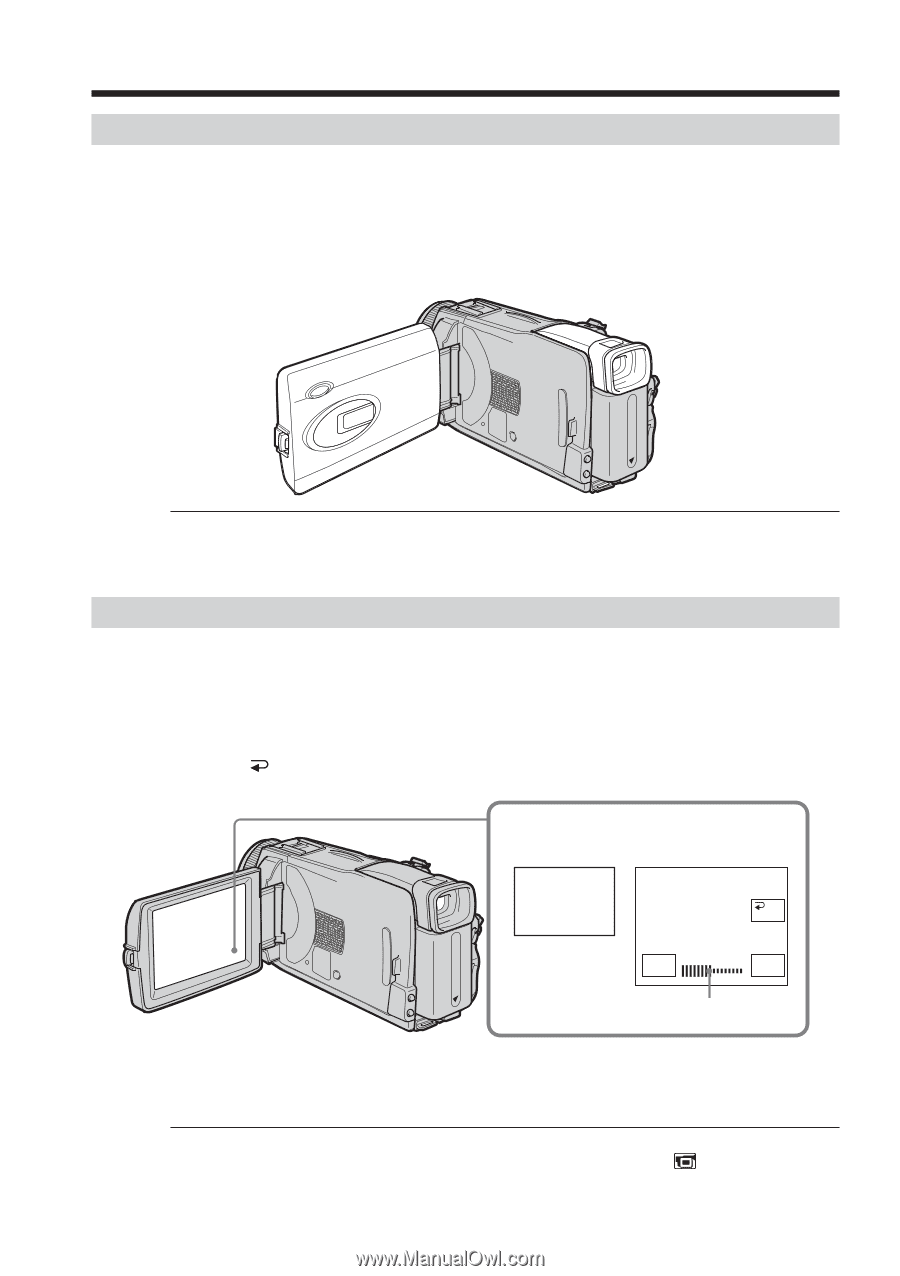
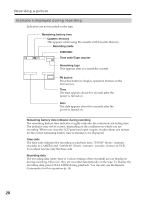
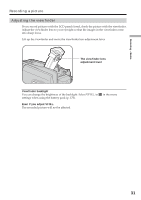
Recording a picture Shooting with the mirror mode This feature allows the camera subject to view him-or herself on the LCD screen. The subject uses this feature to check his or her own image on the LCD screen while you look at the subject in the viewfinder. (1) Set the POWER switch to CAMERA or MEMORY. (2) Rotate the LCD panel 180 degrees. Picture in the mirror mode The picture on the LCD screen is a mirror-image. However, the picture will be normal when recorded. Adjusting the brightness of the LCD screen (1) When the POWER switch is set to CAMERA, press FN and select PAGE2. When the POWER switch is set to VCR, press FN to display PAGE1. When the POWER switch is set to MEMORY, press FN and select PAGE3. (2) Press LCD BRT. The screen to adjust the brightness of the LCD screen appears. (3) Adjust the brightness of the LCD screen using - (to dim)/+ (to brighten). (4) Press OK to return to PAGE1/PAGE2/PAGE3 in step 1. 2,3 LCD BRT OK - LCD BRT + The bar indicator To return to FN Press EXIT. LCD screen backlight You can change the brightness of the backlight. Select LCD B.L. in settings when using the battery pack (p. 170). in the menu 30 Even if you adjust LCD BRT or LCD B.L. The recorded picture will not be affected.
-
 1
1 -
2
-
3
-
4
-
5
-
6
-
7
-
8
-
9
-
10
-
11
-
12
-
13
-
14
-
15
-
16
-
17
-
18
-
19
-
20
-
21
-
22
-
23
-
24
-
 25
25 -
 26
26 -
 27
27 -
 28
28 -
 29
29 -
 30
30 -
 31
31 -
 32
32 -
 33
33 -
 34
34 -
 35
35 -
36
-
37
-
38
-
39
-
40
-
41
-
42
-
43
-
44
-
45
-
46
-
47
-
48
-
49
-
50
-
51
-
52
-
53
-
54
-
55
-
56
-
57
-
58
-
59
-
60
-
61
-
62
-
63
-
64
-
65
-
66
-
67
-
68
-
69
-
70
-
71
-
72
-
73
-
74
-
75
-
76
-
77
-
78
-
79
-
80
-
81
-
82
-
83
-
84
-
85
-
86
-
87
-
88
-
89
-
90
-
91
-
92
-
93
-
94
-
95
-
96
-
97
-
98
-
99
-
100
-
101
-
102
-
103
-
104
-
105
-
106
-
107
-
108
-
109
-
110
-
111
-
112
-
113
-
114
-
115
-
116
-
117
-
118
-
119
-
120
-
121
-
122
-
123
-
124
-
125
-
126
-
127
-
128
-
129
-
130
-
131
-
132
-
133
-
134
-
135
-
136
-
137
-
138
-
139
-
140
-
141
-
142
-
143
-
144
-
145
-
146
-
147
-
148
-
149
-
150
-
151
-
152
-
153
-
154
-
155
-
156
-
157
-
158
-
159
-
160
-
161
-
162
-
163
-
164
-
165
-
166
-
167
-
168
-
169
-
170
-
171
-
172
-
173
-
174
-
175
-
176
-
177
-
178
-
179
-
180
-
181
-
182
-
183
-
184
-
185
-
186
-
187
-
188
-
189
-
190
-
191
-
192
-
193
-
194
-
195
-
196
-
197
-
198
-
199
-
200
-
201
-
202
-
203
-
204
-
205
-
206
-
207
-
208
-
209
-
210
-
211
-
212
 |
 |