Sony DG910 Instructions Manual - Page 85
Using the Remote, Programming the remote
 |
UPC - 027242707023
View all Sony DG910 manuals
Add to My Manuals
Save this manual to your list of manuals |
Page 85 highlights
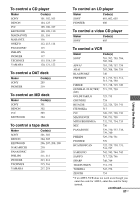
Recording onto a recording media You can record from a video component using the receiver. See the operating instructions supplied with your recording component. 1 Press one of the input buttons to select the playback component. You can also use INPUT SELECTOR on the receiver. 2 Prepare the playback component for playing. For example, insert the video tape you want to copy into the VCR. 3 Prepare the recording component. Insert a blank video tape, etc. into the recording component (connected to VIDEO 1 OUT or VIDEO 2/BD OUT jack) for recording. 4 Start recording on the recording component, then start playback on the playback component. Notes • Some sources contain copy guards to prevent recording. In this case, you may not be able to record from the source. • When DMPORT input is selected and you have assigned VIDEO 1 or VIDEO 2 input to DMPORT input, no video signals are output from the VIDEO 1 VIDEO OUT or VIDEO 2/BD VIDEO OUT jack. Using the Remote Programming the remote You can program the remote to control nonSony components by changing the code. Once the control signals have been memorized, you can use those components as part of your system. Furthermore, you can also program the remote for Sony components that the remote is unable to control. Note that the remote can only control components that accept infrared wireless control signals. 1 Press RM SET UP. The RM SET UP indicator slowly flashes. 2 Press the input button for the component you want to control. For example, if you are going to control a CD player, press SA-CD/CD. The RM SET UP indicator lights up. 3 Press the numeric buttons to enter the numeric code (or one of the codes if more than one code exists) corresponding to the component and the maker of the component you want to control (except TV). See the tables on page 87-90 for information on the numeric code(s) corresponding to the component and the maker of the component (the first digit and the last two digits of the numeric code correspond to the category and the maker's code respectively). Using the Remote continued 85US
-
 1
1 -
2
-
3
-
4
-
5
-
6
-
7
-
8
-
9
-
10
-
11
-
12
-
13
-
14
-
15
-
16
-
17
-
18
-
19
-
20
-
21
-
22
-
23
-
24
-
25
-
26
-
27
-
28
-
29
-
30
-
31
-
32
-
33
-
34
-
35
-
36
-
37
-
38
-
39
-
40
-
41
-
42
-
43
-
44
-
45
-
46
-
47
-
48
-
49
-
50
-
51
-
52
-
53
-
54
-
55
-
56
-
57
-
58
-
59
-
60
-
61
-
62
-
63
-
64
-
65
-
66
-
67
-
68
-
69
-
70
-
71
-
72
-
73
-
74
-
75
-
76
-
77
-
78
-
79
-
 80
80 -
 81
81 -
 82
82 -
 83
83 -
 84
84 -
 85
85 -
 86
86 -
 87
87 -
 88
88 -
 89
89 -
 90
90 -
91
-
92
-
93
-
94
-
95
-
96
-
97
-
98
-
99
-
100
 |
 |
