Sony HCD-HDX500 Operating Instructions
Sony HCD-HDX500 - Dvd/receiver Component For Home Theater System Manual
 |
View all Sony HCD-HDX500 manuals
Add to My Manuals
Save this manual to your list of manuals |
Sony HCD-HDX500 manual content summary:
- Sony HCD-HDX500 | Operating Instructions - Page 1
2-895-962-13(1) DVD Home Theatre System Operating Instructions DAV-HDX500/HDX501W ©2007 Sony Corporation - Sony HCD-HDX500 | Operating Instructions - Page 2
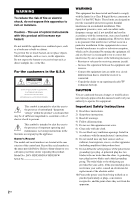
(servicing) instructions in Sony dealer regarding this product. Model No. DAV-HDX500/DAV-HDX501W manual could void your authority to operate this equipment. Important Safety Instructions 1) Read these instructions. 2) Keep these instructions. 3) Heed all warnings. 4) Follow all instructions - Sony HCD-HDX500 | Operating Instructions - Page 3
trouble. 13) Unplug this apparatus during lightning storms or when unused for long periods of time. 14) Refer all servicing to qualified service personnel. Servicing Thank you for purchasing Sony DVD Home Theatre System. Before operating this system, please read this manual thoroughly and retain it - Sony HCD-HDX500 | Operating Instructions - Page 4
Table of Contents Welcome 3 About This Manual 6 This System Can Play the Following Discs 6 Getting Started - BASIC - Step 1: Assembling the Speakers 10 Step 2: Connecting the System and TV 19 Step 3: Positioning the System ...24 Step 4: Performing the Quick Setup 24 Getting Started - ADVANCED - Sony HCD-HDX500 | Operating Instructions - Page 5
Remote Room 82 (SPEAKER FORMATION) Troubleshooting 96 Self-diagnosis Function 100 (When letters/numbers appear in the display) Specifications 101 Glossary 103 Language Code List 107 Index to Parts and Controls 108 Guide to the Control Menu Display ... 111 DVD Setup Display List 114 System - Sony HCD-HDX500 | Operating Instructions - Page 6
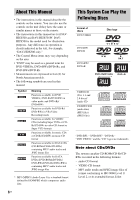
remote. • The instructions in this manual are for DAVHDX500 and DAV-HDX501W. DAVHDX500 is the model used for illustration purposes. Any difference in operation is clearly indicated in the text, for example, "DAV-HDX500 are trademarks. Note about CDs/DVDs The system can play CD-ROMs/CD-Rs/CDRWs - Sony HCD-HDX500 | Operating Instructions - Page 7
or JPEG image files • DVD-RAMs Also, the system cannot play the following discs: • A DVD VIDEO with a different region code (page 8, 105) • A disc that has a been correctly finalized. For more information, see the operating instructions for the recording device. Note that some playback functions may - Sony HCD-HDX500 | Operating Instructions - Page 8
DVDs labeled with the same region code. DVD VIDEOs labeled ALL will also play on this system. If you try to play any system plays DVDs and VIDEO CDs according to the disc contents the software producers designed, some playback features may not be available. Be sure to read the operating instructions - Sony HCD-HDX500 | Operating Instructions - Page 9
Getting Started - BASIC - Getting Started - BASIC - See Unpacking in Specifications, page 101. Inserting batteries into the remote You can control the system using the supplied remote. Insert two R6 (size AA) batteries by matching the 3 and # ends on the batteries to the markings inside the - Sony HCD-HDX500 | Operating Instructions - Page 10
jacks, see page 21. Note • Spread a cloth on the floor to avoid damaging the floor. Tip • You can use the speaker without the speaker stand by installing it on the wall (page 28). Use the screws illustrated below. Screw (small, black) Screw (small, silver) Screw (large, with washer) 1 Thread - Sony HCD-HDX500 | Operating Instructions - Page 11
Getting Started - BASIC - DAV-HDX500 Post (short) Bottom of the base 2 holes Speaker cord DAV-HDX501W , Top of the base (large) Post (long) Bottom of the base 2 holes Speaker cord , Top of the base (small) continued 11US - Sony HCD-HDX500 | Operating Instructions - Page 12
the post cover so that the slot of the post engages with the tab of the post cover, then secure with the screw. Thread the speaker cord through the hole of the post cover. Speaker cord , Hole Upper part of the post Post cover , Screw (small, black) 12US - Sony HCD-HDX500 | Operating Instructions - Page 13
the jack on the rear panel of speaker matches the color tube of the speaker cord. DAV-HDX500 Post cover Be careful the orientation of the post cover when placing the post. Secure 2 screws (large, with washer) in criss-cross pattern. Rear of the speaker , DAV-HDX501W Post cover Be careful the - Sony HCD-HDX500 | Operating Instructions - Page 14
cords to the speaker. Be sure to match the speaker cord to the appropriate terminal on the components: 3 to 3, and # to #. DAV-HDX500 Color tube Front speaker (L): White Front speaker (R): Red Rear of the speaker DAV-HDX501W Color tube Front speaker (L): White Front speaker (R): Red Rear of - Sony HCD-HDX500 | Operating Instructions - Page 15
part of the post aligns with the projection of the base, then secure the post with the 2 screws. DAV-HDX500 Getting Started - BASIC - Post Slit Projection Base DAV-HDX501W , Screws (small, silver) Post Slit Projection Base , Screws (small, silver) Note • Make sure that the slot on the - Sony HCD-HDX500 | Operating Instructions - Page 16
then secure the screws. Adjust the speaker of one side, then adjust another speaker by checking lines as a guide. Note • When adjusting the height of the speaker, grasp the speaker so that the speaker does not fall. DAV-HDX500 Lines Post , Loosen 2 screws. DAV-HDX501W In addition to the screws - Sony HCD-HDX500 | Operating Instructions - Page 17
Take up any speaker cord slack. DAV-HDX500 Take up slack in the speaker cord by pulling from the bottom of the base and hook the speaker cord in the cord clamp. Cord clamp , Secure the speaker cord by running it through the slot. Bottom of the base Adjust the length of the cord. DAV-HDX501W Take up - Sony HCD-HDX500 | Operating Instructions - Page 18
Fully-assembled illustration DAV-HDX500 Front speaker (L): White label Front speaker (R): Red label Getting Started - BASIC - White Red DAV-HDX501W Front speaker (L): White label Front speaker (R): Red label White Red 18US - Sony HCD-HDX500 | Operating Instructions - Page 19
BASIC - Step 2: Connecting the System and TV The following is the basic connection of the unit to the speakers and TV. For other TV connections 1 to 4 on the following pages. DAV-HDX500 Front speaker (R) Front speaker (L) Center speaker CENTER WOOFER SPEAKER AC power cord (mains lead) Subwoofer - Sony HCD-HDX500 | Operating Instructions - Page 20
L R Surround speaker (R) :Signal flow Surround speaker (L) Tip • When you install the wireless kit WAHT-SD1 (supplied with DAV-HDX501W only) in the DIR-TC1 slot, you can enjoy wireless performance. For details, see "Connecting Other Components" (page 34) and the operating instructions of the - Sony HCD-HDX500 | Operating Instructions - Page 21
the label of the jacks to be connected. To the SPEAKER jack Color tube (+) (-) Note • Do not catch the speaker cord insulation in the SPEAKER jack. To avoid short-circuiting the speakers Short-circuiting of the speakers may damage the system. To prevent this, be sure to follow these precautions - Sony HCD-HDX500 | Operating Instructions - Page 22
(not supplied) Yellow White (L/audio) Red (R/audio) Tip • When you want to output the TV sound or stereo sound of a 2 channel source from the 6 speakers, select the "Dolby Pro Logic," "Dolby Pro Logic II MOVIE," or "Dolby Pro Logic II MUSIC" sound field (page 42). 3 Connecting the Antenna (Aerial - Sony HCD-HDX500 | Operating Instructions - Page 23
(aerial) 4 Connecting the AC power cord (mains lead) Before connecting the AC power cord (mains lead) of this unit to a wall outlet (mains), connect the speakers to the unit. 23US - Sony HCD-HDX500 | Operating Instructions - Page 24
Setup Follow the steps below to make the minimum number of basic adjustments for using the system. "/1 C/X/x/c, DISPLAY Note • Do not set the speakers in an inclined position. • Do not place the speakers in locations that are: - Extremely hot or cold - Dusty or dirty - Very humid - Subject to - Sony HCD-HDX500 | Operating Instructions - Page 25
ENGLISH FRENCH SPANISH PORTUGUESE 5 Press X/x to select a language. The system displays the menu and subtitles in the selected language. 6 Press (page 82). SPEAKER FORMATION Note • When the wireless kit WAHT-SD1 (supplied with DAV-HDX501W only) is installed, [STANDARD (WIRELESS)] appears instead. - Sony HCD-HDX500 | Operating Instructions - Page 26
speaker settings. See "Getting Optimal Surround Sound for a Room" (page 82) and "Calibrating the Appropriate Settings Automatically" (page 84). • If you want to change any of the settings, see "Using the Setup Display" (page 86). To recall the Quick Setup display 1 Press DISPLAY when the system - Sony HCD-HDX500 | Operating Instructions - Page 27
. To turn off the demonstration, set the demonstration mode to off, then press "/1 on the remote. When the demonstration mode is set to off, the system saves power in standby mode. • If the system is at its factory default settings (ex. after performing "COLD RESET" (page 94)), you can turn off - Sony HCD-HDX500 | Operating Instructions - Page 28
16 inches) 4.6 mm (3/16 inch) 10 mm (13/32 inch) Hole on the back of the speaker 2 Fasten the screws to the wall. For the center speaker 265 mm (10 7/16 inches) 6 to 9 mm (1/4 to 3/8 inch) For the front speakers of DAV-HDX500 6 to 9 mm (1/4 to 3/8 inch) 170 mm (6 23/32 inches) For the front - Sony HCD-HDX500 | Operating Instructions - Page 29
the screws securely to a beam and fasten them to the wall. Install the speakers on a vertical and flat wall where reinforcement is applied. • Contact a screw installer regarding the wall material or screws to be used. • Sony is not responsible for accident or damage caused by improper installation, - Sony HCD-HDX500 | Operating Instructions - Page 30
D TV with HDMI* IN jack IN CENTER WOOFER SPEAKER To HDMI* OUT To S VIDEO FRONT R FRONT L SUR R SPEAKER SUR L DIR-TC1 COAXIAL OPTICAL DIGITAL IN SAT/CABLE jack * HDMI (high-definition multimedia interface) The system incorporates High-Definition Multimedia Interface (HDMITM) technology. - Sony HCD-HDX500 | Operating Instructions - Page 31
progressive format signals, you must use this connection and set the output channel of the system to progressive format (page 32). Green Blue Red D To connect to a TV with , refer also to the operating instructions supplied with the TV/projector, etc. 1 Press FUNCTION repeatedly to select " - Sony HCD-HDX500 | Operating Instructions - Page 32
this method, you need to connect to a TV that accepts progressive signals. VIDEO FORMAT FUNCTION "PROGRE" lights up in the front panel display when the system outputs progressive signals. 1 Press FUNCTION repeatedly to select "DVD." 32US - Sony HCD-HDX500 | Operating Instructions - Page 33
of the above conditions are not met. Note • When you connect the unit and the TV with the HDMI cord during the system is set to "NORMAL (INTERLACE)," the system is set to "PROGRESSIVE" automatically. Tip • When you connect the unit and the TV with the HDMI cord, VIDEO FORMAT is used - Sony HCD-HDX500 | Operating Instructions - Page 34
/CB PR/CR To SAT/CABLE (VIDEO IN/AUDIO IN) To SAT/CABLE (COMPONENT VIDEO IN) CENTER WOOFER SPEAKER To SAT/CABLE (DIGITAL IN OPTICAL) or (DIGITAL IN COAXIAL) FRONT R FRONT L SUR R SPEAKER SUR L DIR-TC1 slot for the WAHT-SD1 DIR-TC1 COAXIAL OPTICAL DIGITAL IN SAT/CABLE OUT (DVD ONLY - Sony HCD-HDX500 | Operating Instructions - Page 35
cord (not supplied). When connecting a cord, be sure to match the color-coded sleeves to the appropriate jacks on the components. Yellow (Video) White (L/audio page 77). To listen to the portable audio source sound through the system Connect the audio output jacks of the portable audio source to the - Sony HCD-HDX500 | Operating Instructions - Page 36
on the components. Green Blue Red Wireless system option When you install the WAHT-SD1 (supplied with DAV-HDX501W only) in the DIR-TC1 slot, you can enjoy wireless performance by transmission of the sound to the surround speakers. For details, see the operating instructions of the WAHT-SD1. Note - Sony HCD-HDX500 | Operating Instructions - Page 37
CD, some operations may be different or restricted. Refer to the operating instructions supplied with your disc. 1 Turn on your TV. 2 Switch the input selector on the TV to this system. 3 Press "/1. The system turns on. Unless the system is set to "DVD," press FUNCTION to select "DVD." Note • When - Sony HCD-HDX500 | Operating Instructions - Page 38
the system and TV with the HDMI cord, you can operate them simply, using the HDMI CONTROL function. For details, see the HDMI CONTROL Guide (supplied desired disc DISC 1-5 and A on the unit or Z on the remote. Replay the previous scene* (instant replay) during playback. Briefly fast forward - Sony HCD-HDX500 | Operating Instructions - Page 39
on the rear panel. Refer to the operating instructions supplied with the components for further information. Press FUNCTION repeatedly until "SAT/ CABLE" or "TV" appears in the front panel display. Each time you press FUNCTION, the mode of the system changes in the following sequence. DVD t TUNER FM - Sony HCD-HDX500 | Operating Instructions - Page 40
sound may be output from the TV. For details of the System Audio Control function, see the HDMI CONTROL Guide (supplied separately). • When you use both the SAT/CABLE or stereo sound of a 2 channel source from the 6 speakers, select the "PRO LOGIC," "PLII MOVIE," or "PLII MUSIC" sound field. For details - Sony HCD-HDX500 | Operating Instructions - Page 41
Selecting the Movie or Music Mode You can choose a suitable sound mode for movies or music. MOVIE/ MUSIC Press MOVIE/MUSIC during playback. Press MOVIE/MUSIC repeatedly until the mode you want lights up in the front panel display. The default setting is underlined. • AUTO: selects the mode - Sony HCD-HDX500 | Operating Instructions - Page 42
one of the system's preprogrammed sound fields. They bring exciting and powerful sound of movie theaters into your home. SOUND FIELD+/- audio playback of all types of discs from multiple speakers. Note • The sound is not output from multiple speakers depending on the source. • Depending on the - Sony HCD-HDX500 | Operating Instructions - Page 43
Sony's own DSP (Digital Signal Processor) technology to develop "Digital Cinema Sound." "Digital Cinema Sound" simulates in a home theater an ideal movie theater the front speakers "into" the screen. • Cinema Studio Reverberation Reproduces the reverberations peculiar to a movie theater. Cinema - Sony HCD-HDX500 | Operating Instructions - Page 44
and right speakers and subwoofer. Enjoying Multiplex Broadcast Sound (DUAL MONO) You can enjoy multiplex broadcast sound when the system receive or to Dolby Digital. Enjoying the surround sound by headphones x HEADPHONE THEATER This mode outputs the sound as surround from headphone L/R. This - Sony HCD-HDX500 | Operating Instructions - Page 45
(DVD VIDEO, DVD-R, DVD-RW, VIDEO CD only) Press /m or M/ when the system is in pause mode. To return to normal playback speed, press H. Each time you time (Freeze Frame) (DVD VIDEO, DVD-R, DVD-RW, VIDEO CD only) When the system is in the pause mode, press to go to the next frame. Press to go to - Sony HCD-HDX500 | Operating Instructions - Page 46
for. If you make a mistake Cancel the number by pressing CLEAR, then select another number. 5 Press . The system starts playback from the selected number. To search for a scene using the time code (DVD VIDEO and DVD-VR mode only) 1 In Step 2, select [TIME/TEXT]. [T **:**:**] (playing time of the - Sony HCD-HDX500 | Operating Instructions - Page 47
You Stopped the Disc (Resume Play) When you stop the disc, the system remembers the point where you pressed x and "RESUME" appears in the front -RWs in VR mode, VIDEO CDs, CDs, DATA CDs, and DATA DVDs, the system remembers the resume playback point for the current disc. • The resume point is cleared - Sony HCD-HDX500 | Operating Instructions - Page 48
the disc, press x twice, then press H. To enjoy a disc that is played before by resume playback (Multi-disc Resume) (DVD VIDEO, VIDEO CD only) This system stores the point where you stopped the disc for up to 40 discs and resumes playback the next time you insert the same disc. If - Sony HCD-HDX500 | Operating Instructions - Page 49
Various Functions for Playing Discs 4 Press c. The cursor moves to the track row [T] (in this case, [01]). PROGRAM ALL CLEAR 1. TRACK - - 2. TRACK - - 3. TRACK - - 4. TRACK - - 5. TRACK - - 6. TRACK - - 7. TRACK - - 0:00:00 T - - 01 02 03 04 05 06 5 Select the track you want to program. For - Sony HCD-HDX500 | Operating Instructions - Page 50
Playing in Random Order (Shuffle Play) You can have the system "shuffle" tracks. Subsequent "shuffling" may produce a different playing order. Note • Same song may be played repeatedly during MP3 playback. • You can shuffle the tracks on - Sony HCD-HDX500 | Operating Instructions - Page 51
Various Functions for Playing Discs Playing Repeatedly (Repeat Play) You can play all the titles, tracks or albums on a disc or a single title, chapter, track, or album repeatedly. You can use a combination of Shuffle or Program Play modes. 1 Press DISPLAY during playback. The Control Menu - Sony HCD-HDX500 | Operating Instructions - Page 52
the sound of the selected channel through both the right and left speakers. 1 Press AUDIO during playback. The following display appears. 1:ENGLISH displayed, they indicate a language code. Refer to "Language Code List" (page 107) to see which language the code represents. When the same language is - Sony HCD-HDX500 | Operating Instructions - Page 53
signals Audio signals recorded in a disc contain the sound elements (channels) shown below. Each channel is output from a separate speaker. • Front (L) • Front (R) • Center • Surround (L) • Surround (R) • Surround (Monaural): This signal can be either the Dolby Surround Sound processed signals or - Sony HCD-HDX500 | Operating Instructions - Page 54
can be created on recordable DVD players for editing ([PLAY LIST]). You can select the type of title to be played. 1 Press DISPLAY when the system is in stop mode. The Control Menu display appears. 2 Press X/x to select [ORIGINAL/ PLAY LIST], then press . The options for [ORIGINAL/PLAY LIST - Sony HCD-HDX500 | Operating Instructions - Page 55
time of the current track Note • Characters/marks may not be displayed for some languages. • Depending on the type of disc being played, the system can only display a limited number of characters. Also, depending on the disc, not all text characters will be displayed. Checking the play information - Sony HCD-HDX500 | Operating Instructions - Page 56
Bit rate* T 17:30 128k JAZZ RIVER SIDE Album name Track name * Appears when playing an MP3 audio track on DATA CDs/DATA DVDs. Checking the date information (JPEG only) You can check the date information during playback when the Exif* tag is recorded in the JPEG image data. Press DISPLAY twice - Sony HCD-HDX500 | Operating Instructions - Page 57
Various Functions for Playing Discs Displaying the Subtitles If subtitles are recorded on a disc, you can turn the subtitles on or off while playing. If multilingual subtitles are recorded on the disc, you can change the subtitle language while playing, or turn the subtitles on or off whenever you - Sony HCD-HDX500 | Operating Instructions - Page 58
9660 Level 1, Level 2 or Joliet format and DATA DVDs of Universal Disk Format (UDF) for the system to recognize the tracks (or files). You can also play discs recorded in Multi Session. See the operating instructions supplied with the CD-R/CD-RW or DVD-R/DVD-RW drives and the recording software (not - Sony HCD-HDX500 | Operating Instructions - Page 59
DATA DVD, or if there are more than 200 albums and 300 files in each album. • The system can recognize up to 200 albums, and will not play any albums beyond the 200th. • The system may take longer time to playback, when progressing to the following album or jump to other album - Sony HCD-HDX500 | Operating Instructions - Page 60
Playing DATA CDs or DATA DVDs with MP3 Audio Tracks and JPEG Image Files Selecting an MP3 audio track or album 1 Load a DATA CD or DATA DVD. The albums recorded on the DATA CD or DATA DVD appear. When an album is being played, its title is shaded. 3( 30) ROCK BEST HIT KARAOKE MY FAVOURITE SONG R&B - Sony HCD-HDX500 | Operating Instructions - Page 61
Various Functions for Playing Discs 2 Press X/x to select an album. x When selecting an album Press H to start playing the selected album. x When selecting an image Press PICTURE NAVI. Images of files in the album appear in 16 subscreens. To rotate a JPEG image When a JPEG image file is displayed - Sony HCD-HDX500 | Operating Instructions - Page 62
below. 1 Load a DATA CD or DATA DVD. 2 Press DISPLAY when the system is in stop mode. The Control Menu display appears. 3 Press X/x to select [MODE . 7 Press X/x to select the album you want and press H. The system starts playing the selected album. You can turn the album list on and - Sony HCD-HDX500 | Operating Instructions - Page 63
Various Functions for Playing Discs 3 Press X/x to select a setting. The default setting is underlined. • [NORMAL]: sets the duration to about 6 to 9 seconds. • [FAST]: sets the duration shorter than [NORMAL]. • [SLOW1]: sets the duration longer than [NORMAL]. • [SLOW2]: sets the duration longer - Sony HCD-HDX500 | Operating Instructions - Page 64
Step 3 may appear as [Press SELECT] in the operating instructions supplied with the disc. In this case, press H. Tip • To play without press ./> or the number buttons while the system is in stop mode to select a track, then press H or . The system starts continuous play. You cannot play still - Sony HCD-HDX500 | Operating Instructions - Page 65
ST" (for stereo program) appear in the front panel display. 3 Press SYSTEM MENU. 4 Press X/x repeatedly until "MEMORY" appears in the front panel the AM tuning interval, first tune in any AM station, then turn off the system by pressing "/1 on the unit. While holding down > on the unit, press - Sony HCD-HDX500 | Operating Instructions - Page 66
+ or - repeatedly. For automatic tuning, press and hold TUNING + or -. The automatic tuning stops automatically when the system receives the radio station. To stop the automatic tuning manually, press TUNING + or -. To listen to radio stations when you know the frequencies Use direct tuning in Step - Sony HCD-HDX500 | Operating Instructions - Page 67
page 67). Viewing the station name or frequency in the front panel display When the system is set to "TUNER FM" or "TUNER AM," you can check the frequency using a full listing of the XM commercial-free channels and advertising-supported channels, visit lineup.xmradio.com (US residents) or xmradio.ca - Sony HCD-HDX500 | Operating Instructions - Page 68
XM Mni-Tuner, connected the XM Dock to your XM Ready® home audio system, and installed the antenna, you are ready to subscribe and begin does not use the letters "I," "O," "S," or "F." Activate your XM Satellite Radio service in the U.S. online at http:// activate.xmradio.com or call 1-800-XMRADIO - Sony HCD-HDX500 | Operating Instructions - Page 69
Tuner Functions • "ONE CAT" : You can select a channel from one category. "CAT" lights up in the front panel display, when you set to "ONE CAT" mode. 2 Press CATEGORY + or - to select the category you want. The category is selected and the channel with the lowest number in the specified category is - Sony HCD-HDX500 | Operating Instructions - Page 70
7 Repeat 2 to 6 to preset another channel. 8 Press SYSTEM MENU. The system menu turns off. To change the preset number Restart from Step to 30. Note • The preset channel information will be updated depending on the service provided by the XM Satellite Radio Inc. that you have subscribed to. • When - Sony HCD-HDX500 | Operating Instructions - Page 71
connected. Try to disconnect the antenna then reconnect, or turn off the power then turn back on. UPDATING The encryption code is being updated. ,Wait until the encryption code has been updated. NO SIGNAL The signal strength is too weak. ,Adjust the antenna so that the signal strength is - Sony HCD-HDX500 | Operating Instructions - Page 72
Note • When you replace the batteries of the remote, the code number may reset itself to the default (SONY) setting. Reset the appropriate code number. Controlling TVs with the remote Press and hold TV [/1 while entering your TV's manufacturer's code (see the table) using the number buttons. Then - Sony HCD-HDX500 | Operating Instructions - Page 73
of the buttons above. • The TV mode turns off when you do not operate the remote for 10 seconds. Using the THEATRE SYNC Function THEATRE SYNC allows you to turn on your Sony TV and this system, changes the system mode to "DVD," and then switches the TV's input source you set with one - Sony HCD-HDX500 | Operating Instructions - Page 74
the remote to the direction of TV and this unit, then press THEATRE SYNC once. While transmitting the code from the remote, the 1 1.5 2 3 4 5 6 Note • This function is only for Sony TVs. (This function may not work on some Sony TVs.) • If distance between TV and this unit is too far, this function - Sony HCD-HDX500 | Operating Instructions - Page 75
DYNAMIC BASS. Bass frequencies are effectively reinforced. To turn off the sound effect Press DYNAMIC BASS again. Using the Sleep Timer You can set the system to turn off at a preset time, so you can fall asleep listening to music. You can preset the time in 1 or 10-minutes increments. Press - Sony HCD-HDX500 | Operating Instructions - Page 76
of the front panel display can be set to either of 2 levels. 1 Press SYSTEM MENU. 2 Press X/x repeatedly until "DIMMER" appears in the front panel display, then The front panel display and the Sony logo become dark. 4 Press . The setting is made. 5 Press SYSTEM MENU. The system menu turns off. 76US - Sony HCD-HDX500 | Operating Instructions - Page 77
connected component are played on the system or connected TV. For operation details, see the operating instructions of the DIGITAL MEDIA PORT adapter to operate a connected component using either the buttons on the remote or the unit. The following illustration shows an example of buttons that can be - Sony HCD-HDX500 | Operating Instructions - Page 78
lock function is activated, the buttons on the unit are locked and " " lights up in the front panel display. (You can operate the system by using the remote.) Note • When you operate the buttons on the unit while the child lock function is on, "CHILD LOCK" appears in the front panel display - Sony HCD-HDX500 | Operating Instructions - Page 79
) You can set two kinds of playback restrictions for the desired disc. • Custom Parental Control You can set playback restrictions so that the system will not play inappropriate discs. • Parental Control Playback of some DVD VIDEOs can be limited according to a predetermined level such as the age - Sony HCD-HDX500 | Operating Instructions - Page 80
2 Enter your 4-digit password using the number buttons, then press . The system is ready for playback. Tip • If you forget your password, enter the allows you to set a playback limitation level. 1 Press DISPLAY while the system is in stop mode. The Control Menu display appears. 2 Press X/x to - Sony HCD-HDX500 | Operating Instructions - Page 81
When you select [OTHERS t], select and enter a standard code in the table of "Parental Control Area Code List" (page 107) using the number buttons. 7 Press do not have the Parental Control function, playback cannot be limited on this system. • Depending on the disc, you may be asked to change the - Sony HCD-HDX500 | Operating Instructions - Page 82
cannot install. For the better surround sound, it is recommended that first you decide the position of the speakers. 1 Press FUNCTION repeatedly until "DVD" appears in the front panel display. 2 Press DISPLAY when the system is in stop mode. The Control Menu display appears. 3 Press X/x to select - Sony HCD-HDX500 | Operating Instructions - Page 83
normally. • [ALL FRONT]: when installing all the speakers in front of the listening position. Note • When the wireless kit WAHT-SD1 (supplied with DAV-HDX501W only) is installed, [STANDARD (WIRELESS)] appears instead. For details, see the operating instructions of the WAHT-SD1. • [NO CENTER]: when - Sony HCD-HDX500 | Operating Instructions - Page 84
Tip • When the wireless kit WAHT-SD1 (supplied with DAV-HDX501W only) is installed, [STANDARD (WIRED)] appears. For details, see the operating instructions of the WAHTSD1. 6 Press . The setting is made. 7 Press X/x to select [YES] or [NO], then press . • [YES]: continue with [AUTO CALIBRATION], see - Sony HCD-HDX500 | Operating Instructions - Page 85
the measurement (about one minute), to avoid measurement failure. During the measurement, test signals are output from the speakers. • The environment of the room in which the system is installed may affect measurements. • If an error message appears, follow the message, then select [YES]. An error - Sony HCD-HDX500 | Operating Instructions - Page 86
settings and not all the functions described may work. 1 Press FUNCTION repeatedly until "DVD" appears in the front panel display. 2 Press DISPLAY when the system is in stop mode. The Control Menu display appears. 3 Press X/x to select [SETUP], then press . The options for [SETUP] appear - Sony HCD-HDX500 | Operating Instructions - Page 87
displayed list: [LANGUAGE SETUP], [SCREEN SETUP], [CUSTOM SETUP], or [SPEAKER SETUP]. Then press . The Setup item is selected. Example: [SCREEN the system as it takes a few seconds to complete. Note • When you turn the system on after resetting and no disc is in the unit, the guide message - Sony HCD-HDX500 | Operating Instructions - Page 88
the language you selected for the sound track. Tip • If you select [OTHERS t] in [MENU], [AUDIO], and [SUBTITLE], select and enter a language code from "Language Code List" (page 107) using the number buttons. Note • When you select a language in [MENU], [AUDIO], or [SUBTITLE] that is not recorded - Sony HCD-HDX500 | Operating Instructions - Page 89
select [YCBCR]. x [SCREEN SAVER] The screen saver image appears when you leave the system in pause or stop mode for 15 minutes, or when you play back a CD, jacks. You cannot select this and the setting is not effective when the system outputs progressive signal. [OFF] [ON] Sets the black level of - Sony HCD-HDX500 | Operating Instructions - Page 90
CONTROL] Switches the HDMI CONTROL function on or off. This function is available when you connect the system and TV with the HDMI cord. For details on this function, see the HDMI CONTROL Guide (supplied separately). [OFF] [ON] Sets the HDMI CONTROL function to off. Sets the HDMI CONTROL function - Sony HCD-HDX500 | Operating Instructions - Page 91
on the disc, this function may not work.) • If PCM, DTS, Dolby Digital sound, and MPEG audio tracks have the same number of channels, the system selects PCM, DTS, Dolby Digital sound, and MPEG audio tracks in this order. x [MULTI-DISC RESUME] (DVD VIDEO/ VIDEO CD only) Switches the Multi-disc - Sony HCD-HDX500 | Operating Instructions - Page 92
and their distance from your listening position. Then use the test tone to adjust the level and the balance of the speakers to the same level. Select [SPEAKER SETUP] in the Setup Display. For details, see "Using the Setup Display" (page 86). The default settings are underlined. Note • You cannot - Sony HCD-HDX500 | Operating Instructions - Page 93
] setting.) Set this between -6.0 dB and +6.0 dB. To adjust the volume of all the speakers at one time Turn the VOLUME control on the unit, or press VOLUME +/- on the remote. x [TEST TONE] The speakers will emit a test tone to adjust [LEVEL (FRONT)] and [LEVEL (SURROUND)]. [OFF] [ON] The - Sony HCD-HDX500 | Operating Instructions - Page 94
select [ON], then press . You will hear the test tone from each speaker in sequence. 7 From your listening position, adjust the value of [LEVEL You can return the system parameters, such as preset stations, to the default settings. "/1 A x 1 Press "/1 to turn on the system. 2 Press x, A, - Sony HCD-HDX500 | Operating Instructions - Page 95
with very low level inputs or no audio signals. If you do, the speakers may be damaged when a peak level section is suddenly played. On cleaning • or benzine. If you have any questions or problems concerning your system, please consult your nearest Sony dealer. On cleaning discs, disc/lens cleaners • - Sony HCD-HDX500 | Operating Instructions - Page 96
you experience any of the following difficulties while using the system, use this troubleshooting guide to help remedy the problem before requesting repairs. Should any problem persist, consult your nearest Sony dealer. Note that if service personnel changes some parts during repair, these parts may - Sony HCD-HDX500 | Operating Instructions - Page 97
programs could affect picture quality. If you still experience problems even when you connect your unit directly to your speakers. Sound There is no sound. • The speaker cord is not connected securely. • Press MUTING on the remote if "MUTING ON" is displayed in the front panel display. • The system - Sony HCD-HDX500 | Operating Instructions - Page 98
• Check the speaker connections and settings remote are weak. The disc does not play. • There is no disc inserted. • The disc is upside down. Insert the disc with the playback side facing down. • The disc is skewed on the disc tray. • The system cannot play CD-ROMs, etc. (page 6). • The region code - Sony HCD-HDX500 | Operating Instructions - Page 99
remote and then start playback (page 47). • The title, DVD or PBC menu automatically appears on the TV screen. The system the operations above. See the operating instructions that came with the disc. Messages display. • Contact your Sony dealer or local authorized Sony service facility. [Data error] - Sony HCD-HDX500 | Operating Instructions - Page 100
see the HDMI CONTROL Guide (supplied separately). No sound is output from the system and TV while using the System Audio Control function. • system has performed the self- diagnosis function. ,Contact your nearest Sony dealer or local authorized Sony service facility and give the 5character service - Sony HCD-HDX500 | Operating Instructions - Page 101
/CR: 0.7 Vp-p 75 ohms HDMI OUT: Type A (19 pin) SAT/CABLE: 1 Vp-p 75 ohms COMPONENT: Y: 1 Vp-p 75 ohms PB/CB, PR/CR: 0.7 Vp-p 75 ohms Speakers (DAV-HDX500) Front (SS-TS74) Speaker system Two way, Bass reflex, magnetically shielded continued Additional Information 101US - Sony HCD-HDX500 | Operating Instructions - Page 102
6.5 kg (14 lb 6 oz) Speakers (DAV-HDX501W) Front (SS-TS73) Speaker system Bass reflex, magnetically shielded Speaker unit 65 mm (2 5/8 inches) dia, mA Dimensions (approx.) DAV-HDX500: 430 × 86 × 415 mm (17 × 3 1/2 × 16 3/8 inches) (w/h/d) incl. projecting parts DAV-HDX501W: 430 × 86 × - Sony HCD-HDX500 | Operating Instructions - Page 103
(2) • WAHT-SD1 (1) (DAV-HDX501W only) • Operating Instructions • HDMI CONTROL Guide • Speaker and TV connections (card) by Sony to automatically measure and adjusts the speaker settings to theater sound format is more advanced than Dolby Surround Pro Logic. In this format, the surround speakers - Sony HCD-HDX500 | Operating Instructions - Page 104
speakers and a center speaker. The surround speakers is an exclusive definition for this system.) A single file consists of a that are shown at movie theaters. Video based DVDs, such supports HDCP (High-bandwidth Digital Contents Protection), a copy protection technology that incorporates coding - Sony HCD-HDX500 | Operating Instructions - Page 105
frame is scanned twice alternately between the even numbered scanning lines and then odd numbered scanning lines, at 60 times per second. MPEG audio A coding system to compress digital audio signals. MPEG-1 is used for MP3 (MPEG-1 Audio Layer-3). MPEG-2 is used for one of the audio format of DVD - Sony HCD-HDX500 | Operating Instructions - Page 106
of VIDEO CDs. • Version 1.1: You can play only moving pictures and sounds. • Version 2.0: You can play high-resolution still pictures and enjoy PBC functions. This system conforms to both versions. 106US - Sony HCD-HDX500 | Operating Instructions - Page 107
Greek 1144 English 1145 Esperanto 1149 Spanish 1150 Estonian 1151 Basque 1157 Persian 1165 Finnish 1166 Fiji 1171 Faroese 1174 French 1181 Frisian Code Language 1183 Irish 1186 Scots Gaelic 1194 Galician 1196 Guarani 1203 Gujarati 1209 Hausa 1217 Hindi 1226 Croatian 1229 Hungarian 1233 Armenian - Sony HCD-HDX500 | Operating Instructions - Page 108
indicated in parentheses. Front panel A "/1 (on/standby) (37) B A (open/close) (37) C Disc operation (37) D FUNCTION (37) E Front panel display (110) F (remote sensor) (9) G PHONES jack (37) H VOLUME control (37) I AUDIO IN/A.CAL MIC jack (24, 34) J DISC 1-5 buttons/indicators (37) K Disc tray (37 - Sony HCD-HDX500 | Operating Instructions - Page 109
L VIDEO IN S VIDEO (DVD ONLY) Y PB/CB PR/CR COMPONENT VIDEO OUT VIDEO MONITOR OUT R AUDIO IN L TV XM DMPORT1 FM 75 COAXIAL ANTENNA DMPORT2 A SPEAKER jacks (19) B SAT/CABLE (DIGITAL IN COAXIAL) jack (34) C SAT/CABLE (COMPONENT VIDEO IN) jacks (34) D DIR-TC1 slot for the WAHT-SD1 (34) E SAT - Sony HCD-HDX500 | Operating Instructions - Page 110
(51) J Lights up when the child lock function is set to on. (78) K Lights up when the system outputs progressive signals (DVD function only). (32) L Indicates the selected [SPEAKER FORMATION]. (82) M Lights up when Digital Cinema Sound (DCS) is activated. (42) N Current surround format (Except for - Sony HCD-HDX500 | Operating Instructions - Page 111
Additional Information Guide to the Control Menu Display DISPLAY Use the Control Menu display to select a function and to view related information. Press DISPLAY repeatedly to turn on - Sony HCD-HDX500 | Operating Instructions - Page 112
played, the [ORIGINAL] one, or an edited [PLAY LIST]. [TIME/TEXT] (page 46) Checks the elapsed time and the remaining playback time. Input the time code for picture and music searching. Displays the DVD/CD text or the MP3 track name. 112US - Sony HCD-HDX500 | Operating Instructions - Page 113
and sound. [PARENTAL CONTROL] (page 79) Sets to prohibit playback on this system. [SETUP] (page 86) [QUICK] Setup (page 24) Use Quick Setup to the desired language of the on-screen display, the aspect ratio of the TV, speaker formation, and choose yes or no to start the Auto Calibration. [CUSTOM] - Sony HCD-HDX500 | Operating Instructions - Page 114
ON OFF OFF STANDARD MAX OFF ON SCREEN SETUP TV TYPE YCBCR/RGB (HDMI) SCREEN SAVER BACKGROUND BLACK LEVEL BLACK LEVEL (COMPONENT OUT) 4:3 OUTPUT SPEAKER SETUP 16:9 4:3 LETTER BOX 4:3 PAN SCAN YCBCR RGB ON OFF JACKET PICTURE GRAPHICS BLUE BLACK ON OFF OFF ON CONNECTION DISTANCE (FRONT) DISTANCE - Sony HCD-HDX500 | Operating Instructions - Page 115
Menu List You can set the following items with SYSTEM MENU on the remote. System menu MEMORY1) FM MODE2) NAME IN3) SLEEP DIMMER ILLUM MODE DEMO 4)"ATTENUATE" may not appear, depending on the selected function. 5)Appears when the wireless kit WAHT-SD1 is installed. Additional Information 115US - Sony HCD-HDX500 | Operating Instructions - Page 116
104 HDMI CONTROL 90 I ILLUM MODE 38 INDEX 46 Installing the speakers on a wall 28 Instant Advance 38 Instant Replay 38 INTERLACE 33 Interlace format 105 CONTROL 80 Parental Control 105 PAUSE MODE 91 PBC Playback 64 PCM (Pulse Code Modulation) 105 PICTURE NAVI 47, 61 PLAY LIST 54 Playback Control (PBC) - Sony HCD-HDX500 | Operating Instructions - Page 117
42 SPEAKER FORMATION 82 SPEAKER SETUP 92 CONNECTION 92 DISTANCE 92, 93 LEVEL 93 STB SYNCHRO 90 SUBTITLE 57, 88 SYSTEM MENU 27, 38, 39, 66, 75, 76, 78 System menu list 115 T TEST TONE 93 THEATRE SYNC 73 TIME/TEXT 46 TITLE 46 Title 105 TRACK 46 Track 105 TRACK SELECTION 91 Troubleshooting 96 - Sony HCD-HDX500 | Operating Instructions - Page 118
- Sony HCD-HDX500 | Operating Instructions - Page 119
Remote control ALPHABETICAL ORDER A - O ANGLE 5 (56) AUDIO** ed (52) CATEGORY +/- wg (68 P - Z PICTURE NAVI qh (47, 73) PRESET +/- 8 qd (66) SLEEP eh (75) SOUND FIELD +/-** 0 (42) SUBTITLE wf (57) SYSTEM MENU 7 (27, 39, 76, 115) THEATRE SYNC wa (74) TOOLS 7 (72) TUNING +/- wh e; (65) TV qs (72) TV CH - Sony HCD-HDX500 | Operating Instructions - Page 120
(1) Sony Corporation Printed in China
-
 1
1 -
 2
2 -
 3
3 -
 4
4 -
 5
5 -
 6
6 -
 7
7 -
8
-
9
-
10
-
11
-
12
-
13
-
14
-
15
-
16
-
17
-
18
-
19
-
20
-
21
-
22
-
23
-
24
-
25
-
26
-
27
-
28
-
29
-
30
-
31
-
32
-
33
-
34
-
35
-
36
-
37
-
38
-
39
-
40
-
41
-
42
-
43
-
44
-
45
-
46
-
47
-
48
-
49
-
50
-
51
-
52
-
53
-
54
-
55
-
56
-
57
-
58
-
59
-
60
-
61
-
62
-
63
-
64
-
65
-
66
-
67
-
68
-
69
-
70
-
71
-
72
-
73
-
74
-
75
-
76
-
77
-
78
-
79
-
80
-
81
-
82
-
83
-
84
-
85
-
86
-
87
-
88
-
89
-
90
-
91
-
92
-
93
-
94
-
95
-
96
-
97
-
98
-
99
-
100
-
101
-
102
-
103
-
104
-
105
-
106
-
107
-
108
-
109
-
110
-
111
-
112
-
113
-
114
-
115
-
116
-
117
-
118
-
119
-
120
 |
 |
©2007 Sony Corporation
2-895-962-
13
(1)
DVD Home Theatre
System
Operating Instructions
DAV-HDX500/HDX501W