Sony HCD-HDX500 Operating Instructions - Page 35
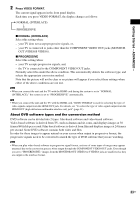
SAT/CABLE VIDEO IN/AUDIO IN jacks of this unit, To connect the DIGITAL MEDIA PORT adapter
 |
View all Sony HCD-HDX500 manuals
Add to My Manuals
Save this manual to your list of manuals |
Page 35 highlights
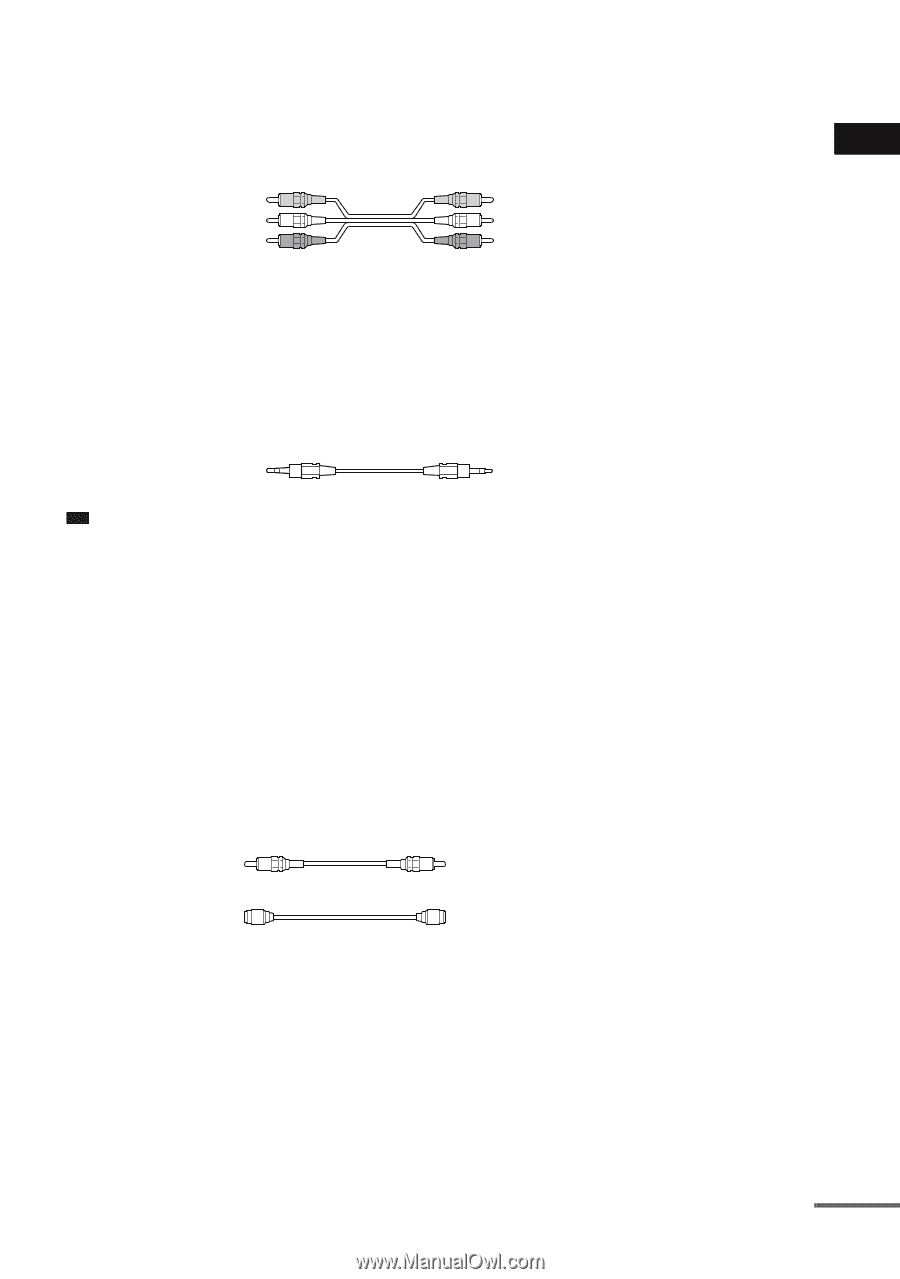
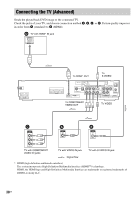
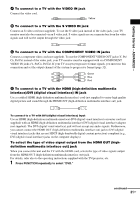
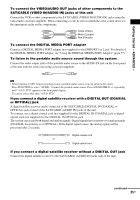
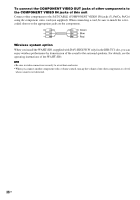
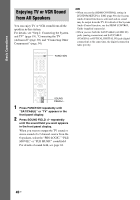
Getting Started - ADVANCED - To connect the VIDEO/AUDIO OUT jacks of other components to the SAT/CABLE (VIDEO IN/AUDIO IN) jacks of this unit Connect the VCR or other components to the SAT/CABLE (VIDEO IN/AUDIO IN) jacks using the video/audio cord (not supplied). When connecting a cord, be sure to match the color-coded sleeves to the appropriate jacks on the components. Yellow (Video) White (L/audio) Red (R/audio) To connect the DIGITAL MEDIA PORT adapter Connect a DIGITAL MEDIA PORT adapter (not supplied) to the DMPORT1 or 2 jack. For details of the DIGITAL MEDIA PORT adapter, see "Using the DIGITAL MEDIA PORT Adapter" (page 77). To listen to the portable audio source sound through the system Connect the audio output jacks of the portable audio source to the AUDIO IN jack on the front panel of the unit with the stereo mini-plug cord (not supplied). Tip • When listening to MP3 format recordings using a portable audio source, you can enhance the sound. Press FUNCTION to select "AUDIO." Connect the portable audio source. Press SOUND FIELD +/- repeatedly until "A.F.D. STD" appears in the front panel display. To cancel, select other than "A.F.D. STD." If you connect a digital satellite receiver with a DIGITAL OUT (COAXIAL or OPTICAL) jack A digital satellite receiver can be connected to the SAT/CABLE (DIGITAL IN COAXIAL or OPTICAL) jack instead of the SAT/CABLE (AUDIO IN) jacks of the unit. To connect, use a digital coaxial cord (not supplied) for the DIGITAL IN COAXIAL jack or digital optical cord (not supplied) for the DIGITAL IN OPTICAL jack. The system can accept both digital and analog signals. Digital signals have priority over analog signals. (COAXIAL has priority over OPTICAL.) If the digital signal ceases, the analog signal will be processed after 2 seconds. Digital coaxial cord or Digital optical cord If you connect a digital satellite receiver without a DIGITAL OUT jack Connect the digital satellite receiver to the SAT/CABLE (AUDIO IN) jacks only of the unit. continued 35US
-
 1
1 -
2
-
3
-
4
-
5
-
6
-
7
-
8
-
9
-
10
-
11
-
12
-
13
-
14
-
15
-
16
-
17
-
18
-
19
-
20
-
21
-
22
-
23
-
24
-
25
-
26
-
27
-
28
-
29
-
 30
30 -
 31
31 -
 32
32 -
 33
33 -
 34
34 -
 35
35 -
 36
36 -
 37
37 -
 38
38 -
 39
39 -
 40
40 -
41
-
42
-
43
-
44
-
45
-
46
-
47
-
48
-
49
-
50
-
51
-
52
-
53
-
54
-
55
-
56
-
57
-
58
-
59
-
60
-
61
-
62
-
63
-
64
-
65
-
66
-
67
-
68
-
69
-
70
-
71
-
72
-
73
-
74
-
75
-
76
-
77
-
78
-
79
-
80
-
81
-
82
-
83
-
84
-
85
-
86
-
87
-
88
-
89
-
90
-
91
-
92
-
93
-
94
-
95
-
96
-
97
-
98
-
99
-
100
-
101
-
102
-
103
-
104
-
105
-
106
-
107
-
108
-
109
-
110
-
111
-
112
-
113
-
114
-
115
-
116
-
117
-
118
-
119
-
120
 |
 |