Sony HCD-HDX500 Operating Instructions - Page 24
Step 3: Positioning the System, Positioning the speakers, Step 4: Performing the Quick Setup
 |
View all Sony HCD-HDX500 manuals
Add to My Manuals
Save this manual to your list of manuals |
Page 24 highlights
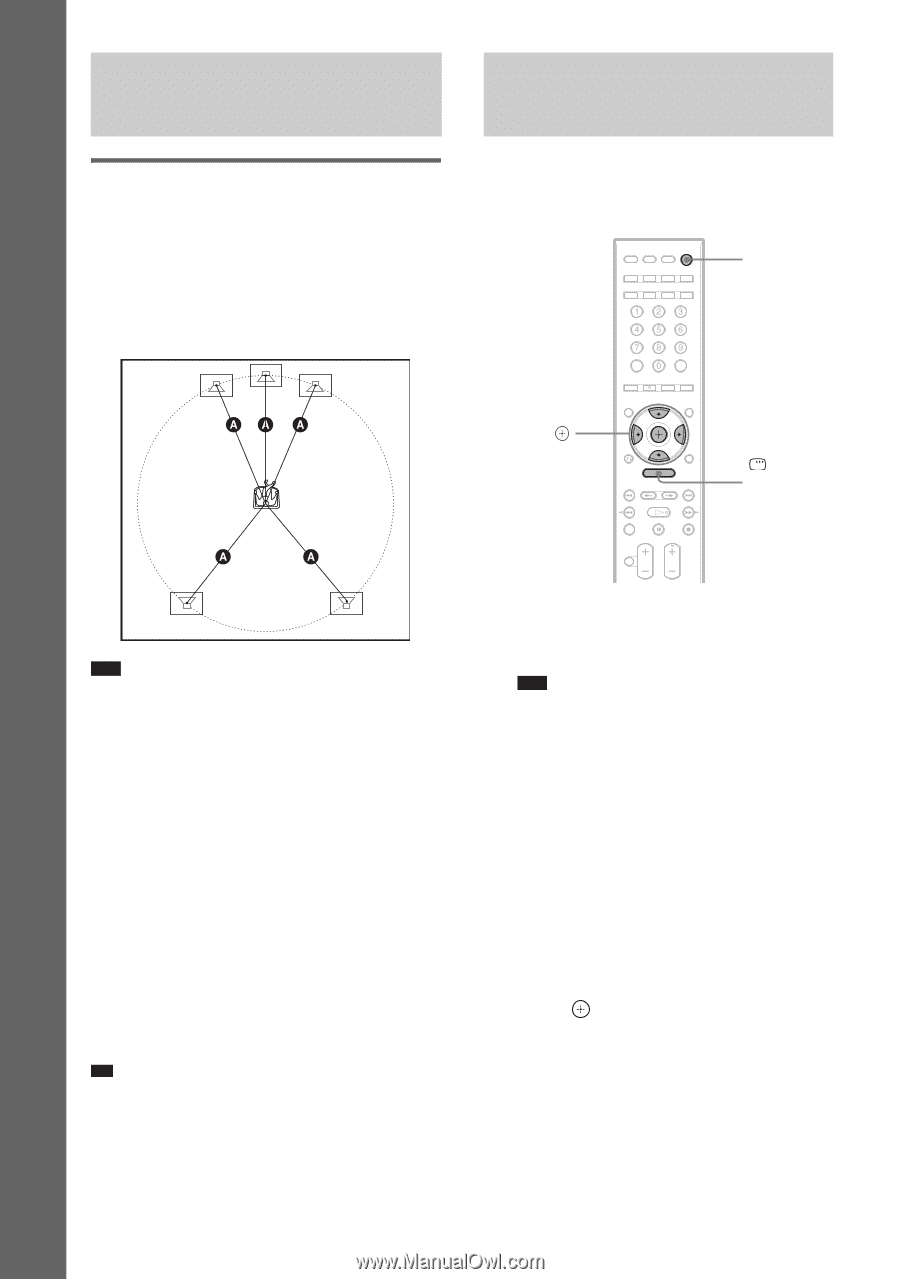
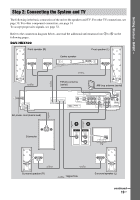
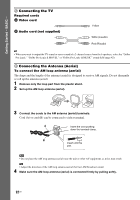
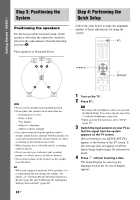
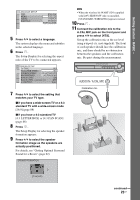
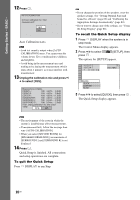
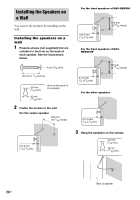
Getting Started - BASIC - Step 3: Positioning the System Positioning the speakers For the best possible surround sound, all the speakers other than the subwoofer should be placed at the same distance from the listening position (A). Place speakers as illustrated below. Step 4: Performing the Quick Setup Follow the steps below to make the minimum number of basic adjustments for using the system. "/1 C/X/x/c, DISPLAY Note • Do not set the speakers in an inclined position. • Do not place the speakers in locations that are: - Extremely hot or cold - Dusty or dirty - Very humid - Subject to vibrations - Subject to direct sunlight • Use caution when placing the speakers and/or speaker stands that are attached with the speakers on a specially treated (waxed, oiled, polished, etc.) floor, as staining or discoloration may result. • When cleaning, use a soft cloth such as a cleaning cloth for glasses. • Do not use any type of abrasive pad, scouring powder, or solvent such as alcohol or benzine. • Do not lean or hang on the speaker, as the speaker may fall down. Tip • When you change the positions of the speakers, it is recommended that you change the settings. For details, see "Getting Optimal Surround Sound for a Room" (page 82) and "Calibrating the Appropriate Settings Automatically" (page 84). 24US 1 Turn on the TV. 2 Press [/1. Note • Disconnect the headphones when you perform the Quick Setup. You cannot operate steps after 11 with the headphones connected. • Make sure that the function is set to "DVD" (page 37). 3 Switch the input selector on your TV so that the signal from the system appears on the TV screen. [Press [ENTER] to run QUICK SETUP.] appears at the bottom of the TV screen. If this message does not appear, recall the Quick Setup display (page 26) and perform again. 4 Press without inserting a disc. The Setup Display for selecting the language used in the on-screen display appears.
-
 1
1 -
2
-
3
-
4
-
5
-
6
-
7
-
8
-
9
-
10
-
11
-
12
-
13
-
14
-
15
-
16
-
17
-
18
-
 19
19 -
 20
20 -
 21
21 -
 22
22 -
 23
23 -
 24
24 -
 25
25 -
 26
26 -
 27
27 -
 28
28 -
 29
29 -
30
-
31
-
32
-
33
-
34
-
35
-
36
-
37
-
38
-
39
-
40
-
41
-
42
-
43
-
44
-
45
-
46
-
47
-
48
-
49
-
50
-
51
-
52
-
53
-
54
-
55
-
56
-
57
-
58
-
59
-
60
-
61
-
62
-
63
-
64
-
65
-
66
-
67
-
68
-
69
-
70
-
71
-
72
-
73
-
74
-
75
-
76
-
77
-
78
-
79
-
80
-
81
-
82
-
83
-
84
-
85
-
86
-
87
-
88
-
89
-
90
-
91
-
92
-
93
-
94
-
95
-
96
-
97
-
98
-
99
-
100
-
101
-
102
-
103
-
104
-
105
-
106
-
107
-
108
-
109
-
110
-
111
-
112
-
113
-
114
-
115
-
116
-
117
-
118
-
119
-
120
 |
 |