Sony HT-M5 Operating Instructions
Sony HT-M5 Manual
 |
View all Sony HT-M5 manuals
Add to My Manuals
Save this manual to your list of manuals |
Sony HT-M5 manual content summary:
- Sony HT-M5 | Operating Instructions - Page 1
Home Theatre System 4-415-789-91(2) Operating Instructions US Manual de instrucciones ES HT-M7/HT-M5/HT-M3 - Sony HT-M5 | Operating Instructions - Page 2
persons. This symbol is intended to alert the user to the presence of important operating and maintenance (servicing) instructions in the literature accompanying the appliance. Important Safety Instructions 1) Read these instructions. 2) Keep these instructions. 3) Heed all warnings. 4) Follow all - Sony HT-M5 | Operating Instructions - Page 3
Manual • The instructions in this manual are for models HT-M7, HT-M5 and HT-M3. In this manual, the HT-M7 is used for illustration purposes unless stated otherwise. • The instructions in this manual SS-WP7M (2) The HT-M5 consists of: • Receiver STR-KM5 • Speaker system - Front speaker SS- - Sony HT-M5 | Operating Instructions - Page 4
Dolby* Digital and Pro Logic Surround and the DTS** Digital Surround System. * Manufactured under license from Dolby Laboratories. Dolby, Pro Logic . "WALKMAN" is a registered trademark of Sony Corporation. MICROVAULT is a trademark of Sony Corporation. Windows Media is either a registered trademark - Sony HT-M5 | Operating Instructions - Page 5
About This Manual 3 Supplied System Power-Off 45 Enjoying optimum sound field for the selected scene (Scene Select 45 Advanced Operations Switching between digital and analog audio (INPUT MODE 46 Using the setting menu 46 Additional Information Precautions 52 Troubleshooting 53 Specifications - Sony HT-M5 | Operating Instructions - Page 6
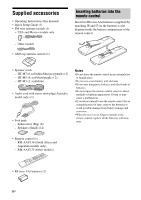
Supplied accessories • Operating Instructions (this manual) • Quick Setup Guide (1) • FM wire antenna (aerial) (1) - USA and of the remote control. • Speaker cords - HT-M7 (6, red/white/blue/grey/purple × 2) - HT-M5 (4, red/white/purple × 2) - HT-M3 (2, red/white) • Audio cord with stereo - Sony HT-M5 | Operating Instructions - Page 7
sw Description and location of parts Front panel * Except for South Africa and Argentina models. A ?/1 (on/standby) (page 30, 42) B INPUT SELECTOR (page 32, 33, 35, 37, 38, 39, 40, 46, 54) C INPUT SELECTOR indicator Flashes when you change the input source. D M-TURBO indicator Lights up when M- - Sony HT-M5 | Operating Instructions - Page 8
Indicators on the display panel 1 23 4 5 6 7 8 9 q; qa qs SW LFE HDMI DTS LCR COAX OPT SL S SR SBL SB SBR 96/24 USB LPCM PL II D ST SLEEP D.RANGE A Playback channel indicator The letters (L, C, R, etc.) indicate the channels being played back. Based on the speaker settings, the box - Sony HT-M5 | Operating Instructions - Page 9
station you select.) K D.RANGE Lights up when dynamic range compression is activated (page 49). L SLEEP Lights up when the Sleep Timer is activated (page 14). * HT-M7 only. ** Except for South Africa and Argentina models. 9US - Sony HT-M5 | Operating Instructions - Page 10
Rear panel HT-M7 HT-M5 10US - Sony HT-M5 | Operating Instructions - Page 11
HT-M3 A Audio signal section DIGITAL INPUT/OUTPUT jacks (page 22, 25, 26, 27) HDMI IN/OUT OPTICAL IN COAXIAL IN (page 22, 26, 28) High quality image Yellow VIDEO IN/OUT * You must connect the HDMI TV OUT or MONITOR OUT (HT-M7/HT-M5 only) jack to your TV to watch the selected input image (page 22 - Sony HT-M5 | Operating Instructions - Page 12
C ANTENNA section (page 29) FM ANTENNA jack AM ANTENNA terminal D SPEAKERS section (page 18, 19, 20) 12US - Sony HT-M5 | Operating Instructions - Page 13
Remote control Use the supplied remote control to operate this receiver and Sony TV. • RM-AAU136 (South Africa and Argentina models only) • RM-AAU135 (Other models) * The 5 and TV PROG + buttons have tactile dots. Use the tactile dots as references when operating the receiver. continued 13US - Sony HT-M5 | Operating Instructions - Page 14
same time. R MUTING Turns off the sound temporarily. Press MUTING again to restore the sound. S RETURN O Returns to the previous menu. T D.TUNING Enters direct tuning mode. To control a Sony TV A TV ?/1 (on/standby) Turns the TV on or off. M TV VOL +/- (RM-AAU136 only) Adjusts the TV volume. N TV - Sony HT-M5 | Operating Instructions - Page 15
the speaker connection using "T. TONE" in LEVEL menu (page 31). If the sound is not digital audio output setting on the connected equipment. For a Sony Blu-ray Disc player, check that "Audio (HDMI)", (with system software version 3.70). For details, refer to the operation instructions supplied with - Sony HT-M5 | Operating Instructions - Page 16
(HT-M7 only) We recommend that you place the surround back speakers on a speaker stand (not supplied). • (HT-M5/HT-M3 only) We recommend that you place the surround speakers on a speaker stand (not supplied). • For details about installing the speakers, please refer to the supplied Quick Setup Guide - Sony HT-M5 | Operating Instructions - Page 17
Attach the supplied foot pads to the bottom of the speakers and subwoofers to prevent vibration or movement. HT-M7: Center speaker, surround back speakers, subwoofers HT-M5/HT-M3: Center speaker, surround speakers, subwoofers • Since the subwoofer does not emit highly directional signals, you can - Sony HT-M5 | Operating Instructions - Page 18
2: Connecting the speakers Before connecting cords, be sure to disconnect the AC power cord (mains lead). HT-M7 Center speaker Surround back speaker Right Left Connector A A Right Left Surround speaker A Speaker cord (supplied) Right Left Front speaker 18US A Subwoofer - Sony HT-M5 | Operating Instructions - Page 19
Connections HT-M5 Center speaker Surround speaker Right Left Front speaker Right Left A Subwoofer A Connector A Speaker cord (supplied) continued 19US - Sony HT-M5 | Operating Instructions - Page 20
HT-M3 Center speaker Surround speaker Right Left Front speaker Right Left Subwoofer A Connector A Speaker cord (supplied) 20US - Sony HT-M5 | Operating Instructions - Page 21
to the speaker terminal on the receiver. Connector Speaker terminal Purple White Red SUBWOOFER FRONT L FRONT R Blue Grey Brown Tan Green * HT-M7 only. SURROUND L SURROUND R SURROUND BACK L* SURROUND BACK R* CENTER To connect the speakers correctly Check the speaker type by referring to - Sony HT-M5 | Operating Instructions - Page 22
lead). Audio/Video signals TV Video signals1) Audio signals or A2) 3) B C D4) A HDMI cable (not supplied) Sony recommends that you use an HDMI- authorized cable or Sony HDMI cable. B Component video cord (not supplied) C Video cord (not supplied) D Audio cord (not supplied) Recommended - Sony HT-M5 | Operating Instructions - Page 23
monitor or a projector to the HDMI TV OUT or MONITOR OUT (HT-M7/HT-M5 only) jack on the receiver. You may not be able to your TV does not support System Audio Control function, set the "AUDIO.OUT" to "TV+AMP" in the HDMI menu (page 51). 4a: instructions of each connected equipment for details. 23US - Sony HT-M5 | Operating Instructions - Page 24
When connecting cords • Before connecting cords, be sure to disconnect the AC power cord (mains lead). • It is not necessary to connect all the cords. Connect according to the availability of jacks on the connected equipment. • Use a High Speed HDMI cable. If you use a Standard HDMI cable, 1080p, - Sony HT-M5 | Operating Instructions - Page 25
player Audio/video signals PlayStation 3 Audio/video signals Satellite tuner, cable TV tuner Audio/video signals TV, etc. Audio/video signals A A A A A HDMI cable (not supplied) Sony recommends that you use an HDMIauthorized cable or - Sony HT-M5 | Operating Instructions - Page 26
Connecting equipment with jacks other than HDMI jacks HT-M7/HT-M5 PlayStation 3 Audio signals Video signals Blu-ray Disc player, DVD player Audio signals Video signals Satellite tuner, cable TV tuner Video signals Audio signals A B C D EF - Sony HT-M5 | Operating Instructions - Page 27
Connections HT-M3 PlayStation 3 Audio signals Video signals Blu-ray Disc player, DVD player Audio signals Video signals Satellite tuner, cable TV tuner Audio signals Video signals A B A - Sony HT-M5 | Operating Instructions - Page 28
, you must make this connection (page 37). ** HT-M7/HT-M5 only. Note (HT-M3 only) Be sure to connect the video output of the VCR or DVD recorder to the TV, so that the image is displayed on the TV. For details, refer to the operating instructions of the connecting equipment. A Audio cord (not - Sony HT-M5 | Operating Instructions - Page 29
Connections Connecting a USB device (Except for South Africa and Argentina models) 5: Connecting the antennas (aerials) Before connecting antennas (aerials), be sure to disconnect the AC power cord (mains lead). FM wire antenna (aerial) (supplied) AM loop antenna (aerial) (supplied) A USB device - Sony HT-M5 | Operating Instructions - Page 30
Preparing the Receiver Setting the voltage selector If your receiver has a voltage selector on the rear panel, check that the voltage selector is set to the local power supply voltage. If not, use a screwdriver to set the selector to the correct position before connecting the AC power cord to a wall - Sony HT-M5 | Operating Instructions - Page 31
(TEST TONE) You can adjust the speaker levels and balance while listening to the test tone from your seating position. 1 Press AMP MENU. 2 Press V/v repeatedly to select "SPKR", then press or b. 3 Press V/v repeatedly to select "SUR SPK", then press or b. 4 Press V/v repeatedly to select the - Sony HT-M5 | Operating Instructions - Page 32
represent a speaker channel. 5 Adjust the speaker levels and balance. Use the LEVEL menu (page 49) to adjust the speakers to have the same sounding test tone not be connected securely. • The speaker cords may have the short-circuit problem. • The MASTER VOLUME may has set to "VOL MIN". Basic - Sony HT-M5 | Operating Instructions - Page 33
input button which you want to create an index name. You can also use INPUT SELECTOR on the receiver. 2 Press AMP MENU. 3 Press V/v repeatedly to select "SYSTEM", then press or b. 4 Press V/v repeatedly to select "NAME IN", then press or b. The cursor flashes and you can enter a character. 5 Press - Sony HT-M5 | Operating Instructions - Page 34
", ".3gp", ".mp4" ".wma" * The receiver does not play files encoded with DRM. Compatible USB devices You can use the following Sony USB devices on this receiver. Verified Sony USB device Product name Model name Walkman® NWZ-S754 / S755 NWZ-E453 / E454 / E455 NWZ-E353 / E354 / E355 NWZ-B133 - Sony HT-M5 | Operating Instructions - Page 35
the USB device. • When USB cable connection is necessary, connect the USB cable supplied with the USB device to be connected. Refer to the operating instructions supplied with the USB device to be connected for details on the operation method. • Do not connect the receiver and the USB device through - Sony HT-M5 | Operating Instructions - Page 36
ERROR The memory of the USB device could not be recognized (page 34). NO SUPPORT An unsupported USB device is connected, an unknown device is connected, or the USB of the receiver status such as sound field. Input buttons AMP MENU DISPLAY 1 Press the corresponding input button which you want to - Sony HT-M5 | Operating Instructions - Page 37
to the operating instructions supplied with your recording equipment. 1 Prepare the source for playing. Press the input button to select the source. You can also use INPUT SELECTOR on the receiver. Example 1 (audio recording): Press SA-CD/CD. Example 2 (video recording - HT-M7/ HT-M5 only): Press - Sony HT-M5 | Operating Instructions - Page 38
50 kHz and Mexico Australia, South Africa, 50 kHz Middle East, India, Thailand, Singapore and Europe AM 10 kHz* 10 kHz* 9 kHz ). TUNER1)/ FM2) Numeric buttons D.TUNING , V/v/B/b FM MODE AM2) ENTER AMP MENU TUNING +/- Tuning to a station automatically (Automatic Tuning) 1 Press TUNER repeatedly ( - Sony HT-M5 | Operating Instructions - Page 39
You can change the AM tuning scale to either 9 kHz or 10 kHz. 1 Press TUNER repeatedly (or press AM) to select AM. 2 Press AMP MENU. 3 Press V/v repeatedly to select "TUNER", then press or b. 4 Press V/v repeatedly to select "AM STEP", then press or b. 5 Press V/v repeatedly to select the AM tuning - Sony HT-M5 | Operating Instructions - Page 40
can also use INPUT SELECTOR on the receiver. 2 Tune to the preset station you want to create an index name for (page 40). 3 Press AMP MENU. 40US - Sony HT-M5 | Operating Instructions - Page 41
repeatedly to select "MOVIE A". Enjoying Surround Sound Digital audio formats supported by the receiver Digital audio formats that this receiver can decode depend playback equipment does not correspond to the format. For details, refer to the operating instructions of the playback equipment. 41US - Sony HT-M5 | Operating Instructions - Page 42
supports the Control for HDMI function. By connecting Sony equipment that is compatible with the "BRAVIA" Sync with an HDMI cable (not supplied), operation is simplified as follows: • One-Touch Play (page 44) • System Audio Control (page 44) • System the operating instructions of the equipment. 42US - Sony HT-M5 | Operating Instructions - Page 43
When the setup is completed, "COMPLETE" will appear on the display panel. For details on setting the TV, refer to the operating instructions supplied with TV. • If the connected equipment do not support the "Control for HDMI-Easy Setting", but still supports the Control for HDMI then you need to set - Sony HT-M5 | Operating Instructions - Page 44
to your TV setting, refer to the operating instructions of the TV. • When "CTRL.HDMI" is set to "CTRL ON", the "AUDIO.OUT" settings in the HDMI menu will set automatically based on the System Audio Control settings. • Your TV must support the System Audio Control function. • If the TV is turned - Sony HT-M5 | Operating Instructions - Page 45
equipment connected via HDMI are turned off. Notes • Set the TV power supply interlock function to on before using the System Power-Off function. For details, refer to the operating instructions of the TV. • Depending on the connected equipment, it may not be turned off. For details, refer to the - Sony HT-M5 | Operating Instructions - Page 46
intend to watch. 1 Press input button to select the input source. You can also use the INPUT SELECTOR on the receiver. 2 Press AMP MENU. 3 Press V/v repeatedly to select "AUDIO", then press or b. 4 Press V/v repeatedly to select "IN MODE", then press or b. 5 Press V/v repeatedly to select the audio - Sony HT-M5 | Operating Instructions - Page 47
either unavailable or fixed and unchangeable. Overview of the menus The following options are available in each menu. For details, see the referencing page in the parentheses. Menu [Display] LEVEL [LEVEL] (page 49) Parameters [Display] Test tone [T. TONE] Front speaker balance [FRT BAL] Center - Sony HT-M5 | Operating Instructions - Page 48
Menu [Display] SPEAKER [SPKR] (page 50) EQ [EQ] (page 50) TUNER [TUNER] (page 50) AUDIO [AUDIO] (page 50) HDMI [HDMI] (page 51) 48US Parameters [Display] Settings - Sony HT-M5 | Operating Instructions - Page 49
SBR, SW - HT-M3/HT-M5 only: FL, FR, CNT, SL, SR, SW b)HT-M7 only. c)USA, Latin America, Argentina and Mexico models only. d)You can only select this parameter if the sound field is set to "MOVIE A" and surround speaker position is set to "REAR". e)USA model only. f) Other models. LEVEL menu You can - Sony HT-M5 | Operating Instructions - Page 50
not placed in equal distance from your seating position, set the distance to the closest speaker. * HT-M7 only. EQ menu You can adjust the tonal quality (bass/treble level) of the front speakers. x BASS x TREBLE TUNER menu You can name the preset stations. x NAME IN Lets you set the name of preset - Sony HT-M5 | Operating Instructions - Page 51
MOVIE A" is selected. - Surround speaker position is set to "REAR". HDMI menu You can make the required settings for equipment connected to the HDMI jack. from the receiver's HDMI TV OUT jack. Sony recommends this setting if you use a "BRAVIA" Sync compatible Sony TV. This setting saves power in the - Sony HT-M5 | Operating Instructions - Page 52
SYSTEM menu You can customize the settings of the receiver. x DIMMER Lets you adjust outlet, contact your dealer. • The AC power cord (mains lead) must be changed only at a qualified service shop. On heat buildup Although the receiver heats up during operation, this is not a malfunction. If you - Sony HT-M5 | Operating Instructions - Page 53
you experience any of the following difficulties while using the receiver, use this troubleshooting guide to help you remedy the problem. Should any problem persist, consult your nearest Sony dealer. Note that if service personnel changes some parts during repair, these parts may be retained. Power - Sony HT-M5 | Operating Instructions - Page 54
set up the equipment. Refer to the operating instructions supplied with each equipment. • Be sure PASS.THRU" is set to "ON" in the HDMI menu if you connect equipment not compatible with the "BRAVIA" signals via HDMI IN and COMPONENT VIDEO IN (HT-M7/ HT-M5 only) jacks cannot be recorded. • Copyright - Sony HT-M5 | Operating Instructions - Page 55
equipment. Check the setup of the connected , check the specification of the connected instructions of the playback equipment. • Make sure the TV is compatible with the System Audio Control function. • If the TV does not have System Audio Control function, set the "AUDIO.OUT" settings in the HDMI menu - Sony HT-M5 | Operating Instructions - Page 56
up the HDMI setting of the equipment and TV. Refer to the operating instructions supplied with each equipment and TV. - Change the input of the receiver enjoy. • Make sure "PASS.THRU" is set to "ON" in the HDMI menu if you connect equipment not compatible with the "BRAVIA" Sync to the receiver (page - Sony HT-M5 | Operating Instructions - Page 57
supported USB device (page 34). • The USB device does not work properly. Refer to the USB device operating instruction on how to deal with this problem. Professional format cannot be played back. • USB device formatted with file systems other than FAT16 or FAT32 are unsupported.* • If you use - Sony HT-M5 | Operating Instructions - Page 58
. Error messages If there is a malfunction, a message appears on the display panel. You can check the condition of the system by the message. If any problem persists, consult your nearest Sony dealer. If an error message appears while you use a USB device, see "USB message list" (page 36). PROTECT - Sony HT-M5 | Operating Instructions - Page 59
back speakers and subwoofers. Depending on the sound field settings and the source, there may be no sound output. • STR-KM5 AUDIO POWER SPECIFICATIONS POWER OUTPUT AND TOTAL HARMONIC DISTORTION: (USA model only) Front L + Front R: With 6 ohm loads, both channels driven, from 50 Hz - 20,000 Hz - Sony HT-M5 | Operating Instructions - Page 60
channel3) 3)Measured under the following conditions: Area Power requirements USA 120 V AC, 60 Hz South Africa, Latin 240 V AC, 50 Hz America, India Middle East 127 V AC, 60 Hz Argentina, Thailand 230 V AC, 50 Hz 4)Reference power output for front, center, surround speakers and subwoofers - Sony HT-M5 | Operating Instructions - Page 61
Full-speed Supported USB device Mass AC - 240 V AC, 50/60 Hz Australia 230 V AC, 50 Hz India 220 V AC - 240 V AC, 50/60 Hz Europe 230 V AC, oz) (STR-KM3) Speaker section • Front speaker for HT-M7/HT-M5 (SS-MSP7M) Speaker system 2-way, 3-driver, Bass reflex Speaker unit Woofer: 200 - Sony HT-M5 | Operating Instructions - Page 62
1/2 in) (with foot) Mass (Approx.) 6.7 kg (14 lb 13 oz) Design and specifications are subject to change without notice. • Surround back speaker for HT-M7/ Surround speaker for HT-M5/HT-M3 (SS-SRP7M) Speaker system Full range, Closed box Speaker unit Woofer: 100 mm (4 in), cone type Rated - Sony HT-M5 | Operating Instructions - Page 63
memory 30 D DVD player connecting 25, 26, 27 DVD recorder connecting 28 G GAMING 41 H HDMI connecting 25 I Initial setup 30 INPUT MODE 46 M Menu AUDIO 50 EQ 50 HDMI 51 LEVEL 49 SPEAKER 50 SYSTEM 52 TUNER 50 Message Error 58 USB 36 MOVIE A 41 MOVIE B 41 M-TURBO 7, 14 MUSIC 41 Muting 33 - Sony HT-M5 | Operating Instructions - Page 64
la parte posterior de la unidad. Registre esos números en el espacio suministrado a continuación. Menciónelos siempre que llame al distribuidor Sony respecto a este producto. Núm. modelo Núm. serie Este símbolo pretende alertar al usuario sobre la presencia de un "voltaje peligroso" no aislado en - Sony HT-M5 | Operating Instructions - Page 65
con el fin de cumplir los límites de emisiones de la FCC. Acerca de este manual • Las instrucciones de este manual corresponden a los modelos HT-M7, HT-M5 y HT-M3. A menos que se indique de otro modo, en este manual se utiliza el modelo HT-M7 para fines ilustrativos. • Las instrucciones de este - Sony HT-M5 | Operating Instructions - Page 66
El HT-M3 consta de: • Receptor Dobly* Digital y Pro Logic Surround y DTS** Digital Surround System. * Fabricado bajo licencia de Dolby Laboratories. Dolby, Pro Logic Sony Corporation. "BRAVIA" es una marca comercial de Sony Corporation. "PlayStation" es una marca comercial registrada de Sony - Sony HT-M5 | Operating Instructions - Page 67
Contenido Acerca de este manual 3 Accesorios suministrados 6 Descripción y ubicación de las piezas........... 7 Procedimientos iniciales 15 Conexiones 1: Instalación de los altavoces 16 2: Conexión de los altavoces 18 3: Conexión del televisor 22 - Sony HT-M5 | Operating Instructions - Page 68
Accesorios suministrados • Manual de instrucciones (este manual) • Guía de instalación rápida (1) • Antena monofilar de FM (1) - Solo modelos a distancia. • Cables de altavoz - HT-M7 (6, rojo/blanco/azul/gris/púrpura × 2) - HT-M5 (4, rojo/blanco/púrpura × 2) - HT-M3 (2, rojo/blanco) • Cable de - Sony HT-M5 | Operating Instructions - Page 69
altavoz de graves Descripción y ubicación de las piezas Panel frontal * Excepto modelos de Sudáfrica y Argentina. A ?/1 (encendido/en espera) (página 30, 43) B INPUT SELECTOR (página 32, 33, 35, 37, 38, 40, 40, 47, 56) C Indicador INPUT SELECTOR Parpadea cuando se cambia la fuente de entrada. D - Sony HT-M5 | Operating Instructions - Page 70
Indicadores de la pantalla 1 23 4 5 6 7 8 9 q; qa qs SW LFE HDMI DTS LCR COAX OPT SL S SR SBL SB SBR 96/24 USB LPCM PL II D ST SLEEP D.RANGE A Indicador del canal de reproducción Las letras (L, C, R, etc.) indican los canales que se están reproduciendo. Dependiendo de los ajustes de - Sony HT-M5 | Operating Instructions - Page 71
Se ilumina cuando se activa la compresión de rango dinámico (página 51). L SLEEP Se ilumina cuando se activa el temporizador de apagado (página 14). * HT-M7 solamente. ** Excepto modelos de Sudáfrica y Argentina. 9ES - Sony HT-M5 | Operating Instructions - Page 72
Panel posterior HT-M7 HT-M5 10ES - Sony HT-M5 | Operating Instructions - Page 73
HT-M3 A Sección de señales de audio Tomas de DIGITAL INPUT/OUTPUT (página 22, 25, 26, 27) HDMI IN/OUT VIDEO IN/OUT * Para ver la imagen de la entrada seleccionada, conecte al televisor la toma HDMI TV OUT o MONITOR OUT (HT-M7/HT-M5 solamente) (página 22). ** HT-M7/HT-M5 solamente. continúa 11ES - Sony HT-M5 | Operating Instructions - Page 74
C Sección ANTENNA (página 29) Toma FM ANTENNA Terminal AM ANTENNA D Sección SPEAKERS (página 18, 19, 20) 12ES - Sony HT-M5 | Operating Instructions - Page 75
Mando a distancia Utilice el mando a distancia suministrado para controlar este receptor y el televisor de Sony. • RM-AAU136 (Solo los modelos de Sudáfrica y Argentina) • RM-AAU135 (Otros modelos) * Los botones 5 y TV PROG + cuentan con puntos táctiles. Utilice los puntos táctiles - Sony HT-M5 | Operating Instructions - Page 76
Presintoniza o sintoniza las emisoras memorizadas (página 39). H AMP MENU Muestra el menú para el funcionamiento del receptor. I , anterior. T D.TUNING Accede al modo de sintonización directa. Para controlar un televisor Sony A TV ?/1 (encendido/en espera) Enciende o apaga el televisor. M TV VOL - Sony HT-M5 | Operating Instructions - Page 77
audio digital del equipo conectado. En el caso de un reproductor de discos Blu-ray de Sony, compruebe que "Audio (HDMI)", "Dolby Digital" y "DTS" se hayan ajustado a " software del sistema). Para obtener más información, consulte el manual de instrucciones suministrado con el equipo conectado. 15ES - Sony HT-M5 | Operating Instructions - Page 78
derecho) FAltavoz envolvente trasero (izquierdo) GAltavoz envolvente trasero (derecho) HAltavoz de graves Instalación de todos los altavoces en la posición frontal - HT-M7 - HT-M5/HT-M3 Instalación de los altavoces de sonido envolvente/altavoces envolventes traseros detrás de la posición de escucha - Sony HT-M5 | Operating Instructions - Page 79
, fije las almohadillas para las patas a la parte inferior de los altavoces y los altavoces de graves. HT-M7: Altavoz central, altavoces envolventes traseros, altavoces de graves HT-M5/HT-M3: Altavoz central, altavoces de sonido envolvente, altavoces de graves • Debido a que el altavoz de graves - Sony HT-M5 | Operating Instructions - Page 80
2: Conexión de los altavoces Antes de conectar los cables, asegúrese de desconectar el cable de alimentación de ca. HT-M7 Altavoz central Altavoz envolvente trasero Derecho Izquierdo Conector A A A Derecho Izquierdo Derecho Izquierdo Altavoz de sonido envolvente Altavoz frontal A Cable - Sony HT-M5 | Operating Instructions - Page 81
Conexiones HT-M5 Altavoz central Altavoz de sonido envolvente Derecho Izquierdo Altavoz frontal Derecho Izquierdo Altavoz de graves A A Conector A Cable de altavoz (suministrado) continúa 19ES - Sony HT-M5 | Operating Instructions - Page 82
HT-M3 Altavoz central Altavoz de sonido envolvente Derecho Izquierdo Altavoz frontal Derecho Izquierdo Altavoz de graves A Conector A Cable de altavoz (suministrado) 20ES - Sony HT-M5 | Operating Instructions - Page 83
del conector con el color del terminal de altavoz en el receptor. Conector Púrpura Blanco Rojo Azul Gris Marrón Bronceado Verde * HT-M7 solamente. Terminal de altavoz SUBWOOFER FRONT L FRONT R SURROUND L SURROUND R SURROUND BACK L* SURROUND BACK R* CENTER Para conectar correctamente los altavoces - Sony HT-M5 | Operating Instructions - Page 84
/vídeo Televisor Señales de vídeo1) Señales de audio o A2) 3) B C D4) A Cable HDMI (no suministrado) Sony recomienda utilizar un cable HDMI autorizado o un cable HDMI de Sony. B Cable de vídeo componente (no suministrado) C Cable de vídeo (no suministrado) D Cable de audio (no suministrado - Sony HT-M5 | Operating Instructions - Page 85
o un proyector a la toma HDMI TV OUT o MONITOR OUT (HT-M7/HT-M5 solamente) del receptor. Es posible que no pueda grabar aunque conecte un digital. Es posible simplificar las operaciones si se conectan equipos compatibles con Sony "BRAVIA" Sync mediante cables HDMI. Consulte "Funciones de "BRAVIA" - Sony HT-M5 | Operating Instructions - Page 86
• Si desea más información, consulte el manual de instrucciones de cada uno de los equipos conectados. Cuando conecta los cables • Antes de conectar los cables, asegúrese de desconectar el cable de - Sony HT-M5 | Operating Instructions - Page 87
Sintonizador de satélite, decodificador de televisión por cable Señales de audio/ vídeo Televisor, etc. Señales de audio/ vídeo A A A A A Cable HDMI (no suministrado) Sony recomienda utilizar un cable HDMI autorizado o un cable HDMI de - Sony HT-M5 | Operating Instructions - Page 88
Conexión de equipos con tomas que no sean tomas HDMI HT-M7/HT-M5 PlayStation 3 Señales de Señales de vídeo audio Reproductor de discos Blu-ray, lector de DVD Señales de Señales de vídeo audio - Sony HT-M5 | Operating Instructions - Page 89
Conexiones HT-M3 PlayStation 3 Señales de audio Señales de vídeo Reproductor de discos Blu-ray, lector de DVD Señales de audio Señales de ví - Sony HT-M5 | Operating Instructions - Page 90
HT-M5 solamente. Nota (HT-M3 solamente) Para que la imagen se visualice en el televisor, la salida de vídeo de la videograbadora o grabadora de DVD se debe conectar al televisor. Para obtener más información, consulte el manual de instrucciones suministrado con el equipo conectado. A Cable de audio - Sony HT-M5 | Operating Instructions - Page 91
Conexiones Conexión de un dispositivo USB (Excepto modelos de Sudáfrica y Argentina) 5: Conexión de las antenas Antes de conectar las antenas, asegúrese de desconectar el cable de alimentación de ca. Antena monofilar de FM (suministrada) Antena cerrada de AM (suministrada) A Dispositivo USB A - Sony HT-M5 | Operating Instructions - Page 92
Preparación del receptor Ajuste del selector de voltaje Si su receptor dispone de un selector de voltaje en el panel posterior, verifique que esté ajustado al voltaje de suministro de energía local. Si no lo está, antes de conectar el cable de alimentación de ca a la toma de corriente de la pared, - Sony HT-M5 | Operating Instructions - Page 93
la posición de los altavoces de sonido envolvente de acuerdo con la configuración de los altavoces. , V/v/B/b AMP MENU 1 Pulse AMP MENU. 2 Pulse V/v varias veces para seleccionar "SPKR" y, a continuación, pulse o b. 3 Pulse V/v varias veces para seleccionar "SUR SPK" y, a continuación, pulse - Sony HT-M5 | Operating Instructions - Page 94
pudo haberse ajustarse a "VOL MIN". Operaciones básicas Reproducción en un equipo fuente de entrada , V/v/B/b Botones de entrada MOVIE, MUSIC, GAMING AMP MENU MASTER VOL +/- MUTING 1 Pulse el botón de entrada que corresponda con el equipo que desee. También puede utilizar INPUT SELECTOR en el - Sony HT-M5 | Operating Instructions - Page 95
cual desea crear un nombre de índice. También puede utilizar INPUT SELECTOR en el receptor. 2 Pulse AMP MENU. 3 Pulse V/v varias veces para seleccionar "SYSTEM" y, a continuación, pulse o b. 4 Pulse V/v varias veces para seleccionar "NAME IN" y, a continuación, pulse o b. El cursor destellará y podr - Sony HT-M5 | Operating Instructions - Page 96
* Este receptor no reproduce archivos codificados con DRM. Dispositivos USB compatibles Este receptor admite los siguientes dispositivos USB de Sony. Dispositivo USB de Sony verificado Nombre del producto Walkman® Nombre del modelo NWZ-S754 / S755 NWZ-E453 / E454 / E455 NWZ-E353 / E354 / E355 - Sony HT-M5 | Operating Instructions - Page 97
el cable USB suministrado con el dispositivo USB que se va a conectar. Para obtener más información sobre el método de operación, consulte el manual de instrucciones suministrado con el dispositivo USB que va a conectar. • No conecte el receptor y el dispositivo USB a través de un concentrador USB - Sony HT-M5 | Operating Instructions - Page 98
ERROR No reconoció la memoria del dispositivo USB (página 34). NO SUPPORT Se ha conectado un dispositivo USB no compatible, un dispositivo desconocido, receptor como, por ejemplo, el campo de sonido. Botones de entrada AMP MENU DISPLAY 1 Pulse el botón de entrada correspondiente a la información que - Sony HT-M5 | Operating Instructions - Page 99
desde un equipo de audio/vídeo mediante el receptor. Consulte el manual de instrucciones suministrado con el equipo de grabación. 1 Prepare la ón. En este caso, ajuste "AUTO.STBY" a "STBY OFF" (página 53). • (HT-M7/HT-M5 solamente) La entrada de señales de audio a través de las tomas HDMI IN, DIGITAL - Sony HT-M5 | Operating Instructions - Page 100
érica, Argentina 50 kHz y México Australia, Sudáfrica, Medio 50 kHz Oriente, India, Tailandia, Singapur y Europa AM 10 kHz* 10 kHz* 9 kHz * Puede cambiar Botones numéricos D.TUNING , V/v/B/b FM MODE ENTER AMP MENU TUNING +/- Sintonización de una emisora directamente (Sintonización directa) - Sony HT-M5 | Operating Instructions - Page 101
) Puede cambiar la escala de sintonización de AM a 9 kHz o 10 kHz. 1 Pulse TUNER varias veces (o pulse AM) para seleccionar AM. 2 Pulse AMP MENU. 3 Pulse V/v varias veces para seleccionar "TUNER" y, a continuación, pulse o b. , V/v/B/b PRESET +/- 1)RM-AAU135 solamente. 2)RM-AAU136 solamente. AMP - Sony HT-M5 | Operating Instructions - Page 102
INPUT SELECTOR en el receptor. 2 Sintonice la emisora presintonizada cuyo nombre de índice desea crear (página 40). 3 Pulse AMP MENU. 4 Pulse V/v varias veces para seleccionar "TUNER" y, a continuación, pulse o b. 5 Pulse V/v varias veces para seleccionar "NAME IN" y, a continuación, pulse o b. El - Sony HT-M5 | Operating Instructions - Page 103
• Para introducir un espacio en blanco, pulse b sin seleccionar ningún carácter. Si comete un error Pulse B/b hasta que el carácter que desee cambiar destelle y, a continuación, pulse V/v para seleccionar el carácter correcto. 7 Pulse . Se registrará el nombre que ha introducido. Para disfrutar del - Sony HT-M5 | Operating Instructions - Page 104
a a a a a a × a * Las señales de audio se emiten en otro formato si el equipo de reproducción no corresponde con el formato. Para obtener más información, consulte el manual de instrucciones suministrado con el equipo de reproducción. 42ES - Sony HT-M5 | Operating Instructions - Page 105
con la función Control por HDMI. Es posible simplificar las operaciones si se conectan equipos de Sony compatibles con la función "BRAVIA" Sync mediante cables HDMI (no suministrado), como sigue: no funcionar dependiendo del equipo conectado. Consulte el manual de instrucciones del equipo. 43ES - Sony HT-M5 | Operating Instructions - Page 106
más información sobre la configuración del televisor, consulte el manual de instrucciones suministrado con el televisor. Si su televisor no con la función "Control por HDMI (ajuste fácil)" , V/v/B/b AMP MENU 1 Pulse AMP MENU. 2 Pulse V/v varias veces para seleccionar "HDMI" y, a continuación, - Sony HT-M5 | Operating Instructions - Page 107
receptor al mismo tiempo. Notas • Si el Control de audio del sistema no funciona de acuerdo con la configuración de su televisor, consulte el manual de instrucciones del televisor. • Si "CTRL.HDMI" se ha ajustado a "CTRL ON", los ajustes de "AUDIO.OUT" del menú HDMI se configurarán automáticamente - Sony HT-M5 | Operating Instructions - Page 108
función de Apagado del sistema, active la función de bloqueo de la fuente de alimentación del televisor. Para obtener más información, consulte el manual de instrucciones del televisor. • Dependiendo del equipo conectado, es posible que no se pueda apagar. Para obtener más información, consulte el - Sony HT-M5 | Operating Instructions - Page 109
menú de configuración Puede personalizar su receptor realizando distintos ajustes en el menú de configuración. , V/v/B/b RETURN O AMP MENU 1 Pulse AMP MENU. 2 Pulse V/v varias veces para seleccionar la opción del menú que desea y, a continuación, pulse o b. continúa 47ES Operaciones avanzadas - Sony HT-M5 | Operating Instructions - Page 110
para seleccionar el ajuste que desea y, a continuación, pulse . Para volver a la pantalla anterior Pulse B o RETURN O. Para salir del menú Pulse AMP MENU. Nota Algunos parámetros y ajustes pueden aparecer atenuados en la pantalla. Esto significa que no están disponibles o que son fijos y no pueden - Sony HT-M5 | Operating Instructions - Page 111
Menú Parámetros [Visualización] [Visualización] Ajustes Ajuste predeterminado SPEAKER [SPKR] (página 51) Posición de los altavoces de sonido envolvente [SUR SPK] FRONT, REAR FRONT Distancia del altavoz frontal izquierdo [FL DIST.] Distancia del altavoz frontal derecho [FR DIST.] Distancia - Sony HT-M5 | Operating Instructions - Page 112
Configuración de la entrada de AMP, TV+AMP audio HDMI [AUDIO.OUT] AMP SYSTEM [SYSTEM] (página 53) Brillo de la pantalla [DIMMER] Modo de espera automática [ de altavoz. - HT-M7 solamente: FL, FR, CNT, SL, SR, SBL, SBR, SW - HT-M3/HT-M5 solamente: FL, FR, CNT, SL, SR, SW b)HT-M7 solamente. c)Solo - Sony HT-M5 | Operating Instructions - Page 113
y el equilibrio entre los altavoces se puede ajustar de forma manual en cada uno de los altavoces. x T. TONE Le (central, sonido envolvente izquierdo/derecho, envolvente trasero izquierdo/derecho*, altavoz de graves). * HT-M7 solamente. x D. RANGE Permite comprimir el rango dinámico de la pista de - Sony HT-M5 | Operating Instructions - Page 114
x AM STEP* Le permite cambiar AM STEP a 9 kHz o 10 kHz. Para obtener más información, consulte "Cambio de la escala de sintonización de AM" (página 39). * Solo modelos de Estados Unidos, Latinoamérica, Argentina y México. Menú AUDIO Puede ajustar la configuración de audio para que se adapte a sus - Sony HT-M5 | Operating Instructions - Page 115
TV OUT (salida TV HDMI) del receptor. Sony recomienda esta configuración cuando se utilice un televisor de Sony compatible con "BRAVIA" Sync. En el emita sonido por el receptor. En este caso, seleccione "AMP". Menú SYSTEM Puede personalizar los ajustes del receptor. x DIMMER Le permite ajustar el - Sony HT-M5 | Operating Instructions - Page 116
Información adicional Precauciones Seguridad Si cae dentro de la caja algún objeto sólido o líquido, desenchufe el receptor y deje que personal cualificado lo compruebe antes de seguir utilizándolo. Fuentes de alimentación • Antes de utilizar el receptor, compruebe que el voltaje de funcionamiento - Sony HT-M5 | Operating Instructions - Page 117
que se sugiera. Si el problema persiste, consulte con el distribuidor Sony más cercano. Tenga presente que si el personal de servicio cambia algunas equipo de reproducción, será necesario configurar el equipo. Consulte el manual de instrucciones suministrado con cada equipo. • Asegúrese de utilizar - Sony HT-M5 | Operating Instructions - Page 118
botones de entrada (página 32). • Las señales de entrada de vídeo no pueden grabarse por las tomas HDMI IN y COMPONENT VIDEO IN (HT-M7/ HT-M5 solamente). • Los dispositivos fuente contienen tecnología de protección de los derechos de autor para impedir la grabación. En tal caso, es posible que no - Sony HT-M5 | Operating Instructions - Page 119
Audio CD mediante una conexión HDMI. • Dependiendo del equipo de reproducción, es posible que necesite configurar el ajuste HDMI del equipo. Consulte el manual de instrucciones suministrado con cada equipo. • Asegúrese de utilizar un cable HDMI de alta velocidad cuando vea imágenes o escuche sonido - Sony HT-M5 | Operating Instructions - Page 120
- Dependiendo del equipo y del televisor conectados, es posible que necesite configurar el ajuste HDMI del equipo y del televisor. Consulte el manual de instrucciones suministrado con cada equipo y televisor. - Cambie la entrada en el receptor a la entrada HDMI conectada al equipo. Los sonidos - Sony HT-M5 | Operating Instructions - Page 121
ón, vuelva a conectar el dispositivo USB. • Conecte el dispositivo USB compatible. (página 34). • El dispositivo USB no funciona correctamente. Consulte el manual de instrucciones del dispositivo USB para saber cómo resolver este problema. La reproducción no se inicia. • Apague el receptor y vuelva - Sony HT-M5 | Operating Instructions - Page 122
compatibles con todos estos FAT. Para obtener más información, consulte el manual de instrucciones de cada dispositivo USB o póngase en contacto con el sistema. Si no consigue resolver el problema, consulte con el distribuidor Sony más cercano. Si aparece un mensaje de error mientras se está - Sony HT-M5 | Operating Instructions - Page 123
PROTECT Se suministra corriente irregular a los altavoces, o el receptor está cubierto y los orificios de ventilación están bloqueados. El receptor se apagará automáticamente al cabo de algunos segundos. Quite el objeto que cubre el panel superior del receptor, compruebe la conexión de los altavoces - Sony HT-M5 | Operating Instructions - Page 124
en las siguientes condiciones: Área Requisitos de alimentación Estados Unidos ca 120 V, 60 Hz Sudáfrica, ca 240 V, 50 Hz Latinoamérica, India Medio Oriente ca 127 V, 60 Hz Argentina, Tailandia ca 230 V, 50 Hz 4)Salida de potencia de referencia para los altavoces frontales, central, de - Sony HT-M5 | Operating Instructions - Page 125
530 kHz - 1 710 kHz 531 kHz - 1 710 kHz Medio Oriente, - Sudáfrica, Australia, Tailandia, India, Singapur, Europa 531 kHz - 1 602 kHz Antena Antena cerrada Sección de vídeo (HT-M7/HT-M5 solamente) Entradas/Salidas Vídeo: 1 Vp-p, 75 ohm COMPONENT VIDEO: Y: 1 Vp-p, 75 ohm PB: 0,7 Vp - Sony HT-M5 | Operating Instructions - Page 126
ca 127/220/ 230 V - ca 240 V, 50/60 Hz Australia ca 230 V, 50 Hz India ca 220 V - 240 V, 50/60 Hz Europa ca 230 V, 50/60 Hz Consumo de y 14 onzas) (STR-KM3) Sección de altavoces • Altavoz frontal para HT-M7/HT-M5 (SS-MSP7M) Sistema de altavoces 2 vías, 3 controladores, reflector de - Sony HT-M5 | Operating Instructions - Page 127
mm (17 pulgadas × 7 1/4 pulgadas × 7 1/8 pulgadas) (con patas) Peso (Aprox.) 3,3 kg (7 libras y 5 onzas) • Altavoz envolvente trasero para HT-M7/ Altavoz de sonido envolvente para HT-M5/ HT-M3 (SS-SRP7M) Sistema de altavoces Rango completo, caja cerrada Altavoz Altavoz de graves: 100 mm - Sony HT-M5 | Operating Instructions - Page 128
27 M Mando a distancia 13 Mensaje Error 60 USB 36 Menú AUDIO 52 EQ 51 HDMI 52 LEVEL 51 SPEAKER 51 SYSTEM 53 TUNER 51 MOVIE A 41 MOVIE B 41 M-TURBO 7, 14 MUSIC 41 P PlayStation 3 conexión 25, 26, 27 de apagado 14 TEST TONE 31 V Videograbadora conexión 28 ©2013 Sony Corporation Printed in Malaysia
-
 1
1 -
 2
2 -
 3
3 -
 4
4 -
 5
5 -
 6
6 -
 7
7 -
8
-
9
-
10
-
11
-
12
-
13
-
14
-
15
-
16
-
17
-
18
-
19
-
20
-
21
-
22
-
23
-
24
-
25
-
26
-
27
-
28
-
29
-
30
-
31
-
32
-
33
-
34
-
35
-
36
-
37
-
38
-
39
-
40
-
41
-
42
-
43
-
44
-
45
-
46
-
47
-
48
-
49
-
50
-
51
-
52
-
53
-
54
-
55
-
56
-
57
-
58
-
59
-
60
-
61
-
62
-
63
-
64
-
65
-
66
-
67
-
68
-
69
-
70
-
71
-
72
-
73
-
74
-
75
-
76
-
77
-
78
-
79
-
80
-
81
-
82
-
83
-
84
-
85
-
86
-
87
-
88
-
89
-
90
-
91
-
92
-
93
-
94
-
95
-
96
-
97
-
98
-
99
-
100
-
101
-
102
-
103
-
104
-
105
-
106
-
107
-
108
-
109
-
110
-
111
-
112
-
113
-
114
-
115
-
116
-
117
-
118
-
119
-
120
-
121
-
122
-
123
-
124
-
125
-
126
-
127
-
128
 |
 |

4-415-789-
91
(2)
HT-M7/HT-M5/HT-M3
Home Theatre
System
Operating Instructions
US
Manual de instrucciones
ES