Sony ILCE-9M2 Operating Instructions - Page 17
Rear side, To remove the eyepiece cup
 |
View all Sony ILCE-9M2 manuals
Add to My Manuals
Save this manual to your list of manuals |
Page 17 highlights
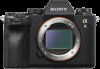
Rear side Preparations for shooting Eyepiece cup To remove the eyepiece cup Push the grips at the bottom of the eyepiece cup to the left and right and lift up the cup. C3 button (Custom button 3) (179)/ (Protect) button (168) MENU button (215) Monitor (For touch operation: Touch panel/Touch pad) (31, 93) You can adjust the monitor to an easily viewable angle and shoot from any position. Remove the eyepiece cup when attaching an angle finder (sold separately). Also, select MENU (Camera Settings 2) [FINDER/MONITOR], and then switch to [Viewfinder (Manual)] or [Monitor (Manual)]. Viewfinder Eye sensor (187) GB 17
-
 1
1 -
2
-
3
-
4
-
5
-
6
-
7
-
8
-
9
-
10
-
11
-
 12
12 -
 13
13 -
 14
14 -
 15
15 -
 16
16 -
 17
17 -
 18
18 -
 19
19 -
 20
20 -
 21
21 -
 22
22 -
23
-
24
-
25
-
26
-
27
-
28
-
29
-
30
-
31
-
32
-
33
-
34
-
35
-
36
-
37
-
38
-
39
-
40
-
41
-
42
-
43
-
44
-
45
-
46
-
47
-
48
-
49
-
50
-
51
-
52
-
53
-
54
-
55
-
56
-
57
-
58
-
59
-
60
-
61
-
62
-
63
-
64
-
65
-
66
-
67
-
68
-
69
-
70
-
71
-
72
-
73
-
74
-
75
-
76
-
77
-
78
-
79
-
80
-
81
-
82
-
83
-
84
-
85
-
86
-
87
-
88
-
89
-
90
-
91
-
92
-
93
-
94
-
95
-
96
-
97
-
98
-
99
-
100
-
101
-
102
-
103
-
104
-
105
-
106
-
107
-
108
-
109
-
110
-
111
-
112
-
113
-
114
-
115
-
116
-
117
-
118
-
119
-
120
-
121
-
122
-
123
-
124
-
125
-
126
-
127
-
128
-
129
-
130
-
131
-
132
-
133
-
134
-
135
-
136
-
137
-
138
-
139
-
140
-
141
-
142
-
143
-
144
-
145
-
146
-
147
-
148
-
149
-
150
-
151
-
152
-
153
-
154
-
155
-
156
-
157
-
158
-
159
-
160
-
161
-
162
-
163
-
164
-
165
-
166
-
167
-
168
-
169
-
170
-
171
-
172
-
173
-
174
-
175
-
176
-
177
-
178
-
179
-
180
-
181
-
182
-
183
-
184
-
185
-
186
-
187
-
188
-
189
-
190
-
191
-
192
-
193
-
194
-
195
-
196
-
197
-
198
-
199
-
200
-
201
-
202
-
203
-
204
-
205
-
206
-
207
-
208
-
209
-
210
-
211
-
212
-
213
-
214
-
215
-
216
-
217
-
218
-
219
-
220
-
221
-
222
-
223
-
224
-
225
-
226
-
227
-
228
-
229
-
230
-
231
-
232
-
233
-
234
-
235
-
236
-
237
-
238
-
239
-
240
-
241
-
242
-
243
-
244
-
245
-
246
-
247
-
248
-
249
-
250
-
251
-
252
-
253
-
254
-
255
-
256
-
257
-
258
-
259
-
260
-
261
-
262
-
263
 |
 |

GB
17
Preparations for shooting
Rear side
Eyepiece cup
To remove the eyepiece cup
Push the grips at the bottom
of the eyepiece cup to the left
and right and lift up the cup.
Remove the eyepiece cup
when attaching an angle
finder (sold separately).
Also, select MENU
(Camera Settings 2)
[FINDER/MONITOR], and then
switch to [Viewfinder (Manual)]
or [Monitor (Manual)].
Viewfinder
C3 button (Custom button 3)
(179)/
(Protect) button
(168)
MENU button (215)
Monitor
(For touch operation: Touch
panel/Touch pad) (31, 93)
You can adjust the monitor to
an easily viewable angle and
shoot from any position.
Eye sensor (187)