Sony KDF E60A20 Operating Instructions
Sony KDF E60A20 - 60" Rear Projection TV Manual
 |
UPC - 027242675339
View all Sony KDF E60A20 manuals
Add to My Manuals
Save this manual to your list of manuals |
Sony KDF E60A20 manual content summary:
- Sony KDF E60A20 | Operating Instructions - Page 1
2-593-962-11(3) LCD Projection TV HD-TV Operating Instructions KDF-E55A20 KDF-E60A20 © 2005 Sony Corporation ™ ™ - Sony KDF E60A20 | Operating Instructions - Page 2
provided below. Refer to them whenever you call upon your Sony dealer regarding this product. Model No. Serial No. Contacting Sony If, after reading the following instructions, you have additional questions related to the use of your Sony® TV, please call one of the following numbers. Customers in - Sony KDF E60A20 | Operating Instructions - Page 3
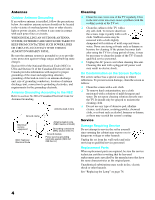
maintenance (servicing) instructions in for long periods of time at a high brightness pursuant to Part 15 of instructions not expressly approved in this manual could void your warranty. have it checked by qualified service personnel before operating it see "Important Safety Instructions" on page - Sony KDF E60A20 | Operating Instructions - Page 4
following Sony appliance(s) only with the following TV STAND. Use with other TV STAND may cause instability and result in possible injury. SONY APPLIANCE MODEL NO: KDF-E55A20 KDF-E60A20 SONY TV STAND MODEL NO: SU-GW12 Replacement Parts See page 4 under "Service". See page 76 for replacement lamp. - Sony KDF E60A20 | Operating Instructions - Page 5
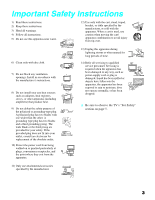
Do not block any ventilation openings. Install in accordance with the manufacturer's instructions. 8) into your outlet, consult an electrician for replacement of the obsolete outlet. 10) Protect long periods of time. 14) Refer all servicing to qualified service personnel. Servicing is required when - Sony KDF E60A20 | Operating Instructions - Page 6
other electric light or power service technician certifies in writing that he has used replacement parts specified by the manufacturer that have the same characteristics as the original parts. Unauthorized substitutions may result in fire, electric shock or other hazards. See "Replacing the Lamp - Sony KDF E60A20 | Operating Instructions - Page 7
lamp as its light source. It is time to replace the lamp with a new one (not supplied) when: • the lamp replacement indicator on the front panel blinks in red, • screen images become dark, • no image appears on the display after prolonged use. ❑ In rare instances, the bulb may pop inside the lamp - Sony KDF E60A20 | Operating Instructions - Page 8
the Remote Control ..........41 Button Descriptions 42 Programming the Remote Control 44 Manufacturer's Codes 45 Using Other Equipment with Your Remote Control 46 Special Buttons on the Remote Control 48 Using the GUIDE Button 48 Using the WIDE Button 50 Using the FREEZE Button 51 Using the - Sony KDF E60A20 | Operating Instructions - Page 9
Vision 72 Accessing the Applications Settings 73 Selecting Applications Options 73 Other Information Overview 75 Contacting Sony 75 Replacing the Lamp 76 How to Replace the Lamp 76 Troubleshooting 80 Remote Control 80 CableCARDTM Device 80 Video 81 Audio 82 Channels 82 General 83 - Sony KDF E60A20 | Operating Instructions - Page 10
Sony's HD LCD Projection TV. This manual is for models KDF-E55A20 and KDF-E60A20. Instructions in this manual manual and a Quick Setup Guide poster. Some of the features that you will enjoy with your new TV include: ❑ WEGA GATE™: WEGA service is activated with your cable TV company, the card replaces - Sony KDF E60A20 | Operating Instructions - Page 11
Introducing the Sony TV Introducing the Sony TV ❑ HDMI (High-Definition Multimedia Interface): Provides an uncompressed, all-digital audio/video interface between this TV and any HDMI-equipped audio/video component, such as a set-top box, DVD player, and A/V receiver. HDMI supports enhanced, or - Sony KDF E60A20 | Operating Instructions - Page 12
light sources from shining directly on to the screen. ❑ The screen surface is easily scratched. Do not rub, touch, or tap it with sharp or abrasive objects (see "Cleaning" on page 4). When not using the TV for a long period of time the cleaning instruction on page 4 for stubborn stains and dirt. 10 - Sony KDF E60A20 | Operating Instructions - Page 13
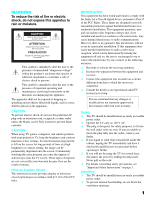
the Sony TV Screen Projection lamp POWER LAMP TIMER POWER Indicators Indicators Projection Lamp How to replace the lamp, see page 76. The indicators show the current status of your TV. If there is a change in the condition or a problem with the TV, the indicators will flash or light up - Sony KDF E60A20 | Operating Instructions - Page 14
Introducing the Sony TV Installing the TV Carrying Your TV Carrying the TV requires at least two people. Do not hold by the pedestal or the front panel of the TV. Doing so may cause these parts to break off. Do not grasp the pedestal or the front panel of the TV. When - Sony KDF E60A20 | Operating Instructions - Page 15
stand for your TV, you must use the support belt. As a protective measure, secure the TV as follows. Using the TV stand with support belts ❑ Sony strongly recommends using the TV stand SU-GW12 with a support within the areas shown below. Model KDF-E55A20 KDF-E60A20 Viewing distance min. 6.8 ft. ( - Sony KDF E60A20 | Operating Instructions - Page 16
servicing (see "Contacting Sony" on page 75). When lit, indicates one of the timers is set. When the timer is set, this LED will remain lit even if the TV set is turned off. For details, see page 73. Lights up in red when the lamp for the light source has burned out. For details, see "Replacing - Sony KDF E60A20 | Operating Instructions - Page 17
TV Front and Rear Panel Connectors Front Panel of TV Introducing the Sony TV POWER LAMP TIMER POWER VIDEO 2 INPUT S VIDEO VIDEO L (MONO) R AUDIO Press up lightly to release the console 1 2 Connection Description 1 S VIDEO (Front and rear) Connects to the S VIDEO OUT jack of your - Sony KDF E60A20 | Operating Instructions - Page 18
Sony TV 1 2 3 Rear of TV VIDEO IN 1 3 S VIDEO VHF/UHF VIDEO L (MONO) AUDIO R HD/DVD IN (1080i/720p/ 480p/480i) 4 5 Y PB PR L AUDIO R AUDIO OUT (VAR/FIX) L AUDIO R EJECT PCM/DOLBY DIGITAL DIGITAL AUDIO (OPTICAL , and A/V receiver. HDMI supports enhanced, or high-definition video - Sony KDF E60A20 | Operating Instructions - Page 19
Connecting the TV Connecting the TV Overview Making Video and Audio Connections Your new LCD Projection TV can receive both analog and digital broadcasting signals from antenna, satellite and cable TV. To display clear crisp pictures, you must connect your TV correctly and choose the correct - Sony KDF E60A20 | Operating Instructions - Page 20
Equipment with S VIDEO S VIDEO cable Rear of TV VIDEO IN 1 3 S VIDEO VIDEO L (MONO) AUDIO R Audio cable Cables are often color-coded to connectors. Connect red to red, white to white, etc. About Using HDMI to DVI Adapter If you are connecting equipment with DVI connector with this TV, you - Sony KDF E60A20 | Operating Instructions - Page 21
Connecting the TV Connecting the TV Basic Connections The way in which you connect your TV will vary, depending on how your home receives a signal (antenna and satellite, cable, cable box) and whether or not you plan to connect a VCR. If You Are Connecting See Page Cable System or VHF/UHF 20 - Sony KDF E60A20 | Operating Instructions - Page 22
Connecting the TV Cable System or VHF/UHF For best results, use this connection if you: ❑ Have a cable and/or an antenna. (This is convenient if you are using a separate rooftop antenna to receive additional channels that are not provided by your cable TV company.) ❑ Do not have a cable box or VCR. - Sony KDF E60A20 | Operating Instructions - Page 23
Remote box Control" on page 44. Activate the remote control to operate the cable Press SAT/CABLE (FUNCTION) once, and the SAT/CABLE box indicator lights up. Prevent the accidental switching of TV channels When using the cable box, ensure that the TV remains tuned to the channel that the cable - Sony KDF E60A20 | Operating Instructions - Page 24
Remote box Control" on page 44. Activate the remote control to operate the cable Press SAT/CABLE (FUNCTION) once, and the SAT/CABLE box indicator lights up. Prevent the accidental switching of TV channels When using the cable box, ensure that the TV remains tuned to the channel that the cable - Sony KDF E60A20 | Operating Instructions - Page 25
VHF/UHF CABLE Coaxial cable VIDEO L (MONO) AUDIO R S VIDEO Cables are often color-coded to connectors. Connect red to red, white to white, etc. VIDEO (yellow) AUDIO-L (white) AUDIO-R (red) A/V cable (not supplied) Satellite receiver Satellite antenna cable S VIDEO cable (not supplied) ✍ If - Sony KDF E60A20 | Operating Instructions - Page 26
(1080i/720p/ 480p/480i) 4 5 Y PB PR L AUDIO R AUDIO OUT (VAR/FIX) L AUDIO R Audio cable (not supplied) Cables are often color-coded to connectors. Connect red to red, white to white, etc. 2 Use a component video cable to connect the YPBPR jacks of your digital cable box or digital satellite - Sony KDF E60A20 | Operating Instructions - Page 27
service is activated with your cable TV company, the card replaces ). At this time, these services require a bidirectional Sony. Activating CableCARD Service Before you can use CableCARD service, you need to insert the CableCARD device (supplied by your cable TV company) and activate the service - Sony KDF E60A20 | Operating Instructions - Page 28
. This screen includes information your cable TV company will request before they can activate your service. 4 Follow the displayed instructions: Phone your cable TV company. A representative will guide you through the activation process. 5 After your CableCARD device is activated, your cable TV - Sony KDF E60A20 | Operating Instructions - Page 29
/UHF VIDEO L (MONO) AUDIO R HD/DVD IN (1080i/720p/ 480p/480i) 4 5 Y PB PR L AUDIO R AUDIO OUT (VAR/FIX) L AUDIO R EJECT PCM/DOLBY DIGITAL DIGITAL AUDIO (OPTICAL) OUT CABLE 6 L R AUDIO IN HDMI cable (not supplied) 27 - Sony KDF E60A20 | Operating Instructions - Page 30
Y PB PR L AUDIO R AUDIO OUT (VAR/FIX) L AUDIO R EJECT PCM/DOLBY DIGITAL DIGITAL AUDIO (OPTICAL) OUT CABLE 6 L R AUDIO IN Audio cable (not supplied) HDMI-to-DVI adapter or cable (not supplied) AUDIO-R (red) AUDIO-L (white) ✍ When using a DVI-HDMI cable or an adapter, be sure to connect the - Sony KDF E60A20 | Operating Instructions - Page 31
connect a digital audio device that is PCM/Dolby Digital compatible, such as an audio amplifier. Use an optical audio cable to connect the device's OPTICAL IN jack to the TV's DIGITAL AUDIO (OPTICAL) OUT jack. Rear of TV VIDEO IN 1 3 S VIDEO VHF/UHF CABLE VIDEO L (MONO) AUDIO R HD/DVD IN - Sony KDF E60A20 | Operating Instructions - Page 32
box for all channel selection. Using Initial Setup To run Initial Setup the first time you turn on your TV 1 TV POWER Press to turn on the TV. Auto Program as a reminder. To run Auto Program at a later time 1 Select Settings in WEGA GATE, and then go to Channel settings. 2 Select Auto Program then - Sony KDF E60A20 | Operating Instructions - Page 33
equipment to your TV. This section provides some of the individual connections you can have. For multiple connections please refer to the Quick Setup Guide. If You Are Connecting VCR and Cable VCR and Cable Box Two VCRs for Tape Editing DVD Player with Component Video Connectors DVD Player with - Sony KDF E60A20 | Operating Instructions - Page 34
and S VIDEO IN jacks. Rear of TV VIDEO IN 1 3 S VIDEO VIDEO L (MONO) AUDIO R VHF/UHF S VIDEO VIDEO (yellow) AUDIO-L (white) AUDIO-R (red) Coaxial cable CABLE Splitter Coaxial cable Cable VCR A/V cable (not supplied) S VIDEO cable (not supplied) ✍ If your VCR is not equipped with - Sony KDF E60A20 | Operating Instructions - Page 35
. With this setup you can: ❑ Use the TV's remote control to change channels on your cable box when the signal is scrambled. To program your Sony remote control to operate your cable box, see "Programming the Remote Control" on page 44. ❑ Use the TV's remote control to change channels on your - Sony KDF E60A20 | Operating Instructions - Page 36
the TV Cables are often color-coded to connectors. Connect red to red, white to white, etc. Coaxial cable CATV cable Splitter Rear of TV VIDEO IN 1 3 S VIDEO VIDEO L (MONO) AUDIO R VHF/UHF A/V cable (not supplied) VCR AUDIO-R (red) AUDIO-L (white) VIDEO (yellow) A/V cable (not - Sony KDF E60A20 | Operating Instructions - Page 37
S VIDEO jacks? See page 18. Cables are often color-coded to connectors. Connect red to red, white to white, etc. VCR (playback) If you connect to change the video input on your VCR. Consult your VCR's operating manual for instructions. ✍ If your VCRs have S VIDEO jacks: For best picture quality - Sony KDF E60A20 | Operating Instructions - Page 38
with Component Video Connectors Cables are often color-coded to connectors. Connect red to red, white to white, etc. Use this hookup IN (1080i/720p/ 480p/480i) 4 5 Y PB PR L AUDIO R 36 AUDIO-R (red) AUDIO-L (white) Audio cable (not supplied) ✍ To take advantage of the Wide Mode feature - Sony KDF E60A20 | Operating Instructions - Page 39
and Audio Connectors Cables are often color-coded to connectors. Connect red to red, white to white, etc. Use this DVD input (VIDEO 1 in the illustration). If you have a non-Sony DVD player, and want to set up the TV remote control to operate instructions for setting up Video Labels on page 70. 37 - Sony KDF E60A20 | Operating Instructions - Page 40
S VIDEO, use a VIDEO cable (yellow) instead of the S VIDEO cable. Front of TV Camcorder PlayStation VIDEO 2 INPUT S VIDEO VIDEO L (MONO) R AUDIO AUDIO-R (red) AUDIO-L (white) To A/V output A/V cable (not supplied) VIDEO (yellow) S VIDEO S VIDEO cable (not supplied) To S VIDEO output 38 - Sony KDF E60A20 | Operating Instructions - Page 41
set to Off. Rear of TV HD/DVD IN (1080i/720p/ 480p/480i) 4 5 Y PB PR L AUDIO R AUDIO OUT (VAR/FIX) L AUDIO R Cables are often color-coded to connectors. Connect red to red, white to white, etc. AUDIO-R (red) A/V cable (not supplied) Line input AUDIO-L (white) Audio receiver 39 - Sony KDF E60A20 | Operating Instructions - Page 42
- Sony KDF E60A20 | Operating Instructions - Page 43
describes the buttons on the remote control. Topic Inserting Batteries into the Remote Control Button Descriptions Programming the Remote Control Manufacturer's Codes Using Other Equipment with Your Remote Control Using Special Buttons Page 41 42 44 45 46 48 Inserting Batteries into the Remote - Sony KDF E60A20 | Operating Instructions - Page 44
PICTURE TV/SAT SUR WIDE DISPLAY GUIDE TOOLS RETURN WEGA GATE PREV REPLAY ADVANCE NEXT FUNCTION Buttons The FUNCTION button indicator lights up momentarily when pressed to for a set period of time. z b ADVANCE: Press to advance forward a set period of time when playing back a recorded program - Sony KDF E60A20 | Operating Instructions - Page 45
, see "Selecting Audio Options" on page 60. ws FREEZE wd SUR/TV/SAT Press time. Press V/v/B/b to move the on-screen cursor. To select an item, press . To be used only with your connected external equipment that supports this TOOLS function. (This button does not operate for the TV.) wk WEGA - Sony KDF E60A20 | Operating Instructions - Page 46
GUIDE TOOLS RETURN WEGA GATE PREV REPLAY ADVANCE NEXT PLAY VISUALSEARCH PAUSE STOP VOL CH REC REC PAUSE REC STOP TOP MENU MENU F1 F2 POWER SAVING Find the three-digit code for your equipment from the "Manufacturer's Codes not, it flashes five times. To check if the code works Aim your TV - Sony KDF E60A20 | Operating Instructions - Page 47
206, 207, 208, 218, 222 227, 228, 229 219, 220, 221 211, 214, 215 209, 210, 211 216, 217 212, 213 Satellite Receivers Manufacturer Code Sony 801 Dish Network 810 Echostar 810 General Electric 802 Hitachi 805 Hughes 804 Mitsubishi 809 Panasonic 803 Philips 811 RCA/PROSCAN 802, 808 - Sony KDF E60A20 | Operating Instructions - Page 48
with your TV, first turn to page 44 and program the necessary code. For operating video equipment, press TV/VIDEO repeatedly until you see To Do This ... Display channel number Display SAT Guide Display SAT Menu Move highlight (cursor) Select item Press DISPLAY GUIDE MENU V v B b To Do This ... - Sony KDF E60A20 | Operating Instructions - Page 49
Watching the TV Operating a 5.1ch DVD AV System (Sony DAV) To Do This ... Press Activate the remote control to DVD/VCR operate the DVD (FUNCTION) Turn on/off Select other equipment connected to the - Sony KDF E60A20 | Operating Instructions - Page 50
the GUIDE Button This TV is equipped to show program information if it is available from the station. The Program Guide lets you review program aquatic misadventures of Henry and Riley, two wayward ducks on a unique mission. Time remaining: 1:26 TV-G CC 1 ABC 10 DISC 23.1 FAM 36 TLC - Sony KDF E60A20 | Operating Instructions - Page 51
the channels from a drop down list. The Guide also provides information about the current program being shown on each channel. Make Way for Ducks! Series follows the aquatic misadventures of Henry and Riley, two wayward ducks on a unique mission. Time remaining: 1:26 TV-G CC 1 ABC 10 DISC - Sony KDF E60A20 | Operating Instructions - Page 52
Watching the TV Using the WIDE Button Wide screen mode lets you watch 4:3 normal broadcasts in several wide screen modes (16:9 aspect ratio). 4:3 Original source (Standard definition) 16:9 Original source (High definition) Wide Zoom Normal Full Zoom Wide Zoom Full Zoom z When the TV receives a - Sony KDF E60A20 | Operating Instructions - Page 53
Watching the TV Watching the TV Using the FREEZE Button The FREEZE button allows you to temporarily capture a program's picture. You can use this feature to write down information such as phone numbers, recipes, etc. To Freeze FREEZE Using the JUMP Button To cancel FREEZE for normal viewing, - Sony KDF E60A20 | Operating Instructions - Page 54
equipment signals or adjusting or adjusting TV settings. 1 Press WEGA GATE on the remote. RETURN WEGA GATE FUNCTION F1 F2 TOP MENU MENU GUIDE SLEEP WEGA GATE Favorites C Cable Antenna External Inputs Settings Press WEGA GATE to exit WEGA GATE control panel appears. 2 Press V/v to highlight the - Sony KDF E60A20 | Operating Instructions - Page 55
Introducing WEGA GATE Introducing WEGA GATE The WEGA GATE screen gives you access to the following items: Icon Description The Favorites feature lets you select programs from a list of up to 16 favorite - Sony KDF E60A20 | Operating Instructions - Page 56
list using the Add to Favorites option. 1 Select Favorites from the WEGA GATE control panel and press . The Favorite Channels list appears. Make your settings and select Favorites Channels then edit the channel. Using Cable in WEGA GATE The Cable feature takes you to the most recently viewed channel - Sony KDF E60A20 | Operating Instructions - Page 57
Program Banner and Channel number will be displayed. Select Antenna from the WEGA GATE control panel and press . Full Focus Sd Film Festivals Growth number. To run Auto Program see page 64. Using External Inputs in WEGA GATE The External Inputs feature lets you view from a selected external input - Sony KDF E60A20 | Operating Instructions - Page 58
Max 50 55 0 Cool 40 On Audio Antenna Audio Press WEGA GATE to exit Sound Mode Custom Reset Treble 0 Midrange 0 Sound Mode (page 60) Reset (page 60) Treble (page 60) Midrange (page 60) Bass (page 60) Balance (page 60) Steady Sound (page 60) Volume Offset (page 60) Effect (page 60) BBE (page - Sony KDF E60A20 | Operating Instructions - Page 59
Language Menu Color Power Saving Image Shift High Altitude CineMotion On On English Gray Standard Auto Off Off Applications Antenna Applications Press WEGA GATE to exit Clock/Timers Diagnostics CableCARD Allows you to set/change Favorite Channels (page 64) Auto Program (page 64) Digital Channels - Sony KDF E60A20 | Operating Instructions - Page 60
to change settings, press V v B b. Press to confirm the selection. To exit the Video, press WEGA GATE . Selecting Video Options z To quickly and easily change from one Picture Mode to another, use PICTURE Warm When selected Custom in Picture Mode, select to give the white colors a red tint. 58 - Sony KDF E60A20 | Operating Instructions - Page 61
Using the Settings Using the Settings Option Description Sharpness Adjust to sharpen or soften the picture. Noise On Reduction Select to reduce the noise level of signal from connected equipment and from the VHF/UHF jack. Off Select to turn off Noise Reduction. DRC Mode High Density - Sony KDF E60A20 | Operating Instructions - Page 62
to change settings, press V v B b. Press to confirm the selection. To exit the Audio, press WEGA GATE . Selecting Audio Options z TruSurround XT attempts to create the same surround effect produced by a multichannel a surround-like effect to mono programs. Off Normal stereo or mono reception. 60 - Sony KDF E60A20 | Operating Instructions - Page 63
system. A/V Sync Off/1/2/3 Use this option to make adjustments to audio and video synchronization when you have external equipment connected to DIGITAL AUDIO (OPTICAL )OUT of the TV. Select Off (factory default setting) to make no adjustments. Select 1, 2 or 3 to adjust so that the video and audio - Sony KDF E60A20 | Operating Instructions - Page 64
to select To highlight an option and to change settings, press V v B b. Press to confirm the selection. To exit the Screen, press WEGA GATE . Selecting Screen Options z Wide Mode is unavailable while in Freeze (page 51). The Screen settings include the following options: Option Description - Sony KDF E60A20 | Operating Instructions - Page 65
set to anything but Off, the Wide Mode setting changes only for the current channel. When you change channels (or inputs), Wide Mode is automatically replaced with the 4:3 Default setting. To retain the current Wide Mode setting as channels and inputs are changed, set 4:3 Default to Off. Option - Sony KDF E60A20 | Operating Instructions - Page 66
a list of your favorite channels. For details, see "Using Favorites in WEGA GATE" on page 54. Digital Channels Add Select to add digital channels Hide Channels Allows you to show or hide channels that appear in the Program Guide (page 48) and when you use the CH+/- buttons to channel surf. Channels - Sony KDF E60A20 | Operating Instructions - Page 67
(A-Z, 09, etc.). Then press to select the highlighted character. Repeat to add characters to the label. 3 Press B to return to the Channel menu, or press WEGA GATE to exit the menus. Using the Settings 65 - Sony KDF E60A20 | Operating Instructions - Page 68
to confirm the selection. To exit the Parental Lock, press WEGA GATE . ✍ You need your password for any future access Child Turn Parental Lock off. No programs are blocked from viewing. Maximum ratings permitted are: US: TV manually. US: See page 68 for details. Canada: See page 69 for details. 66 - Sony KDF E60A20 | Operating Instructions - Page 69
0-9 buttons. 3 Confirm the new password by entering it again. 4 Press WEGA GATE to exit the menu screen. Viewing Blocked Programs You can view a blocked program by entering the password. 1 Press ENT when tuned to a blocked program. 2 Enter your password using the 0-9 buttons. Parental Lock will be - Sony KDF E60A20 | Operating Instructions - Page 70
Rating Options z To ensure maximum blocking capability, the age-based ratings should be blocked. z If you select Block, be aware that the following programs may be blocked: news, sports, weather, emergency broadcasts, political programs, public service announcements, and religious programs. US - Sony KDF E60A20 | Operating Instructions - Page 71
Using the Settings Canadian custom rating options If you selected Canada as the country of residence on page 67, the Custom Rating menu includes the following options. (If you selected U.S.A., see page 68.) Option English Rating French Rating U.S.A. Rating Description C All children. C8+ - Sony KDF E60A20 | Operating Instructions - Page 72
Press to confirm the selection. To exit the Setup, press WEGA GATE . Selecting Setup Options The Setup settings include the following Select On to display the program name, time remaining and other information (if the broadcaster offers this service). Also displays when the channel is changed or - Sony KDF E60A20 | Operating Instructions - Page 73
EEnngglilsishh MMeennuuCCoololorr GGrarayy PPoowweerrSSaavviningg AAuutoto ImImaaggeeSShhifitft AAuutoto HHigighhAAltlittuutduede OOfff CCinineeMMootitoionn OOfff Antenna Setup Press WEGA GATE to exit Caption Vision On Info Banner On Label Video Inputs Language Menu - Sony KDF E60A20 | Operating Instructions - Page 74
Using the Settings Programming Caption Vision If you selected the Program option under Caption Vision (see page 70), you can change the following settings: Option Basic Advanced Digital CC Advanced Settings Description Allows you to select basic analog (EIA-608) closed caption options. CC1, CC2 - Sony KDF E60A20 | Operating Instructions - Page 75
Press to confirm the selection. To exit the Applications, press WEGA GATE . Selecting Applications Options The Applications settings include the off at two scheduled viewing times. Sleep Allows you to select the amount of time (Off, 15 minutes, 30 minutes, 45 minutes, 60 minutes or 90 minutes) - Sony KDF E60A20 | Operating Instructions - Page 76
to go back to the previous setting. 4 Press WEGA GATE to exit the menu screen. An LED on the front panel will light, indicating the Timer has been set. Current Time You can set the current time. 1 Press to select Current Time. 2 Press V and v to set the current time (day, hour, minute, and AM/PM - Sony KDF E60A20 | Operating Instructions - Page 77
Sony Replacing the Lamp Troubleshooting Specifications Optional Accessories Index Page 75 76 80 84 85 87 Contacting Sony If, after reading these operating instructions, you have additional questions related to the use of your Sony television, please call our Customer Information Services - Sony KDF E60A20 | Operating Instructions - Page 78
the TV flashes, it is time to replace the lamp with a new one (not supplied). WARNING Electric appliances can cause fire or high temperature, resulting in injury or death. Be sure to follow the instructions below. ❑ Use a Sony XL-2200 replacement lamp (not supplied) for replacement. Use of any other - Sony KDF E60A20 | Operating Instructions - Page 79
5 Remove the front panel. STD/DUO PRO POWER 6 Pull out the lamp. Loosen the right screw on the cover with a coin or similar object. Remove the screw from the lamp cover. Pull down the cover toward you. Unscrew the lamp and pull out the lamp horizontally. Other Information (Continued) 77 - Sony KDF E60A20 | Operating Instructions - Page 80
hot immediately after use. Never touch the glass portion of the lamp or the surrounding parts. ✍ After it has cooled, place the used lamp into the empty box of the replacement lamp. Never put the used lamp into a plastic bag. 7 Place the new lamp into its place, then tighten the screw. Mount the new - Sony KDF E60A20 | Operating Instructions - Page 81
. Other Information ✍ Consult your Sony dealer for a Sony XL-2200 replacement lamp. ✍ Take great care when replacing the lamp or plugging in/unplugging the connecting cords. Rough handling may cause the TV to fall, damaging the TV, the TV stand and/or the floor. The used lamp For customers in the - Sony KDF E60A20 | Operating Instructions - Page 82
Other Information Troubleshooting Remote Control Problem Remote control does not operate Cannot change channels with the remote control Remote control does not operate non-Sony video equipment Possible Remedies ❏ The batteries could be weak. Replace the batteries. ❏ Check the orientation of the - Sony KDF E60A20 | Operating Instructions - Page 83
Problem Possible Remedies No picture (screen not lit), no ❏ If your TV does not turn on, and a red light keeps flashing, your TV may need sound service. Call your local Sony Service another channel; it could be station trouble. ❏ Press ANT to change cause artifacts (small blocks or loss of - Sony KDF E60A20 | Operating Instructions - Page 84
cable box's remote control. Then press FUNCTION once, and the TV indicator lights up and adjust the TV's volume. ❏ The TV's audio might the TV speakers, set the Speaker option to On (see page 61). Channels Problem Possible Remedies Cannot receive upper channels ❏ Press ANT to select the VHF/UHF - Sony KDF E60A20 | Operating Instructions - Page 85
Problem 60). red) blinks continuously, this may indicate the TV needs service replacement lamp does not ❏ The screw of the lamp cover may be slanted. Take out the screw, insert it straight light up into the screw hole, and then tighten it completely (see page 76 for both KDF-E55A20 and KDF-E60A20 - Sony KDF E60A20 | Operating Instructions - Page 86
Lamp Television System Visible Screen Size (Picture measured diagonally) Channel Coverage Power Requirements Number of Inputs/Outputs HDMI IN Video (IN) S Video (IN) Audio (IN) Component Video Input AUDIO (VAR/FIX) OUT RF Inputs Digital Audio Optical 2000 KDF-E55A20: 55 inches KDF-E60A20: 60 inches - Sony KDF E60A20 | Operating Instructions - Page 87
inches) (1,456 × 943 × 491 mm) KDF-E60A20: (62 × 39 5/8 × 20 1/2 inches) (1,574 × 1,005 × 518 mm) Mass KDF-E55A20: 92.5 lb (42 kg) KDF-E60A20: 101.5 lb (46.1 kg) Supplied ❑ S VIDEO cable ❑ A/V cable ❑ Audio cable ❑ Optical cable ❑ TV Stand: SU-GW12 ❑ Lamp: XL-2200 Other Information 85 - Sony KDF E60A20 | Operating Instructions - Page 88
- Sony KDF E60A20 | Operating Instructions - Page 89
59 P Parental control, described 9 Parental Lock Settings 66 Password, changing 67 PICTURE button 42 Picture contrast, adjusting 58 POWER LED indicator 14 problems, troubleshooting 80-83 Program Guide 48 Program Options menu 49 R Ratings setting 68 viewing blocked programs 67 (Continued) 87 - Sony KDF E60A20 | Operating Instructions - Page 90
from the channel list 64 Video setting 56 VOL +/- button 42 W WEGA GATE 43, 52-55 WIDE button 43, 50 S Satellite Receiver 23 satellite Steady Sound adjusting 60 Surround sound 60, 61 T Timer set current 74 TIMER indicator 11, 14 Timer setting 73 Treble, adjusting 60, 62 troubleshooting 80-83 TV - Sony KDF E60A20 | Operating Instructions - Page 91
- Sony KDF E60A20 | Operating Instructions - Page 92
http://www.sony.net/ Printed in U.S.A.
-
 1
1 -
 2
2 -
 3
3 -
 4
4 -
 5
5 -
 6
6 -
 7
7 -
8
-
9
-
10
-
11
-
12
-
13
-
14
-
15
-
16
-
17
-
18
-
19
-
20
-
21
-
22
-
23
-
24
-
25
-
26
-
27
-
28
-
29
-
30
-
31
-
32
-
33
-
34
-
35
-
36
-
37
-
38
-
39
-
40
-
41
-
42
-
43
-
44
-
45
-
46
-
47
-
48
-
49
-
50
-
51
-
52
-
53
-
54
-
55
-
56
-
57
-
58
-
59
-
60
-
61
-
62
-
63
-
64
-
65
-
66
-
67
-
68
-
69
-
70
-
71
-
72
-
73
-
74
-
75
-
76
-
77
-
78
-
79
-
80
-
81
-
82
-
83
-
84
-
85
-
86
-
87
-
88
-
89
-
90
-
91
-
92
 |
 |

LCD Projection TV
HD-TV
Operating Instructions
2-593-962-
11
(3)
KDF-E55A20
KDF-E60A20
© 2005 Sony Corporation
™
™