Sony KE-42M1 Operating Instructions (primary manual) - Page 23
Connecting a VCR and Cable TV - screen
 |
View all Sony KE-42M1 manuals
Add to My Manuals
Save this manual to your list of manuals |
Page 23 highlights
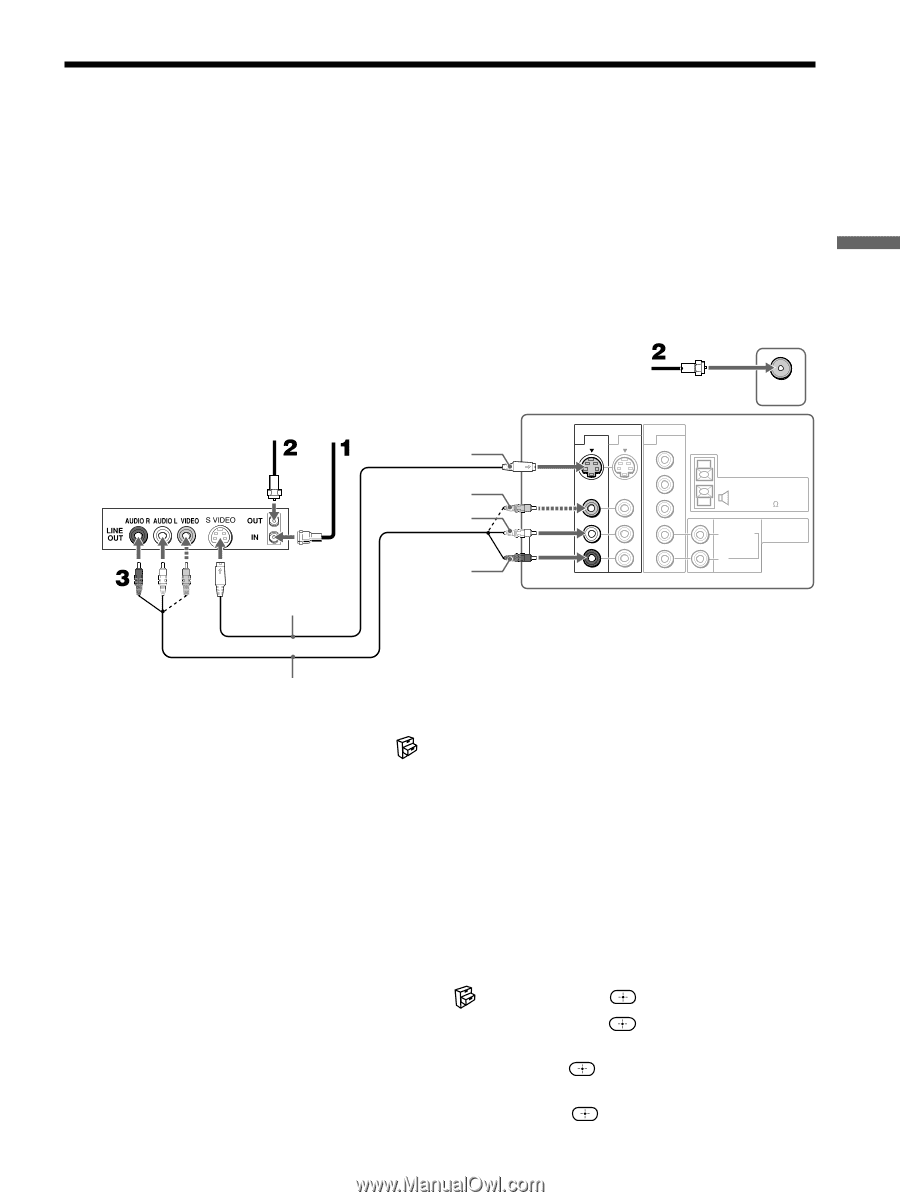
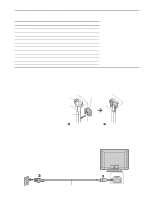
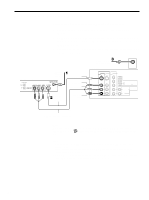
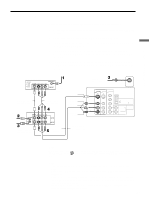
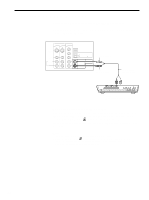
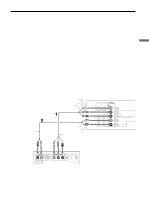
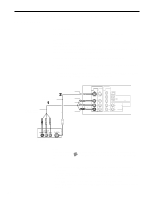
Connecting and Setting the TV Connecting a VCR and Cable TV Use this hookup if: • You subscribe to a cable TV system that does not require a cable box. Disconnect all power sources before making any connections. 1 Connect the CATV cable to the VCR's IN jack. 2 Using the supplied 75-ohm coaxial cable, connect the VCR's OUT jack to the TV's VHF/UHF jack. 3 Using AUDIO and S VIDEO cables, connect the VCR's AUDIO and S VIDEO OUT jacks to the TV's AUDIO and S VIDEO IN jacks (VIDEO IN 1 or 3). 75-ohm coaxial cable (supplied) 75-ohm coaxial cable (supplied) S VIDEO Rear of TV VIDEO IN 1 3 S VIDEO HD/DVD IN 4 Y VHF/UHF VCR Cable VIDEO (yellow) AUDIO-L (white) S VIDEO cable (not supplied) AUDIO-R (red) VIDEO L(MONO) AUDIO R PB PR L AUDIO R CENTER SPEAKER IN 180W (6 ) MAX L(MONO) AUDIO R AUDIO OUT (VAR/FIX) AUDIO cable (not supplied) Note When you connect video equipment to both the VIDEO and the S VIDEO input jacks, make sure "Auto YC" in the (Setup) menu is set to "On" to view the S VIDEO input (see below). Tips • You can also use the VIDEO IN 2 jacks located on the front of the TV to connect your VCR. • If your VCR is not equipped with S VIDEO, use a VIDEO cable (yellow) instead of the S VIDEO cable. When connecting both VIDEO IN and S VIDEO IN Using the menu, you can select the jack from which the TV receives the input signal. You can set it for each video input (VIDEO IN 1, VIDEO IN 2 and VIDEO IN 3) separately. The TV is factory set to receive S VIDEO input signals. 1 Press VIDEO 1/2/3 repeatedly until the desired video input appears. 2 Press MENU. 3 Press V/v to select (Setup), then press . 4 Press V/v to select "Auto YC," then press . 5 To watch the pictures input from the S VIDEO input jack: Press V/v to select "On," then press . To watch the pictures input from the VIDEO input jack: Press V/v to select "Off," then press . 6 Press MENU to exit the menu screen. 23
-
 1
1 -
2
-
3
-
4
-
5
-
6
-
7
-
8
-
9
-
10
-
11
-
12
-
13
-
14
-
15
-
16
-
17
-
 18
18 -
 19
19 -
 20
20 -
 21
21 -
 22
22 -
 23
23 -
 24
24 -
 25
25 -
 26
26 -
 27
27 -
 28
28 -
29
-
30
-
31
-
32
-
33
-
34
-
35
-
36
-
37
-
38
-
39
-
40
-
41
-
42
-
43
-
44
-
45
-
46
-
47
-
48
-
49
-
50
-
51
-
52
-
53
-
54
-
55
-
56
-
57
-
58
-
59
-
60
-
61
-
62
-
63
-
64
-
65
-
66
-
67
-
68
-
69
-
70
-
71
-
72
-
73
-
74
-
75
-
76
-
77
-
78
-
79
-
80
-
81
-
82
-
83
-
84
 |
 |