Sony STR-DA3400ES Operating Instructions (Large File - 15.18 MB) - Page 39
: Operating the receiver using the GUI (Graphical User Interface), Graphical User, Interface
 |
View all Sony STR-DA3400ES manuals
Add to My Manuals
Save this manual to your list of manuals |
Page 39 highlights
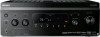
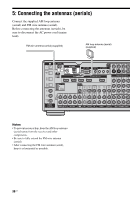
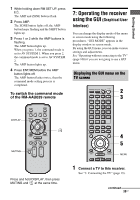
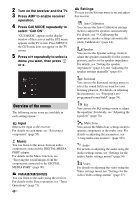
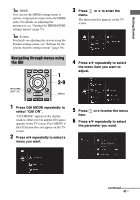
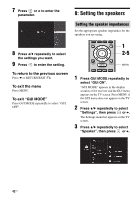
1 While holding down RM SET UP, press ?/1. The AMP and ZONE buttons flash. 2 Press AMP. The ZONE button lights off, the AMP button keeps flashing and the SHIFT button lights up. 3 Press 1 or 2 while the AMP buttons is flashing. The AMP button lights up. When you press 1, the command mode is set to AV SYSTEM 1. When you press 2, the command mode is set to AV SYSTEM 2. The AMP button lights up. 4 Press ENT/MEM before the AMP button lights off. The AMP button flashes twice, then the command mode setting process is completed. To switch the command mode of the RM-AAU039 remote SLEEP DISPLAY DISPLAY GUI MODE MUTING Press and hold DISPLAY, then press MUTING and at the same time. 7: Operating the receiver using the GUI (Graphical User Interface) You can change the display mode of the menu to screen mode using the following procedures. "GUI MODE" appears in the display window in screen mode. By using the GUI menu, you can make various settings and adjustments. See "Operating without connecting to the TV" (page 108) if you are not going to use a GUI menu. Displaying the GUI menu on the TV screen THEATER SHIFT TV ZONE AMP 1 2 3 TV INPUT VIDEO1 VIDEO2 BD DVD 4 SAT 7 TUNER -/-- 5 TV 8 PHONO 0/10 6 WIDE MD/ TAPE SA-CD/ CD 9 D.TUNING MULTI IN DMPORT ENT/MEM CLEAR HDMI1 HDMI2 HDMI3 HDMI4 XM SIRIUS 2CH/ A.DIRECT A.F.D. SOURCE MOVIE MUSIC INPUT NIGHT RESOLUTION MODE SLEEP MODE GUI MODE 2 3 4 5 HOME CATEGORY MENU TUNING CATEGORY MODE TUNING 1 Connect a TV to this receiver. See "3: Connecting the TV" (page 19). continued 39US Getting Started
-
 1
1 -
2
-
3
-
4
-
5
-
6
-
7
-
8
-
9
-
10
-
11
-
12
-
13
-
14
-
15
-
16
-
17
-
18
-
19
-
20
-
21
-
22
-
23
-
24
-
25
-
26
-
27
-
28
-
29
-
30
-
31
-
32
-
33
-
 34
34 -
 35
35 -
 36
36 -
 37
37 -
 38
38 -
 39
39 -
 40
40 -
 41
41 -
 42
42 -
 43
43 -
 44
44 -
45
-
46
-
47
-
48
-
49
-
50
-
51
-
52
-
53
-
54
-
55
-
56
-
57
-
58
-
59
-
60
-
61
-
62
-
63
-
64
-
65
-
66
-
67
-
68
-
69
-
70
-
71
-
72
-
73
-
74
-
75
-
76
-
77
-
78
-
79
-
80
-
81
-
82
-
83
-
84
-
85
-
86
-
87
-
88
-
89
-
90
-
91
-
92
-
93
-
94
-
95
-
96
-
97
-
98
-
99
-
100
-
101
-
102
-
103
-
104
-
105
-
106
-
107
-
108
-
109
-
110
-
111
-
112
-
113
-
114
-
115
-
116
-
117
-
118
-
119
-
120
-
121
-
122
-
123
-
124
-
125
-
126
-
127
-
128
-
129
-
130
-
131
-
132
-
133
-
134
-
135
-
136
-
137
-
138
-
139
-
140
-
141
-
142
-
143
-
144
 |
 |
