Sony TRV950 Operating Instructions - Page 181
Using the optional printer
 |
UPC - 027242607460
View all Sony TRV950 manuals
Add to My Manuals
Save this manual to your list of manuals |
Page 181 highlights
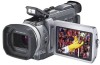
Using the optional printer You can use the optional printer on your camcorder to print images on print paper. For details, refer to the operating instructions of the printer. There are various ways of printing still images. The following describes the setup for printing with the DATE/DAY & TIME information superimposed and the print setup required to select 9PIC PRINT. Before operation •Insert a recorded "Memory Stick" into your camcorder. •Attach the optional printer to your camcorder as illustrated. Printer "Memory Stick" Operations 2 FN MENU Inserting DATE/DAY & TIME You can print the recorded DATE/DAY & TIME data on the print paper. (1) Set the POWER switch to MEMORY/NETWORK (DCR-TRV950 only). Make sure that the LOCK switch is set to the further side (unlock position). (2) Press MENU, then turn the SEL/PUSH EXEC dial to select DATE/TIME in , then press the dial (p. 213). (3) Turn the SEL/PUSH EXEC dial to select the desired mode. DATE DAY & TIME JUL 4 2002 4 12:00AM 181
-
 1
1 -
2
-
3
-
4
-
5
-
6
-
7
-
8
-
9
-
10
-
11
-
12
-
13
-
14
-
15
-
16
-
17
-
18
-
19
-
20
-
21
-
22
-
23
-
24
-
25
-
26
-
27
-
28
-
29
-
30
-
31
-
32
-
33
-
34
-
35
-
36
-
37
-
38
-
39
-
40
-
41
-
42
-
43
-
44
-
45
-
46
-
47
-
48
-
49
-
50
-
51
-
52
-
53
-
54
-
55
-
56
-
57
-
58
-
59
-
60
-
61
-
62
-
63
-
64
-
65
-
66
-
67
-
68
-
69
-
70
-
71
-
72
-
73
-
74
-
75
-
76
-
77
-
78
-
79
-
80
-
81
-
82
-
83
-
84
-
85
-
86
-
87
-
88
-
89
-
90
-
91
-
92
-
93
-
94
-
95
-
96
-
97
-
98
-
99
-
100
-
101
-
102
-
103
-
104
-
105
-
106
-
107
-
108
-
109
-
110
-
111
-
112
-
113
-
114
-
115
-
116
-
117
-
118
-
119
-
120
-
121
-
122
-
123
-
124
-
125
-
126
-
127
-
128
-
129
-
130
-
131
-
132
-
133
-
134
-
135
-
136
-
137
-
138
-
139
-
140
-
141
-
142
-
143
-
144
-
145
-
146
-
147
-
148
-
149
-
150
-
151
-
152
-
153
-
154
-
155
-
156
-
157
-
158
-
159
-
160
-
161
-
162
-
163
-
164
-
165
-
166
-
167
-
168
-
169
-
170
-
171
-
172
-
173
-
174
-
175
-
 176
176 -
 177
177 -
 178
178 -
 179
179 -
 180
180 -
 181
181 -
 182
182 -
 183
183 -
 184
184 -
 185
185 -
 186
186 -
187
-
188
-
189
-
190
-
191
-
192
-
193
-
194
-
195
-
196
-
197
-
198
-
199
-
200
-
201
-
202
-
203
-
204
-
205
-
206
-
207
-
208
-
209
-
210
-
211
-
212
-
213
-
214
-
215
-
216
-
217
-
218
-
219
-
220
-
221
-
222
-
223
-
224
-
225
-
226
-
227
-
228
-
229
-
230
-
231
-
232
-
233
-
234
-
235
-
236
-
237
-
238
-
239
-
240
-
241
-
242
-
243
-
244
-
245
-
246
-
247
-
248
-
249
-
250
-
251
-
252
-
253
-
254
-
255
-
256
 |
 |
