TEAC CRH227I Owners Manual
TEAC CRH227I Manual
 |
View all TEAC CRH227I manuals
Add to My Manuals
Save this manual to your list of manuals |
TEAC CRH227I manual content summary:
- TEAC CRH227I | Owners Manual - Page 1
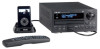
Z CQX1A1192Z CR-H227i ENGLISH CD Receiver OWNER'S MANUAL MANUEL DU PROPRIÉTAIRE MANUAL DEL USUARIO FRANÇAIS ESPAÑOL - TEAC CRH227I | Owners Manual - Page 2
the presence of important operating and maintenance (servicing) instructions in the literature accompanying the appliance. IMPORTANT SAFETY INSTRUCTIONS 1) Read these instructions. 2) Keep these instructions. 3) Heed all warnings. 4) Follow all instructions. 5) Do not use this apparatus near water - TEAC CRH227I | Owners Manual - Page 3
RAIN OR MOISTURE. CAUTION < DO NOT REMOVE THE EXTERNAL CASES OR CABINETS TO EXPOSE THE ELECTRONICS. NO USER SERVICEABLE PARTS ARE WITHIN! < IF YOU ARE EXPERIENCING PROBLEMS WITH THIS PRODUCT, CONTACT TEAC FOR A SERVICE REFERRAL. DO NOT USE THE PRODUCT UNTIL IT HAS BEEN REPAIRED. < USE OF CONTROLS OR - TEAC CRH227I | Owners Manual - Page 4
TEAC. Read this manual carefully to get the best performance from this unit. Important Safety Instructions should get into the set, contact your dealer or service agency. < When removing the power plug from the the disc tray when not using the CD player. < Do not attempt to clean the unit with chemical - TEAC CRH227I | Owners Manual - Page 5
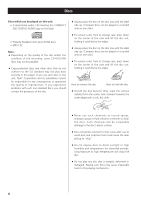
fluid completely. Do not use thinner, benzine or alcohol as they may damage the surface of the unit. Restoring factory settings If you want to manually initialize the settings, restore the unit to the factory settings as follows: 1. If the unit is on, turn it off (standby). 2. Hold down the FM - TEAC CRH227I | Owners Manual - Page 6
and/or the condition of the recording, some CD-R/CD-RW discs may not be playable. < Copy-protected discs and other discs that do not conform to the CD standard may not play back correctly in this player. If you use such discs in this unit, TEAC Corporation and its subsidiaries cannot be responsible - TEAC CRH227I | Owners Manual - Page 7
audio files < This unit can play MP3 and Windows Mediaformatted audio files recorded on a CD-R or CDRW. (Windows Media is a trademark of Microsoft Corporation , ".wma" for WMA files.) < MP3 files are monaural or stereo MPEG-1 Audio Layer 3 format. This unit can play MP3 files with sampling frequency - TEAC CRH227I | Owners Manual - Page 8
making connection. < Read the instructions of each component you intend to use with this unit. < Be sure to insert each plug securely. To prevent hum and noise, avoid bundling the signal interconnection cables together with the AC power cord or speaker cables. CD recorder, MD deck, etc. DIGITAL - TEAC CRH227I | Owners Manual - Page 9
-in amplifier referred to as a "powered subwoofer". C TAPE/AUX1/AUX2 jacks Analog 2-channel audio signal is input or output from these jacks. Connect a cassette tape deck, CD recorder, DVD player, etc. using commerciallyavailable RCA cables. Make sure to connect: white plug q white jack (L: left - TEAC CRH227I | Owners Manual - Page 10
Connection 2 TV or Monitor VIDEO S-VIDEO IN IN F J I G H Dock 10 - TEAC CRH227I | Owners Manual - Page 11
the LINE OUT or PHONES jack (audio output jack) of the player using a commercially available stereo mini plug cable. < When using the PHONES jack of your mini player, you must adjust the volume of the mini-player or you may hear no sound from your CR-H227i. label side G VIDEO OUT terminal This - TEAC CRH227I | Owners Manual - Page 12
Connecting Antennas AM Indoor Loop Antenna The high-performance AM loop antenna provided with this unit is sufficient for good reception in most areas. To stand the loop antenna on a surface, fix the claw to the slot in the antenna base. AM Outdoor Antenna If the AM loop antenna provided does not - TEAC CRH227I | Owners Manual - Page 13
FM Indoor Antenna Connect the lead-type FM antenna to the FM 75Ω socket, extend the lead and tune the tuner to your favorite station (see page 33). Adjust the antenna in a suitable location like a window frame or wall until the reception is best and then affix the antenna in that position using - TEAC CRH227I | Owners Manual - Page 14
Identifying the Parts 1 AB C D E F P O N MLK J I HG 14 - TEAC CRH227I | Owners Manual - Page 15
iPod or CD mode, use this button to pause playback. In FM mode, use this button to select stereo or monaural. J PLAY (y), BAND In iPod or CD mode, See page 22 for details. O AUX 3 IN Jack You can connect a portable audio player to this jack. See page 11 for details. P PHONES For private listening, - TEAC CRH227I | Owners Manual - Page 16
. H MEMORY In TUNER mode, use this button to preset stations. I SOURCE (AUX 1, AUX 2, AUX 3, CD, TUNER, TAPE, iPod) Use these buttons to select a source. Note: To simplify explanations, instructions in this manual refer to the names of the buttons and controls on the front panel only. Associated - TEAC CRH227I | Owners Manual - Page 17
a few seconds.) M MUTING Use this button to mute the sound. N TIME During audio CD playback, use this button to change the time display. or monaural. V RDS In FM CD mode, first press the CD button, and then press the SHUFFLE button. U FM MODE In FM TUNER mode, use this button to select stereo 17 - TEAC CRH227I | Owners Manual - Page 18
Remote Control Unit The provided Remote Control Unit allows the unit to be operated from a distance. When operating the remote control unit, point it towards the REMOTE SENSOR on the front panel of the unit. Battery Replacement If the distance required between the remote control unit and main unit - TEAC CRH227I | Owners Manual - Page 19
by turning the VOLUME knob. 2 Select a source by pressing the SOURCE button. Each time the SOURCE button is pressed, the source changes as follows: TUNER CD iPod TAPE AUX3 AUX2 AUX1 < To listen to an external source connected to the AUX IN jack, select AUX (1, 2 or 3). < You can use the - TEAC CRH227I | Owners Manual - Page 20
Basic Operation 2 Headphones For private listening, first reduce the volume level to minimum. Then insert the plug from your headphones into the PHONES jack, and adjust the volume using the VOLUME buttons. The sound from the speakers is cut off while the headphone jack is inserted. Muting To mute - TEAC CRH227I | Owners Manual - Page 21
How to adjust bass, treble, balance of speakers and dimmer Available menu item and options BASS Adjusts the level of low frequency sound range. The level can be adjusted from -10 to +10. 12 1 Repeatedly press the TONE/BAL/DIMMER button to select the menu item to be changed. TREBLE Adjusts the - TEAC CRH227I | Owners Manual - Page 22
3. Insert the adapter into the Dock of the CRH227i. Fit the front edge of the adapter into video (60 GB, 80 GB). "nano" for iPod nano. "mini" for iPod mini. "20GB (color) + Photo 30GB" for iPod with color display the CR-H227i or with the remote control unit, software update may solve the problem. - TEAC CRH227I | Owners Manual - Page 23
the CR-H227i is connected to the AC power supply. < When headphones are plugged into the iPod, sound comes from both the speakers of the CRH227i and control unit doesn't work, press the CD button or the iPod button and try again. (Even when the CD or iPod button is pressed without pointing at - TEAC CRH227I | Owners Manual - Page 24
next or a previous track Extended mode (default) Select this to use the display of the CR-H227i. Information on the audio files is displayed on the display of the CR-H227i. The screen of the iPod shows TEAC logo. < No signal is output from the S-VIDEO and VIDEO terminals. During playback, press - TEAC CRH227I | Owners Manual - Page 25
To go back to the previous menu To activate the repeat mode Press the MENU button to go back to the previous menu. This button is equivalent to the MENU button on your iPod. During playback, press the REPEAT button to change the repeat mode. Each time the REPEAT button is pressed, the REPEAT - TEAC CRH227I | Owners Manual - Page 26
/WMA 1 3 24 4 Press the OPEN/CLOSE button (L) to close the tray. 15 1 Press the CD button of the remote control unit (or repeatedly press the SOURCE button) to select "CD". When an audio CD is loaded: The total number of the tracks and total play time of the disc is displayed. When an MP3 - TEAC CRH227I | Owners Manual - Page 27
iPod): PLAY, PAUSE, SHUFFLE, SKIP, SEARCH, REPEAT 1/ALL If the remote control unit doesn't work, press the CD button or the iPod button and try again. (Even when the CD or iPod button is pressed without pointing at the main unit, the function of the remote control unit will be switched.) For - TEAC CRH227I | Owners Manual - Page 28
stop or playback mode, you can use the numeric buttons of the remote control to select a track. When you use the numeric buttons, press the CD button of the remote control first. During playback, hold down the SEARCH button (m or ,) of the remote control unit (or the SKIP button of the - TEAC CRH227I | Owners Manual - Page 29
playback, programmed tracks will be played repeatedly. Each time the REPEAT 1/ALL button is pressed, the mode is changed as follows: A-B Repeat Playback When a CD is loaded: Repeat 1 Repeat All Play (off) When an MP3/WMA disc is loaded. Repeat 1 RPT Folder Repeat All Play (off) < If one of - TEAC CRH227I | Owners Manual - Page 30
Programmed Playback (CD/MP3/WMA) Up to 32 tracks can be programmed in the desired is unplugged, the programmed contents will be erased. < If the numeric buttons don't work, first press the CD button, and then press the number. < You can also use the SKIP button and the PROGRAM button to program - TEAC CRH227I | Owners Manual - Page 31
To check the programmed order To clear the program 1. In the stop mode, press the PROGRAM button. In the stop mode, press the PROGRAM button repeatedly. The track number and program number will be shown on the display. To add a track to the program 2. Hold down the CLEAR button for more than 4 - TEAC CRH227I | Owners Manual - Page 32
SHUFFLE button in the stop or play mode. "Random play" appears on the display, and the tracks will be played randomly. When playing back an audio CD, each time the TIME button is pressed the display changes as follows: < If you press the / button during shuffle playback, next track will be - TEAC CRH227I | Owners Manual - Page 33
mode. Each time the TUNING MODE button is pressed, the tuning mode changes as follows: Manual tune, Auto tune, Preset tune Select "Manual tune" or "Auto tune". Stereo FM stereo broadcasts are received in stereo and the "STEREO" indicator lights in the display. < If the sound is distorted and the - TEAC CRH227I | Owners Manual - Page 34
Preset Tuning You can store up to 30 FM and 30 AM stations. Preset Automatically 1 Select AM or FM by pressing the BAND button. Preset Manually 1 Tune in a station you want to listen to (see page 33). 2 Press the MEMORY button. 2 Press the MEMORY button for more than 3 seconds. "CH01" blinks - TEAC CRH227I | Owners Manual - Page 35
< You can also use the numeric buttons. For instance, to select preset number 25, first press the TUNER button, and then press "2" and "5". How to select preset stations 1 Select AM or FM by pressing the BAND button. 2 Select "Preset tune" using the TUNING MODE button. To select numbers less than - TEAC CRH227I | Owners Manual - Page 36
" will blink for 3 seconds and then the unit searches for a traffic announcement. < When a traffic programme is found, the Traffic announce mode is switched to Program service mode. If the station currently selected is transmitting a traffic program signal, the RDS mode will be switched to Program - TEAC CRH227I | Owners Manual - Page 37
RDS (PTY Search) 4 35 A station can be searched by this function. 1 Select FM by pressing the BAND button. 12 5 Press the TUNING button. The unit starts searching. 2 Press the RDS MODE button for more than 3 seconds. "RDS PROGRAM TYPE" appears on the display. < When the programme that you have - TEAC CRH227I | Owners Manual - Page 38
announcements other than news, documents, discussion, analysis and so on. Information: daily information or reference such as weather forecast, consumer guide, medical assistance and so on. Sport: sports related programs. Education: educational and cultural information. Drama: all kinds of radio - TEAC CRH227I | Owners Manual - Page 39
Setting the Clock ENTER SKIP 1 Press the TIME MODE button once. TIME MODE 3 Press the ENTER button. Each time the TIME MODE button is pressed, the mode is changed as follows: Current time On time Off time Source select The "minute" value blinks. 4 Press the SKIP buttons to set the current minute - TEAC CRH227I | Owners Manual - Page 40
Setting the Timer ENTER SKIP TIME MODE Setting the Timer < The unit can be programmed to turn on and off at a specified time. < Adjust the clock before setting the timer. < When no action is taken for 1 minute, the timer setting mode will be cancelled. 1 Press the TIME MODE button twice. 4 Press - TEAC CRH227I | Owners Manual - Page 41
the display. 2 Prepare the source and adjust the volume. When the source is set to "iPod", insert an iPod. When the source is set to "CD", set a disc. When the source is set to "TUNER", tune in a station. When you don't use the timer, press the TIMER button to turn it - TEAC CRH227I | Owners Manual - Page 42
. iPod Player Cannot insert the iPod. e Check the dock adapter. eRemove dust or obstacles from the Dock connector of the CR-H227i and the iPod, and insert the iPod again. Will not play. e Remove the iPod from the dock, wait a few seconds, and insert it again. e Software update may solve the problem - TEAC CRH227I | Owners Manual - Page 43
Mono) 60 dB (Stereo) Presets 30 Dock x 1 Dock adapter x 8 (adapter "60GB (color) + Photo 40GB/60GB" premounted) Cover for the Dock x 1 Owner's Manual x 1 Warranty are approximate. • Illustrations may differ slightly from production models. CD Player Section Frequency Response . . . 20 Hz to 20,
-
 1
1 -
 2
2 -
 3
3 -
 4
4 -
 5
5 -
 6
6 -
 7
7 -
8
-
9
-
10
-
11
-
12
-
13
-
14
-
15
-
16
-
17
-
18
-
19
-
20
-
21
-
22
-
23
-
24
-
25
-
26
-
27
-
28
-
29
-
30
-
31
-
32
-
33
-
34
-
35
-
36
-
37
-
38
-
39
-
40
-
41
-
42
-
43
 |
 |

CR
-
H227i
Z
CQX1A1192Z
CD Receiver
OWNER’S MANUAL
MANUEL DU PROPRIÉTAIRE
MANUAL DEL USUARIO
ENGLISH
FRANÇAIS
ESPAÑOL