TP-Link TL-R860 User Guide - Page 17
Configuring the Router - port forwarding
 |
UPC - 845973040109
View all TP-Link TL-R860 manuals
Add to My Manuals
Save this manual to your list of manuals |
Page 17 highlights
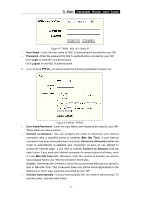
TL-R860 Cable/DSL Router User Guide Chapter 4. Configuring the Router This chapter describes each web page's key functions. 4.1 login After your successful login, you can configure and manage the router. There are nine main menus on the left of the web-based utility. Submenus will be available after you click one of the main menus. The nine main menus are: Status, Quick Setup, Network, DHCP, Forwarding, Security, Static Routing, DDNS and System Tools. On the right of the web-based utility, there are the detailed explanations and instructions for the corresponding page. To apply any settings you have altered on the page, please click the Save button. There are the detailed explanations for each web page's key functions below. 4.2 Status The Status page displays the router's current status and configuration. All information is read-only. 1. LAN This field displays the current settings or information for the LAN, including the MAC address, IP address and Subnet Mask. 2. WAN These parameters apply to the WAN port of the router, including MAC address, IP address, Subnet Mask, Default Gateway, DNS server and WAN connection type. If PPPoE is chosen as the WAN connection type, the Disconnect button will be shown here while you are accessing the Internet. You can also cut the connection by clicking the button. If you have not connected to the Internet, a Connect button will be shown, you can then establish the connection by clicking the button. 3. Traffic Statistics This field displays the router's traffic statistics. 4. System Up Time This field displays the time since router is powered on or is rebooted. - 12 -
-
 1
1 -
2
-
3
-
4
-
5
-
6
-
7
-
8
-
9
-
10
-
11
-
 12
12 -
 13
13 -
 14
14 -
 15
15 -
 16
16 -
 17
17 -
 18
18 -
 19
19 -
 20
20 -
 21
21 -
 22
22 -
23
-
24
-
25
-
26
-
27
-
28
-
29
-
30
-
31
-
32
-
33
-
34
-
35
-
36
-
37
-
38
-
39
-
40
-
41
-
42
-
43
-
44
-
45
-
46
-
47
-
48
-
49
-
50
-
51
-
52
-
53
-
54
-
55
-
56
-
57
-
58
-
59
-
60
-
61
-
62
-
63
 |
 |
