Weider Pro 2000 Uk Manual - Page 13
Locate the Low Cable 48.
 |
View all Weider Pro 2000 manuals
Add to My Manuals
Save this manual to your list of manuals |
Page 13 highlights
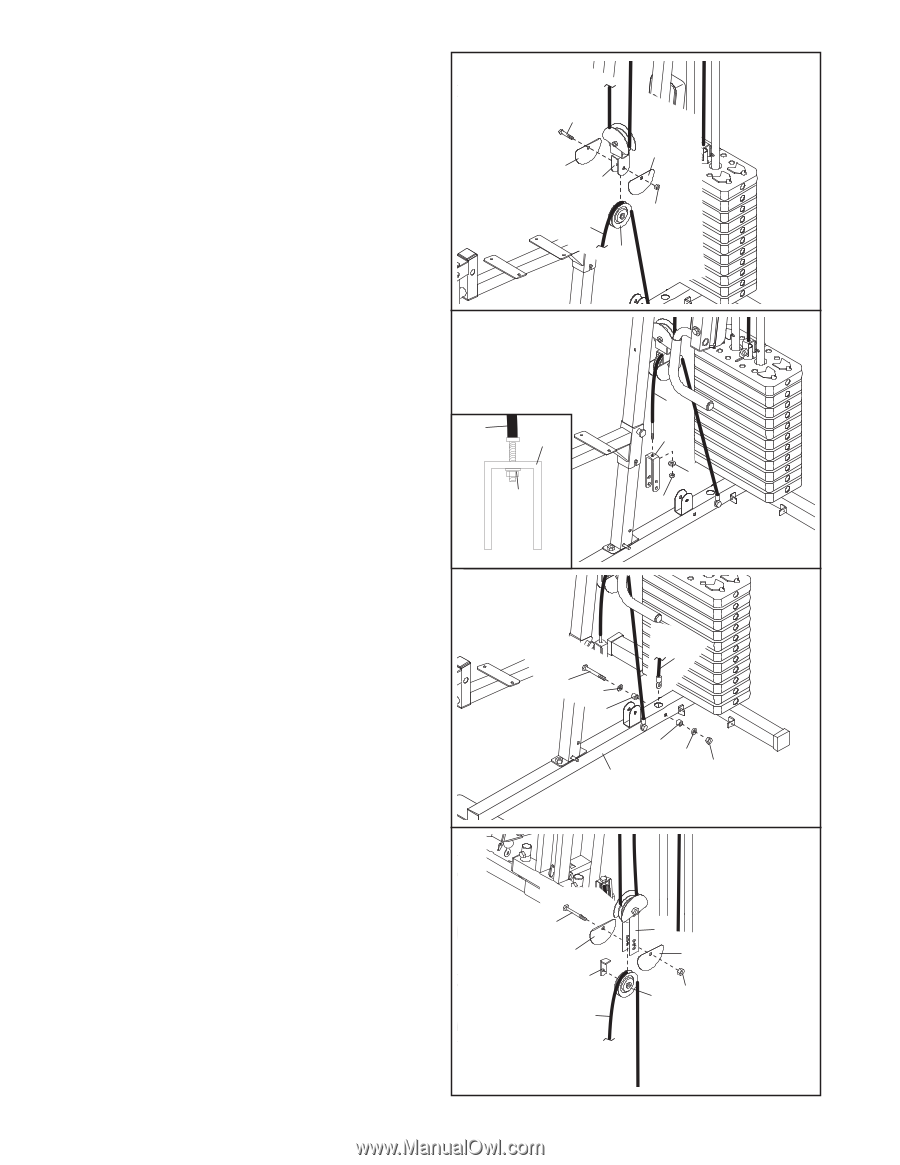
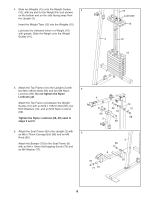
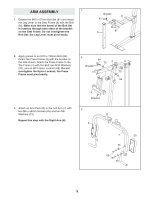
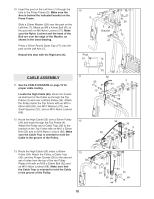
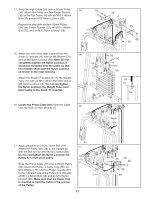
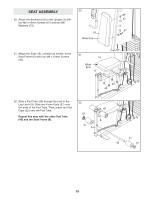
22. Wrap the Short Cable (47) over a 90mm Pulley 22 (34). Attach the Pulley and two Finger Guards (35) to the Double "U"-bracket (42) with an M10 x 46mm Bolt (53) and an M10 Nylon Locknut (68). 53 35 35 42 68 47 34 23. Attach the end of the Short Cable (47) to the 23 "U"-bracket (43) with an M8 Washer (71) and an M8 Nylon Locknut (69). Note: Do not com- pletely tighten the Nylon Locknut; it should be threaded onto the Cable so that two threads show past the Nylon Locknut, as shown in the inset drawing. 47 43 69 47 43 71 69 24. Locate the Low Cable (48). Attach the Cable 24 inside the Base (1) with an M10 x 65mm Bolt (55), two M10 Washers (70), two Large Spacers (51), and an M10 Nylon Locknut (68). 25. Route the Low Cable (48) over a 90mm Pulley 25 (34). Attach the Pulley, a Cable Trap (36), and two Finger Guards (35) to the second set of holes from the bottom of the two Pulley Plates (44) with an M10 x 52mm Bolt (52) and an M10 Nylon Locknut (68). Make sure that the Cable Trap is oriented to hold the Cable in the groove of the Pulley. 55 70 51 1 48 51 70 68 52 35 36 48 44 35 34 68 13
-
 1
1 -
2
-
3
-
4
-
5
-
6
-
7
-
 8
8 -
 9
9 -
 10
10 -
 11
11 -
 12
12 -
 13
13 -
 14
14 -
 15
15 -
 16
16 -
 17
17 -
 18
18 -
19
-
20
-
21
-
22
-
23
-
24
 |
 |