Xerox 6180MFP Features Setup Guide
Xerox 6180MFP - Phaser Color Laser Manual
 |
UPC - 095205733839
View all Xerox 6180MFP manuals
Add to My Manuals
Save this manual to your list of manuals |
Xerox 6180MFP manual content summary:
- Xerox 6180MFP | Features Setup Guide - Page 1
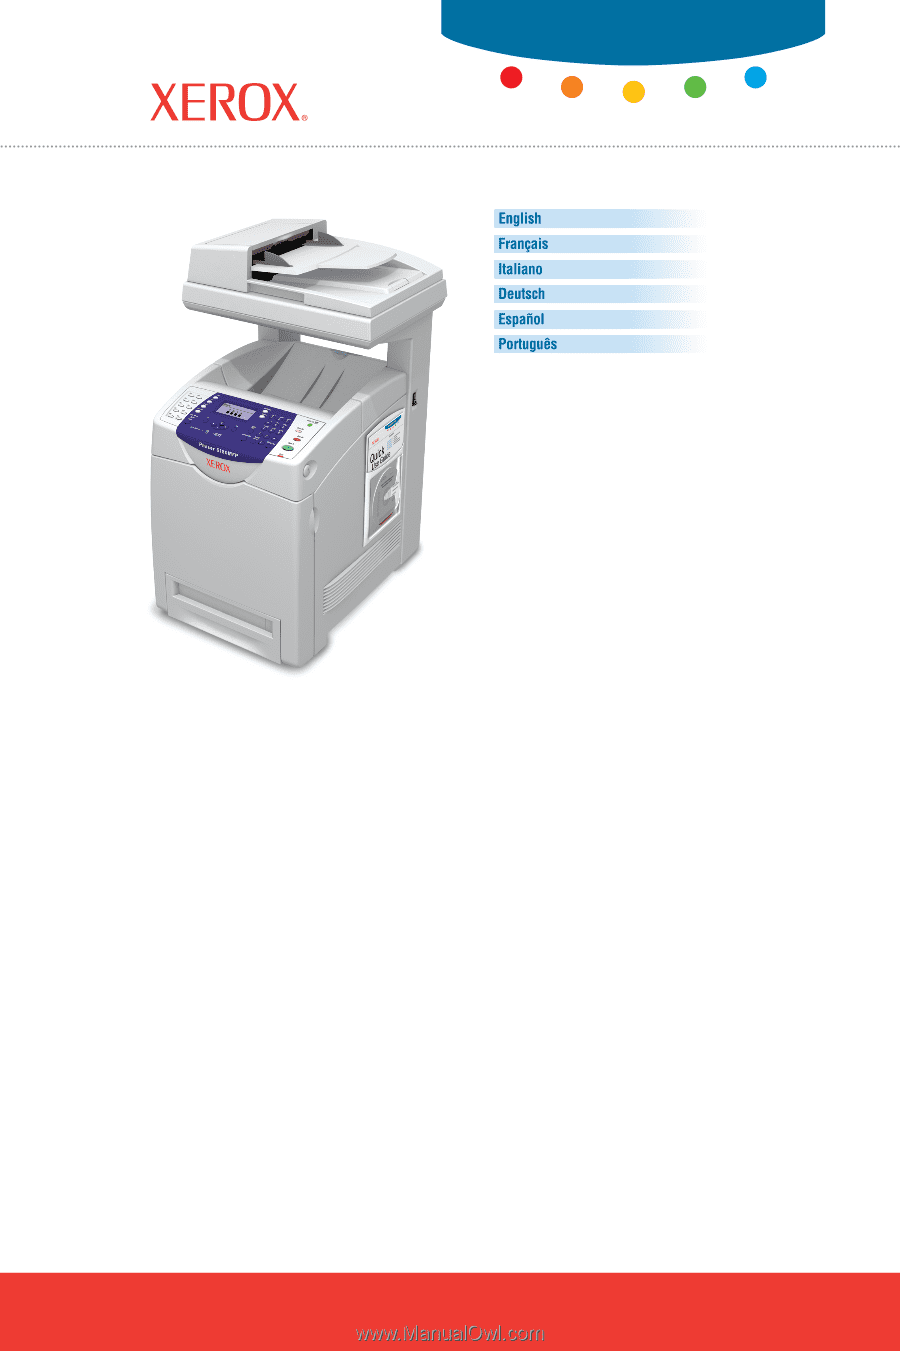
Phaser® 6180MFP multifunction printer EN FR IT DE ES PT Features Setup Guide Guide de configuration des fonctions Guida all'installazione delle funzioni Funktionsinstallationshandbuch Guía de configuración de funciones Guia de Configuração dos Recursos www.xerox.com/office/6180MFPsupport - Xerox 6180MFP | Features Setup Guide - Page 2
. All Rights Reserved. Unpublished rights reserved under the copyright laws of the United States. XEROX®, CentreWare®, Phaser®, and PrintingScout® are trademarks of Xerox Corporation in the United States and/or other countries. Adobe® and PostScript® are trademarks of Adobe Systems Incorporated - Xerox 6180MFP | Features Setup Guide - Page 3
Setting up scanning to an FTP server Enable Fax Features: ■ Entering fax number and country code ■ Creating individual fax addresses ■ Creating and editing a fax group For detailed user information for this printer, go to www.xerox.com/ office/6180MFPsupport. Phaser® 6180MFP Multifunction Printer EN - Xerox 6180MFP | Features Setup Guide - Page 4
Click Install Printer Driver. 5. Select I Agree if you accept the Xerox License Agreement. 6. Select your Phaser 6180MFP Multifunction Printer from the list of available printers, and then click the Install button. 7. If your printer was not in the list, type the printer's IP address directly into - Xerox 6180MFP | Features Setup Guide - Page 5
Printer Driver. 2. When asked if Windows can connect to the Windows Update to search for software, select No, not this time, and then click Next. 3. Select Install from a list or specific location Next. 7. When the installation is complete, click Finish. Phaser® 6180MFP Multifunction Printer EN - 3 - Xerox 6180MFP | Features Setup Guide - Page 6
the list of available printers. 7. Click the Add button. Macintosh OS X 10.4.x and Higher (Bonjour) 1. Open the Printer Setup Utility. 2. Click the Add button. 3. Click the Default Browser button. 4. Select the Bonjour connected printer. 5. Click the Add button. Phaser® 6180MFP Multifunction Printer - Xerox 6180MFP | Features Setup Guide - Page 7
the Phaser 6180MFP from the list of available printers. 5. Click the Add button. Setting Up the Printer Features Connecting over Ethernet (Network) The following section will help you: ■ Set up a shared folder. ■ Create an address for the scanner. ■ Set up the SMTP Server. ■ Create an email Address - Xerox 6180MFP | Features Setup Guide - Page 8
instructions on how to obtain the Printer IP address, see Frequently Asked Questions on page 15. 3. On the printer's home page, click Address Book. 4. On the Address Book tab, under Server Address Book on the left navigation panel, click Individual Directory. Phaser® 6180MFP Multifunction Printer - Xerox 6180MFP | Features Setup Guide - Page 9
the Scan to Email feature, you first need to set up your SMTP server information. SMTP (Simple Mail Transfer Protocol) is a protocol for sending email. 1. Launch your web browser. 2. Enter the printer's IP address in the browser's Address field. You will see the printer's home page. For instructions - Xerox 6180MFP | Features Setup Guide - Page 10
In the Server Address field, enter the IP address of the FTP server. c. If the FTP server is not using the default port, enter a Port Number. d. Leave the Share Name and Server Path fields blank. 6. Click the Save Changes button to create the new address. Phaser® 6180MFP Multifunction Printer EN - 8 - Xerox 6180MFP | Features Setup Guide - Page 11
to the ten one touch buttons found on the left navigation panel of the control panel. 6. Enter the information for the individual. 7. Click the Save Changes button to create the new address. The new individual is saved to the printer's address book. Phaser® 6180MFP Multifunction Printer EN - 9 - Xerox 6180MFP | Features Setup Guide - Page 12
only, you do not need to do the steps in this section. To create an address to a folder on your computer where your printer can scan images directly: 1. On the Start menu, select All Programs/Xerox/Phaser6180MFP/ Address Book Editor, and then click OK. Phaser® 6180MFP Multifunction Printer EN - 10 - Xerox 6180MFP | Features Setup Guide - Page 13
: 139 ■ FTP: 21 16. Click OK. The Address Book is saved with the new entry for your computer. You are now ready to scan images to the network computer. Note: For more information about the Address Book Editor, click the Help button while in the editor. Phaser® 6180MFP Multifunction Printer EN - 11 - Xerox 6180MFP | Features Setup Guide - Page 14
on your computer where your printer can scan images directly: 1. Open the Applications folder, and then select Xerox/ Phaser6180MFP/Address Book Editor. 2. In the left navigation panel of the Address Book Editor, double- click the Server icon and then select New. The Server Address dialog box opens - Xerox 6180MFP | Features Setup Guide - Page 15
the group(s) to add this entry to, and then click OK. 6. Confirm the group members, and click OK. 7. Click OK. 8. Windows: On the File menu, select Save all. Macintosh: On the File menu, select Save. The address book is saved with the new fax entry. Phaser® 6180MFP Multifunction Printer EN - 13 - Xerox 6180MFP | Features Setup Guide - Page 16
using the Address Book Editor: 1. Windows: On the Start menu, select All Programs/Xerox/ Phaser 6180MFP/Address Book Editor, and then click OK. Macintosh: From the Application folder, click Xerox/ Phaser 6180MFP, and then double-click Address Book Editor. 2. In the left navigation panel, right-click - Xerox 6180MFP | Features Setup Guide - Page 17
Why would you use a network connection? When connecting your printer to the computer over the Ethernet (Network) you can: ■ Scan to a computer on the network using shared folders. ■ Scan to an FTP server. ■ Scan to email. ■ Use CentreWare IS to create address book entries. Why would you use - Xerox 6180MFP | Features Setup Guide - Page 18
un numéro de fax et d'un code pays ■ Création d'adresses fax individuelles ■ Création et modification d'un groupe de télécopie Pour obtenir des informations détaillées sur cette imprimante, rendez-vous sur le site www.xerox.com/office/6180MFPsupport. Imprimante multifonctions Phaser® 6180MFP FR - 16 - Xerox 6180MFP | Features Setup Guide - Page 19
d'imprimante Windows sur Ethernet (réseau) 1. Vérifiez que l'imprimante est sous tension et connectée au réseau. 2. Insérez le Software and accepter le contrat de licence du logiciel Xerox. 6. Sélectionnez l'imprimante multifonction Phaser 6180MFP dans la liste des imprimantes détectées et cliquez - Xerox 6180MFP | Features Setup Guide - Page 20
Windows Update pour rechercher les mises à jour ?, sélectionnez Non, par pour cette fois, puis cliquez sur Suivant. 3. Sélectionnez Installer à partir d'une liste . 5. Accédez au Software and Documentation CD-ROM (CD-ROM Logiciels et documentation). Imprimante multifonctions Phaser® 6180MFP FR - 18 - Xerox 6180MFP | Features Setup Guide - Page 21
. 4. Sélectionnez l'imprimante dans la fenêtre des imprimantes. 5. Sélectionnez Xerox dans la liste de constructeurs du menu déroulant inférieur Modèle d'imprimante. 6. Sélectionnez Phaser 6180MFP dans la liste des imprimantes disponibles. 7. Cliquez sur le bouton Ajouter. Imprimante multifonctions - Xerox 6180MFP | Features Setup Guide - Page 22
menu déroulant. 4. Sélectionnez l'imprimante dans la fenêtre des imprimantes. 5. Sélectionnez Xerox parmi les constructeurs proposés dans le menu déroulant inférieur. 6. Sélectionnez Phaser 6180MFP dans la liste des imprimantes disponibles. 7. Cliquez sur le bouton Ajouter. Macintosh OS X 10.4.x et - Xerox 6180MFP | Features Setup Guide - Page 23
. 3. Activez Partage Windows. 4. Cliquez sur le bouton Comptes, puis activez votre compte. 5. Suivez les instructions affichées à l'écran pour entrer votre mot de passe. 6. Cliquez sur Terminé. 7. Cliquez sur Tout afficher, puis sur l'icône Réseau. Imprimante multifonctions Phaser® 6180MFP FR - 21 - Xerox 6180MFP | Features Setup Guide - Page 24
le volet de navigation gauche, cliquez sur Répertoire individuel. 5. Dans la Liste des répertoires, cliquez sur le bouton Ajouter pour les adresses inutilisées. carnet d'adresses. b. Sélectionnez l'option SMB dans la liste déroulante Type de serveur. Imprimante multifonctions Phaser® 6180MFP FR - 22 - Xerox 6180MFP | Features Setup Guide - Page 25
vos nom et mot de passe de connexion. f. Windows : Dans le champ Nom du partage, saisissez le nom SMTP. SMTP (Simple Mail Transfer Protocol) est un protocole liste Protocoles. 4. Cochez la case Activer SNMP, puis cliquez sur Enregistrer les modifications. Imprimante multifonctions Phaser® 6180MFP - Xerox 6180MFP | Features Setup Guide - Page 26
connectée via Ethernet (réseau) 5. Sélectionnez Serveur de messagerie dans la liste Protocoles. 6. Entrez vos paramètres de courrier électronique puis cliquez sur d'adresses. 4. Sous Carnet d'adresses du serveur, cliquez sur Répertoire individuel. Imprimante multifonctions Phaser® 6180MFP FR - 24 - Xerox 6180MFP | Features Setup Guide - Page 27
de l'imprimante connectée via Ethernet (réseau) 5. Dans la Liste des répertoires, cliquez sur le bouton Ajouter pour les le Carnet d'adresses, sous Répertoire FAX, cliquez sur Répertoire individuel. 5. Dans la Liste des répertoires, cliquez sur le bouton Ajouter pour les entrées inutilisées. Les dix - Xerox 6180MFP | Features Setup Guide - Page 28
le Carnet d'adresses, sous Répertoire FAX, cliquez sur Répertoire de groupe. 5. Dans la Liste des répertoires, cliquez sur le bouton Ajouter pour les groupes inutilisés. 6. Entrez un nom de de télécopie ; ■ créer et modifier un groupe de télécopie. Imprimante multifonctions Phaser® 6180MFP FR - 26 - Xerox 6180MFP | Features Setup Guide - Page 29
carnet d'adresses pour créer une adresse (Windows) Remarque : Si votre ordinateur est connecté marrer, sélectionnez Tous les programmes/ Xerox/Phaser 6180MFP/Editeur du carnet d'adresses. Cliquez . Sélectionnez la case Utiliser Utilisateur du service de numérisation pour autoriser les utilisateurs - Xerox 6180MFP | Features Setup Guide - Page 30
peut numériser les images directement : 1. Ouvrez le dossier Applications, puis sélectionnez Xerox/ Phaser6180MFP/Editeur du carnet d'adresses. 2. Dans le panneau de navigation gauche de l'Éditeur passe dans le champ Confirmer le Mot passe connex. Imprimante multifonctions Phaser® 6180MFP FR - 28 - Xerox 6180MFP | Features Setup Guide - Page 31
numérisation USB Remarque : Le logiciel Gestionnaire de numérisation express doit être installé. 1. Windows : Dans le menu Démarrer, sélectionnez Tous les programmes/Xerox/Phaser 6180MFP/Gestionnaire de numérisation express. Cliquez ensuite sur OK. Macintosh : Dans le dossier Applications, cliquez - Xerox 6180MFP | Features Setup Guide - Page 32
pour créer un groupe de télécopie Pour créer un groupe à l'aide de l'Éditeur du carnet d'adresses : 1. Windows : Dans le menu Démarrer, sélectionnez Tous les programmes/Xerox/Phaser 6180MFP/Editeur du carnet d'adresses, puis cliquez sur OK. Macintosh : Dans le dossier Application, sélectionnez - Xerox 6180MFP | Features Setup Guide - Page 33
les membres du groupe dans la liste du panneau de navigation situé à groupe. 8. Sélectionnez les membres du groupe, puis cliquez sur OK. 9. Windows : Dans le menu Fichier, sélectionnez Enregistrer tout. Macintosh : Dans le menu carnet d'adresses. Imprimante multifonctions Phaser® 6180MFP FR - 31 - Xerox 6180MFP | Features Setup Guide - Page 34
es de carnet d'adresses. Comment trouver l'adresse IP de l'ordinateur ? Pour Windows : Dans une fenêtre d'invite DOS de Windows, entrez la commande suivante : ipconfig L'adresse IP de votre ordinateur s'affiche tres réseau de la page de configuration. Imprimante multifonctions Phaser® 6180MFP FR - 32 - Xerox 6180MFP | Features Setup Guide - Page 35
Installazione di driver e utilità: ■ Windows 2000 o versioni successive ■ Macintosh 10.2 e versioni successive Abilitazione delle funzioni Scansione su email, Scansione su su questa stampante, visitare il sito www.xerox.com/office/6180MFPsupport. Stampante multifunzione Phaser® 6180MFP IT - 33 - Xerox 6180MFP | Features Setup Guide - Page 36
una lingua dall'elenco visualizzato. 4. Fare clic su Installa driver della stampante. 5. Fare clic su Accetto per accettare i termini del contratto di licenza Xerox. 6. Selezionare la Stampante multifunzione Phaser 6180MFP dall'elenco delle stampanti disponibili, quindi fare clic sul pulsante - Xerox 6180MFP | Features Setup Guide - Page 37
driver della stampante. 2. Quando viene visualizzato il messaggio Windows può collegarsi all'aggiornamento di Windows per cercare il software?, clic sul pulsante Sfoglia. 5. Passare al Software and Documentation CD-ROM (CD Software e documentazione). Stampante multifunzione Phaser® 6180MFP IT - 35 - Xerox 6180MFP | Features Setup Guide - Page 38
Rendezvous. 4. Selezionare la stampante dalla finestra delle stampanti. 5. Dall'elenco di produttori nel menu a discesa inferiore Modello Stampante, scegliere Xerox. 6. Dall'elenco delle stampanti disponibili, selezionare Phaser 6180MFP. 7. Fare clic sul pulsante Aggiungi. Stampante multifunzione - Xerox 6180MFP | Features Setup Guide - Page 39
default. 4. Selezionare la stampante Bonjour connessa. 5. Fare clic sul pulsante Aggiungi. Installazione USB in Macintosh Inserire il Software and Documentation CD-ROM (CD Software discesa inferiore, scegliere Xerox. 6. Dall'elenco delle stampanti disponibili, selezionare Phaser 6180MFP. 7. Fare clic - Xerox 6180MFP | Features Setup Guide - Page 40
SMTP. ■ Creazione di un indirizzo email. ■ Impostazione della funzione di scansione su un server FTP. ■ Impostazione del fax. ■ Aggiunta di indirizzi individuali o di gruppo alla propria rubrica fax. Punto 1: Impostazione di una cartella condivisa Windows: Per condividere una cartella su un sistema - Xerox 6180MFP | Features Setup Guide - Page 41
nell'elenco a discesa Tipo server. c. Nel campo Indirizzo Server, immettere l'indirizzo IP del proprio computer. Windows: Per ottenere l'indirizzo IP e fare clic su Network. d. Se il server non utilizza la porta predefinita, immettere un Numero porta. Stampante multifunzione Phaser® 6180MFP IT - 39 - Xerox 6180MFP | Features Setup Guide - Page 42
su Salva modifiche. 5. Selezionare Server email dall'elenco dei protocolli. 6. Immettere le impostazioni email e fare clic su Salva modifiche. Nota: Se necessario, rivolgersi all'amministratore di sistema per ottenere le proprie impostazioni email. Stampante multifunzione Phaser® 6180MFP IT - 40 - Xerox 6180MFP | Features Setup Guide - Page 43
(rete) Passo 4: Utilizzo di CentreWare IS per creare un indirizzo email 1. Avviare il browser web. 2. Immettere l'indirizzo IP della stampante visualizzare nella Rubrica indirizzi. b. Nel campo Indirizzo Server, immettere l'indirizzo IP del server FTP. Stampante multifunzione Phaser® 6180MFP IT - 41 - Xerox 6180MFP | Features Setup Guide - Page 44
porta. d. Lasciare vuoti i campi Nome altri utenti e Percorso server. 6. Fare clic su Salva modifiche per creare il nuovo indirizzo. prime dieci voci nella Rubrica indirizzi corrispondono ai dieci pulsanti one touch posti nel pannello di navigazione a sinistra del pannello Phaser® 6180MFP IT - 42 - Xerox 6180MFP | Features Setup Guide - Page 45
. ■ Utilizzare Gestione scansioni espresse per impostare la scansione USB. ■ Impostazione del fax. ■ Aggiungere una voce agli indirizzi fax. ■ Creare e modificare un gruppo fax. Stampante multifunzione Phaser® 6180MFP IT - 43 - Xerox 6180MFP | Features Setup Guide - Page 46
creare un indirizzo (Windows) Nota: Se Xerox/ Phaser 6180MFP/Editor rubrica indirizzi. Fare clic su OK. 2. Fare doppio clic sull'icona Server per aprire la finestra di dialogo Indirizzo server password con cui si è eseguito il login. 11. Selezionare la casella di controllo Usa Utente del servizio Scan - Xerox 6180MFP | Features Setup Guide - Page 47
server. Xerox Password login. 9. Se si sta utilizzando il numero porta predefinito, selezionare la casella di controllo Utilizza Numero di porta predefinito. Se non si sta utilizzando il numero porta predefinito, digitare il numero porta nel campo Numero porta. Stampante multifunzione Phaser® 6180MFP - Xerox 6180MFP | Features Setup Guide - Page 48
stampato sull'intestazione del fax). Passo 4: Utilizzo di Editor rubrica indirizzi per aggiungere una voce agli indirizzi fax 1. Windows: dal menu Start, selezionare Programmi/Xerox/ Phaser 6180MFP/Editor rubrica indirizzi, quindi fare clic su OK. Macintosh: dalla cartella Applicazione, fare clic su - Xerox 6180MFP | Features Setup Guide - Page 49
voci della Rubrica indirizzi corrispondono ai dieci pulsanti di selezione one-touch presenti sul pannello di navigazione sinistro del pannello di controllo tramite Editor rubrica indirizzi: 1. Windows: dal menu Start, selezionare Programmi/Xerox/ Phaser 6180MFP/Editor rubrica indirizzi, quindi fare - Xerox 6180MFP | Features Setup Guide - Page 50
clic su OK. 9. Windows: Dal menu File, server FTP. ■ Eseguire scansioni su email driver di scansione. ■ Inviare un'immagine scansita in una cartella utilizzando Gestione scansioni espresse. ■ Utilizzare Editor rubrica indirizzi per creare voci di rubrica. Stampante multifunzione Phaser® 6180MFP - Xerox 6180MFP | Features Setup Guide - Page 51
Windows: Da una finestra del prompt dei comandi di DOS, digitare: ipconfig Viene visualizzato l'indirizzo IP del proprio computer. Per Macintosh: 1. Dal dock, aprire Preferenze di sistema. 2. Fare clic sulla scheda Network IP della propria stampante. Stampante multifunzione Phaser® 6180MFP IT - 49 - Xerox 6180MFP | Features Setup Guide - Page 52
folgende Aufgaben: Installation der Treiber und Dienstprogramme: ■ Windows 2000 und höher ■ Macintosh ab Version 10.2 ■ Aktivieren von Scanausgabe: FTP-Server Aktivieren der Faxfunktionen: ■ Eingabe von unter www.xerox.com/office/6180MFPsupport erhältlich. Multifunktionsdrucker Phaser® 6180MFP DE - - Xerox 6180MFP | Features Setup Guide - Page 53
Windows-Druckertreiber über Ethernet (Netzwerk) 1. Sicherstellen, dass der Drucker eingeschaltet und an das Netzwerk angeschlossen ist. 2. Die Software and Documentation CD-ROM (Software um den Xerox Software- Lizenzvertrag zu akzeptieren. 6. Phaser 6180MFP Multifunktionsdrucker aus der Liste der - Xerox 6180MFP | Features Setup Guide - Page 54
Soll eine Verbindung mit Windows Update zur Suche nach Software hergestellt werden? angezeigt wird . 3. Die Option Software von einer Liste oder bestimmten Quelle installieren Software and Documentation CD-ROM (Software- und Dokumentations-CD-ROM) ansteuern. Multifunktionsdrucker Phaser® 6180MFP - Xerox 6180MFP | Features Setup Guide - Page 55
nur USB) 1. Auf Dienstprogramme installieren klicken. 2. Auf Fax-/Scan-Dienstprogramme installieren und dann auf Weiter klicken. 3. Die gewü unteren Dropdown-Menü unter Druckermodell die Option Xerox auswählen. 6. Aus der Liste der verfügbaren Drucker Phaser 6180MFP auswählen. 7. Auf Hinzufügen - Xerox 6180MFP | Features Setup Guide - Page 56
-Menü USB auswählen. 4. Drucker im Druckerfenster auswählen. 5. Aus der Herstellerliste im unteren Dropdown-Menü Xerox auswählen. 6. Aus der Liste der verfügbaren Drucker Phaser 6180MFP auswählen. 7. Auf Hinzufügen klicken. Mac OS X 10.4.x und höher (Bonjour) 1. Drucker-Dienstprogramm öffnen. 2. Auf - Xerox 6180MFP | Features Setup Guide - Page 57
Server ■ Einrichten der Faxfunktion ■ Hinzufügen von Einzel- und Gruppenempfängern zum Faxadressbuch Schritt 1: Freigegebene Ordner einrichten Windows: Ordner unter Windows freigeben: 1. Windows 9. Alle einblenden auswählen und dann auf Benutzer klicken. Multifunktionsdrucker Phaser® 6180MFP DE - 55 - Xerox 6180MFP | Features Setup Guide - Page 58
, unter dem die Adresse im Adressbuch geführt werden soll. b. Aus der Dropdown-Liste Servertyp die Option SMB auswählen. c. In das Feld Server Adresse die IP-Adresse des Computers eingeben. Windows: Zur Ermittlung der IP-Adresse des Computers an der DOS-Eingabeaufforderung ipconfig eingeben und die - Xerox 6180MFP | Features Setup Guide - Page 59
Kurznamen eintragen. g. Windows: Das Feld Server konfigurieren Bevor die Funktion Scanausgabe: E-Mail verfügbar ist, müssen die SMTP-Serverinformationen konfiguriert werden. SMTP (Simple Mail Transfer . 5. Aus der Liste "Protokolle" die Option E-Mail-Server auswählen. 6. Die Phaser® 6180MFP DE - 57 - Xerox 6180MFP | Features Setup Guide - Page 60
des FTP-Servers eingeben. c. Wenn der FTP-Server nicht den Standardport verwendet, eine Portnummer eingeben. d. Die Felder Freigabename und Serverpfad leer lassen. 6. Auf die Schaltfläche Änderungen speichern klicken, um die neue Adresse zu erstellen. Multifunktionsdrucker Phaser® 6180MFP DE - 58 - Xerox 6180MFP | Features Setup Guide - Page 61
des Browsers eingeben. Die Homepage des Druckers wird angezeigt. Erläuterungen zur Abfrage der Drucker-IP-Adresse, siehe Häufig gestellte Fragen auf Seite 65. Multifunktionsdrucker Phaser® 6180MFP DE - 59 - Xerox 6180MFP | Features Setup Guide - Page 62
Editors erstellen (Windows) Hinweis: Wenn der Computer nur über USB an den Drucker angeschlossen ist, sind die folgenden Schritte nicht nötig. Ordneradresse auf dem Computer für die automatische Ablage von Scandateien einrichten: 1. Im Startmenü Alle Programme/Xerox/Phaser 6180MFP/ Adressbuch-Editor - Xerox 6180MFP | Features Setup Guide - Page 63
von Scandateien eingeben. 15. Die Option Vorgegebene Port-Nummer verwenden deaktivieren und die vom Server verwendete Anschlussnummer eingeben. Die Standardanschlüsse sind: ■ SMB: 139 ■ FTP: 21 auf die Schaltfläche Hilfe im Editor aufgerufen werden. Multifunktionsdrucker Phaser® 6180MFP DE - 61 - Xerox 6180MFP | Features Setup Guide - Page 64
Den Ordner Programme öffnen und die Menüreihenfolge Xerox/ Phaser6180MFP/Adressbuch-Editor wählen. 2. Im das Optionsfeld Computer (SMB) klicken. 5. Die IP-Adresse im Feld Server-Name / IP-Adresse eingeben. 6. Den Kurznamen im Feld Freigabename eingeben . Multifunktionsdrucker Phaser® 6180MFP DE - 62 - Xerox 6180MFP | Features Setup Guide - Page 65
der Kopfzeile gesendeter Faxnachrichten). Schritt 4: Einzeleinträge mit Hilfe des Adressbuch-Editors zum Faxadressbuch hinzufügen 1. Windows: Im Startmenü Alle Programme/Xerox/ Phaser 6180MFP/Adressbuch-Editor auswählen und auf OK klicken. Macintosh: Den Ordner Programme öffnen, die Menüreihenfolge - Xerox 6180MFP | Features Setup Guide - Page 66
mit Hilfe des Adressbuch-Editors erstellen: 1. Windows: Im Startmenü Alle Programme/Xerox/ Phaser 6180MFP/Adressbuch-Editor auswählen und auf OK eingeben. 4. Auf Gruppenmitgliedschaft klicken. 5. Die Gruppenmitglieder aus der Liste im linken Fensterbereich auswählen und anschließend auf Hinzufügen - Xerox 6180MFP | Features Setup Guide - Page 67
auf OK klicken. 8. Die Gruppenmitglieder bestätigen und auf OK klicken. 9. Windows: Im Menü Datei die Option Alle speichern auswählen. Macintosh: Im Menü PC mit Hilfe von freigegeben Ordnern ■ Scanausgabe: FTP-Server ■ Scanausgabe: E-Mail ■ Erstellen von Adressbucheinträgen Phaser® 6180MFP DE - 65 - Xerox 6180MFP | Features Setup Guide - Page 68
Häufig gestellte Fragen Wie wird die IP-Adresse des Computers ermittelt? Windows: An der DOS-Eingabeaufforderung den folgenden Befehl eingeben: ipconfig Die IP-Adresse des auf der Konfigurationsseite im Abschnitt mit den Netzwerkeinstellungen angegeben. Multifunktionsdrucker Phaser® 6180MFP DE - 66 - Xerox 6180MFP | Features Setup Guide - Page 69
los controladores y utilidades: ■ Windows 2000 o posterior ■ Macintosh 10.2 y superior Activar Explorar a correo electrónico, Explorar a PC y Scan to FTP Features (Explorar ón de usuario sobre esta impresora, visite www.xerox.com/office/6180MFPsupport. Impresora multifunción Phaser® 6180MFP ES - 67 - Xerox 6180MFP | Features Setup Guide - Page 70
Windows en Ethernet (Red) 1. Asegúrese de que la impresora está encendida y conectada a la red. 2. Introduzca el Software and Documentation CD-ROM (CD-ROM de software si acepta el acuerdo de licencia de Xerox. 6. Seleccione Impresora multifunción Phaser 6180MFP en la lista de impresoras disponibles y - Xerox 6180MFP | Features Setup Guide - Page 71
de impresora. 2. Cuando se le pregunte si Windows puede conectarse a Windows Update para buscar software, seleccione No, quizá en otro momento, en el botón Examinar. 5. Busque en el Software and Documentation CD-ROM (CD-ROM de software y documentación). Impresora multifunción Phaser® 6180MFP ES - 69 - Xerox 6180MFP | Features Setup Guide - Page 72
haga clic en Siguiente. 5. Seleccione Acepto si acepta el acuerdo de licencia de Xerox, y luego haga clic en Siguiente. 6. Elija la carpeta de destino y 5. Seleccione Xerox de la lista de fabricantes en el menú desplegable inferior de Modelo de impresora. 6. Seleccione Phaser 6180MFP de la lista - Xerox 6180MFP | Features Setup Guide - Page 73
. 3. Seleccione USB del menú desplegable. 4. Seleccione la impresora en la ventana de la impresora. 5. Seleccione Xerox de la lista de fabricantes en el menú desplegable inferior. 6. Seleccione Phaser 6180MFP de la lista de impresoras disponibles. 7. Haga clic en el botón Agregar. Macintosh OS X 10 - Xerox 6180MFP | Features Setup Guide - Page 74
Windows: para compartir una carpeta en un sistema operativo Windows: 1. Abra una ventana del Explorador de Windows verifique que estén activados todos los permisos (para Control total, Cambiar y leer). 6. Haga clic en en el icono Compartir. 3. Active Compartir Windows. 4. Haga clic en el botón - Xerox 6180MFP | Features Setup Guide - Page 75
Libreta de direcciones, debajo de Libreta de direcciones del servidor del panel de navegación izquierdo, haga clic en Directorio individual. 5. En En el campo Dirección del servidor, escriba la dirección IP del PC. Windows: para obtener la dirección IP del ordenador, abra una ventana de comandos - Xerox 6180MFP | Features Setup Guide - Page 76
el nombre y contraseña que utilice para iniciar sesión. f. Windows: En el campo Nombre compartido, teclee el nombre compartido de tienen que configurar los datos del servidor SMTP. SMTP (Simple Mail Transfer Protocol) es un protocolo para enviar correo electrónico. 1. Inicie Phaser® 6180MFP ES - 74 - Xerox 6180MFP | Features Setup Guide - Page 77
desea cambiar la ID de la dirección que se ha asignado automáticamente, haga clic en la casilla Specify an Address Number (Especificar un número de dirección) y luego introduzca un valor de 1 a 100 para la ID de escriba la dirección IP del servidor FTP. Impresora multifunción Phaser® 6180MFP ES - 75 - Xerox 6180MFP | Features Setup Guide - Page 78
, debajo de Listín telefónico panel de control. 6. Introduzca los datos de la persona individual. 7. Haga clic en el botón Guardar cambios para crear la nueva dirección. La nueva persona individual se guarda en la libreta de direcciones de la impresora. Impresora multifunción Phaser® 6180MFP - Xerox 6180MFP | Features Setup Guide - Page 79
la página 82. 3. Haga clic en Libreta de direcciones. 4. En Libreta de direcciones, debajo de Listín telefónico del fax, haga clic en Directorio de grupo. 5. En Listado de directorios, haga clic las direcciones del fax. ■ Crear y editar grupos de fax. Impresora multifunción Phaser® 6180MFP ES - 77 - Xerox 6180MFP | Features Setup Guide - Page 80
Uso del Editor de la libreta de direcciones para crear una dirección (Windows) Nota: Si el ordenador está conectado a la impresora solamente por USB directamente: 1. En el menú Inicio, seleccione Todos los programas/Xerox/ Phaser 6180MFP/Editor de la libreta de direcciones. Luego, haga clic en - Xerox 6180MFP | Features Setup Guide - Page 81
en la que la impresora pueda colocar las imágenes escaneadas directamente: 1. Abra la carpeta Aplicaciones, y luego seleccione Xerox/ Phaser 6180MFP/Editor de la libreta de direcciones. 2. En el panel de navegación de la izquierda del Editor de la libreta de direcciones, haga doble clic en el icono - Xerox 6180MFP | Features Setup Guide - Page 82
en Xerox/ Phaser 6180MFP, y luego haga doble clic en Administrador de exploración Express. 2. Haga clic en Examinar y localice la carpeta Destino de salida. 3. Haga clic en Aceptar. Paso 3: Configuración del fax 1. Compruebe que esté conectado a la línea de teléfono. 2. Desde el panel de control - Xerox 6180MFP | Features Setup Guide - Page 83
diez botones de un toque que se encuentran en el panel de navegación de la izquierda del panel de control. 4. Escriba un valor en Nombre y Número de de la libreta de direcciones: 1. Windows: En el menú Inicio seleccione Todos los programas/ Xerox/Phaser 6180MFP/Editor de la libreta de direcciones, - Xerox 6180MFP | Features Setup Guide - Page 84
8. Confirme los miembros del grupo y haga clic en Aceptar. 9. Windows: en el menú Archivo, seleccione Guardar todo. Macintosh: en el libreta de direcciones. 2. En el panel de navegación de la izquierda, haga clic en el icono Fax. 3. En el panel de navegación superior, haga clic Phaser® 6180MFP ES - 82 - Xerox 6180MFP | Features Setup Guide - Page 85
. ¿Cómo se averigua la dirección IP del ordenador? En Windows: En una ventana de comandos del DOS, escriba esto: ipconfig ordenador. ¿Cómo se averigua la dirección IP de la impresora? En el panel de control de la impresora: 1. Haga clic en el botón Sistema. 2. Utilice la Phaser® 6180MFP ES - 83 - Xerox 6180MFP | Features Setup Guide - Page 86
üentes na página 99. Este guia o ajudará a: Instalar os drivers e utilitários: ■ Windows 2000 ou posterior ■ Macintosh 10.2 e posterior Ativar os recursos Digitalizar ções detalhadas sobre o usuário, vá para www.xerox.com/office/6180MFPsupport. Impressora Multifuncional Phaser® 6180MFP PT - 84 - Xerox 6180MFP | Features Setup Guide - Page 87
Clique no botão Idioma e selecione o idioma na lista. 4. Clique em Instalar driver da impressora. 5. Selecione Concordo para aceitar o Contrato de Licença Xerox. 6. Selecione Impressora Multifuncional Phaser 6180MFP na lista de impressoras disponíveis e, em seguida, clique no botão Instalar. 7. Se - Xerox 6180MFP | Features Setup Guide - Page 88
a instalação do driver da impressora. 2. Quando perguntar se O Windows pode conectar o Windows Update para procurar o software, selecione Não, não no botão Procurar. 5. Procure o Software and Documentation CD-ROM (CD-ROM de software e documentação). Impressora Multifuncional Phaser® 6180MFP PT - 86 - Xerox 6180MFP | Features Setup Guide - Page 89
. 3. Selecione Rendezvous no menu suspenso. 4. Selecione a impressora na janela da impressora. 5. No menu suspenso Modelo da impressora, selecione Xerox na lista de fabricantes. 6. Selecione a Phaser 6180MFP na lista de impressoras disponíveis. 7. Clique no botão Adicionar. Impressora Multifuncional - Xerox 6180MFP | Features Setup Guide - Page 90
. 3. Selecione USB no menu suspenso. 4. Selecione a impressora na janela da impressora. 5. No menu suspenso inferior, selecione Xerox na lista de fabricantes. 6. Selecione a Phaser 6180MFP na lista de impressoras disponíveis. 7. Clique no botão Adicionar. Macintosh OS X 10.4.x e superior (Bonjour - Xerox 6180MFP | Features Setup Guide - Page 91
expandir a janela. 16. Defina as permissões para que o Grupo tenha acesso de Leitura e Gravação e, em seguida, clique em Aplicar aos itens anexos. Impressora Multifuncional Phaser® 6180MFP PT - 89 - Xerox 6180MFP | Features Setup Guide - Page 92
. c. No campo Endereço do servidor, digite o endereço IP do computador. Windows: Para obter o endereço IP de seu computador, abra uma janela do prompt de login, digite o nome e a senha usadas para fazer login. f. Windows: No campo Nome de compartilhamento, digite o nome de compartilhamento da pasta - Xerox 6180MFP | Features Setup Guide - Page 93
impressora conectando via Ethernet (rede) g. Windows: O campo Caminho do servidor é primeiro configurar as suas informações do servidor SMTP. O SMTP (Simple Mail Transfer Protocol) é um protocolo para enviar e-mail. 1. Inicie o seu navegador e-mail. Impressora Multifuncional Phaser® 6180MFP PT - 91 - Xerox 6180MFP | Features Setup Guide - Page 94
de porta. d. Deixe os campos Nome de compartilhamento e Caminho do servidor em branco. 6. Clique no botão Salvar alterações para criar o novo endereço. Impressora Multifuncional Phaser® 6180MFP PT - 92 - Xerox 6180MFP | Features Setup Guide - Page 95
endereços correspondem aos dez botões de um toque localizados no painel de navegação esquerdo do painel de controle. 6. Digite as informações da pessoa. 7. Clique no botão Salvar alterações para criar o novo 99. 3. Clique no Catálogo de endereços. Impressora Multifuncional Phaser® 6180MFP PT - 93 - Xerox 6180MFP | Features Setup Guide - Page 96
Utilização do Editor do catálogo de endereços para criar um endereço (Windows) Observação: Se seu computador estiver conectado à impressora apenas por USB, você imagens diretamente: 1. No menu Iniciar, selecione Todos os programas/Xerox/ Phaser 6180MFP/Editor do catálogo de endereços. Clique em OK. - Xerox 6180MFP | Features Setup Guide - Page 97
de rede. Observação: Para obter mais informações sobre o Editor do catálogo de endereços, clique no botão Ajuda com o editor aberto. Impressora Multifuncional Phaser® 6180MFP PT - 95 - Xerox 6180MFP | Features Setup Guide - Page 98
computador onde a impressora pode digitalizar imagens diretamente: 1. Abra a pasta Aplicativos e selecione Xerox/Phaser6180MFP/ Editor do catálogo de endereços. 2. No painel de navegação esquerdo para digitalizar imagens para o computador de rede. Impressora Multifuncional Phaser® 6180MFP PT - 96 - Xerox 6180MFP | Features Setup Guide - Page 99
ços para adicionar uma pessoa aos Endereços de fax 1. Windows: No menu Iniciar, selecione Todos os programas/ Xerox/Phaser 6180MFP/Editor do catálogo de endereços e clique em OK. Macintosh: Na pasta Aplicativos, clique em Xerox/ Phaser 6180MFP e dê um clique duplo em Editor do catálogo de endere - Xerox 6180MFP | Features Setup Guide - Page 100
localizados no painel de navegação esquerdo do painel de controle. 4. Digite um valor para Nome e Telefone. 5. Windows: No menu Iniciar, selecione Todos os programas/ Xerox/Phaser 6180MFP/Editor do catálogo de endereços e clique em OK. Macintosh: Na pasta Aplicativos, clique em Xerox/ Phaser 6180MFP - Xerox 6180MFP | Features Setup Guide - Page 101
membros do grupo e clique em OK. 9. Windows: No menu Arquivo, selecione Salvar tudo. Macintosh: os membros do grupo e clique em OK. 9. Windows: No menu Arquivo, selecione Salvar tudo. Macintosh: uma imagem para um aplicativo usando os drivers de digitalização. ■ Digitalizar uma imagem para - Xerox 6180MFP | Features Setup Guide - Page 102
o endereço IP de seu computador? Para Windows: Em um prompt do DOS no Windows, digite o seguinte: ipconfig Será exibida computador. Como você localiza o endereço IP de sua impressora? No painel de controle da impressora: 1. Pressione o botão Sistema. 2. Use a Seta para cima Phaser® 6180MFP PT - 100 - Xerox 6180MFP | Features Setup Guide - Page 103
001181100 Rev A A Copyright © 2007 Xerox Corporation. All rights reserved.
-
 1
1 -
 2
2 -
 3
3 -
 4
4 -
 5
5 -
 6
6 -
 7
7 -
8
-
9
-
10
-
11
-
12
-
13
-
14
-
15
-
16
-
17
-
18
-
19
-
20
-
21
-
22
-
23
-
24
-
25
-
26
-
27
-
28
-
29
-
30
-
31
-
32
-
33
-
34
-
35
-
36
-
37
-
38
-
39
-
40
-
41
-
42
-
43
-
44
-
45
-
46
-
47
-
48
-
49
-
50
-
51
-
52
-
53
-
54
-
55
-
56
-
57
-
58
-
59
-
60
-
61
-
62
-
63
-
64
-
65
-
66
-
67
-
68
-
69
-
70
-
71
-
72
-
73
-
74
-
75
-
76
-
77
-
78
-
79
-
80
-
81
-
82
-
83
-
84
-
85
-
86
-
87
-
88
-
89
-
90
-
91
-
92
-
93
-
94
-
95
-
96
-
97
-
98
-
99
-
100
-
101
-
102
-
103
 |
 |
Phaser
®
6180MFP
www.xerox.com/office/6180MFPsupport
multifunction printer
FR
IT
DE
ES
PT
EN
Features Setup Guide
Guia de Configuração dos Recursos
Guía de configuración de funciones
Funktionsinstallationshandbuch
Guida all'installazione delle funzioni
Guide de configuration des fonctions