Xerox 6180MFP Features Setup Guide - Page 8
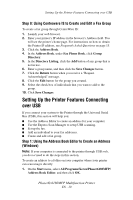
Step 2: Using CentreWare IS to Create an Address for the, Scanner - printer
 |
UPC - 095205733839
View all Xerox 6180MFP manuals
Add to My Manuals
Save this manual to your list of manuals |
Page 8 highlights
Setting Up the Printer Features Connecting over Ethernet (Network) 4. Click the Permissions button. 5. Select the Everyone group, and verify that all permissions are enabled (for Full control, Change, and Read). 6. Click OK. Write down your Share name; you will need it for setting up other features later in the setup process. 7. Click OK again. Macintosh: To share a folder in a Macintosh operating system: 1. From the dock, open System Preferences. 2. Click the Sharing icon. 3. Enable Windows Sharing. 4. Click the Accounts button, and then enable your account. 5. Follow the on-screen prompts for entering your password. 6. Click Done. 7. Click Show All, and then click the Network icon. 8. Write down your IP address; you will need it for setting up other features later in the setup process. 9. Click Show All, and then click Accounts. 10. Write down your Short Name; you will need it for setting up other features later in the setup process. 11. Close System Preferences. 12. From the dock, open your Public folder and create a new folder. The scanner will place images in this folder. 13. In the Finder window, click the folder you just created. 14. On the File menu, click Get Info, and then Ownership & Permissions. 15. Click Details to expand the window. 16. Set permissions for Group to have Read and Write access, and then click Apply to enclosed items. Step 2: Using CentreWare IS to Create an Address for the Scanner 1. Launch your web browser. 2. Enter your printer's IP address in the browser's Address field. You will see the home page for the printer. For instructions on how to obtain the Printer IP address, see Frequently Asked Questions on page 15. 3. On the printer's home page, click Address Book. 4. On the Address Book tab, under Server Address Book on the left navigation panel, click Individual Directory. Phaser® 6180MFP Multifunction Printer EN - 6
-
 1
1 -
2
-
 3
3 -
 4
4 -
 5
5 -
 6
6 -
 7
7 -
 8
8 -
 9
9 -
 10
10 -
 11
11 -
 12
12 -
 13
13 -
14
-
15
-
16
-
17
-
18
-
19
-
20
-
21
-
22
-
23
-
24
-
25
-
26
-
27
-
28
-
29
-
30
-
31
-
32
-
33
-
34
-
35
-
36
-
37
-
38
-
39
-
40
-
41
-
42
-
43
-
44
-
45
-
46
-
47
-
48
-
49
-
50
-
51
-
52
-
53
-
54
-
55
-
56
-
57
-
58
-
59
-
60
-
61
-
62
-
63
-
64
-
65
-
66
-
67
-
68
-
69
-
70
-
71
-
72
-
73
-
74
-
75
-
76
-
77
-
78
-
79
-
80
-
81
-
82
-
83
-
84
-
85
-
86
-
87
-
88
-
89
-
90
-
91
-
92
-
93
-
94
-
95
-
96
-
97
-
98
-
99
-
100
-
101
-
102
-
103
 |
 |
