Xerox 6180MFP Features Setup Guide - Page 7
Macintosh USB Installation, Setting Up the Printer Features Connecting, over Ethernet Network
 |
UPC - 095205733839
View all Xerox 6180MFP manuals
Add to My Manuals
Save this manual to your list of manuals |
Page 7 highlights
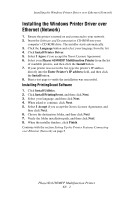
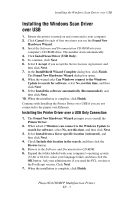
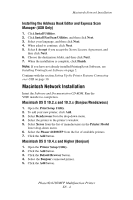
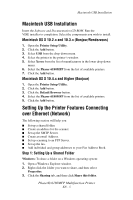
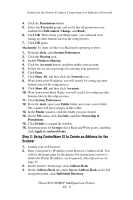
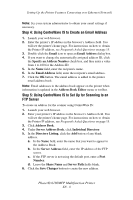
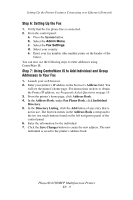
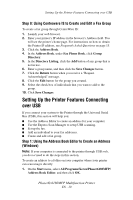
Macintosh USB Installation Macintosh USB Installation Insert the Software and Documentation CD-ROM. Run the VISE installer to completion. Select the components you wish to install. Macintosh OS X 10.2.x and 10.3.x (Bonjour/Rendezvous) 1. Open the Printer Setup Utility. 2. Click the Add button. 3. Select USB from the drop-down menu. 4. Select the printer in the printer's window. 5. Select Xerox from the list of manufacturers in the lower drop-down menu. 6. Select the Phaser 6180MFP from the list of available printers. 7. Click the Add button. Macintosh OS X 10.4.x and Higher (Bonjour) 1. Open the Printer Setup Utility. 2. Click the Add button. 3. Click the Default Browser button. 4. Select the Phaser 6180MFP from the list of available printers. 5. Click the Add button. Setting Up the Printer Features Connecting over Ethernet (Network) The following section will help you: ■ Set up a shared folder. ■ Create an address for the scanner. ■ Set up the SMTP Server. ■ Create an email Address. ■ Set up scanning to an FTP Server. ■ Set up the fax. ■ Add individual and group addresses to your Fax Address Book. Step 1: Setting Up a Shared Folder Windows: To share a folder on a Windows operating system: 1. Open a Windows Explorer window. 2. Right-click the folder you want to share, and then select Properties. 3. Click the Sharing tab, and then click Share this folder. Phaser® 6180MFP Multifunction Printer EN - 5
-
 1
1 -
 2
2 -
 3
3 -
 4
4 -
 5
5 -
 6
6 -
 7
7 -
 8
8 -
 9
9 -
 10
10 -
 11
11 -
 12
12 -
13
-
14
-
15
-
16
-
17
-
18
-
19
-
20
-
21
-
22
-
23
-
24
-
25
-
26
-
27
-
28
-
29
-
30
-
31
-
32
-
33
-
34
-
35
-
36
-
37
-
38
-
39
-
40
-
41
-
42
-
43
-
44
-
45
-
46
-
47
-
48
-
49
-
50
-
51
-
52
-
53
-
54
-
55
-
56
-
57
-
58
-
59
-
60
-
61
-
62
-
63
-
64
-
65
-
66
-
67
-
68
-
69
-
70
-
71
-
72
-
73
-
74
-
75
-
76
-
77
-
78
-
79
-
80
-
81
-
82
-
83
-
84
-
85
-
86
-
87
-
88
-
89
-
90
-
91
-
92
-
93
-
94
-
95
-
96
-
97
-
98
-
99
-
100
-
101
-
102
-
103
 |
 |
