Yamaha DVD-S663 Owner's Manual - Page 38
Turning the progressive scan, function on/off, Adjusting picture settings
 |
View all Yamaha DVD-S663 manuals
Add to My Manuals
Save this manual to your list of manuals |
Page 38 highlights
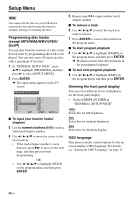
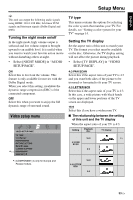
Setup Menu When the aspect ratio of your TV is 16:9 (widescreen): Setting Playback disc TV display 16:9 16:9 4:3 *2 *1: If the disc is not assigned to playback in panscan, it is played in letterbox. *2: The side of the picture may be stretched depending on the TV. In this case, check the screen size and aspect ratio of your TV. Turning the progressive scan function on/off This feature is only available if you have connected this unit to a progressive scan TV through the component video jacks (see "Component video jacks " on page 10). • Select [PROGRESSIVE] in "VIDEO SETUP PAGE". OFF Select this to disable the progressive scan function. ON Select this to enable the progressive scan function. Notes on activating progressive scan: • Ensure that your TV is equipped with progressive scan. • Connect using a component video cable. • When making HDMI connections, you cannot select [PROGRESSIVE]. • (Europe and Russia models only) When [COMPONENT] is set to [RGB] (see page 36), you cannot select [PROGRESSIVE]. • You can turn off the progressive scan without using the setup mode if no picture is displayed. See "No picture is displayed when you do not use progressive scan connections (using the component video jacks)" in "Troubleshooting" on page 43. Adjusting picture settings This unit comes with three predefined sets of picture color settings and one personal setting that you can define yourself. 1 In "VIDEO SETUP PAGE", press 5/a to highlight [PICTURE SETTING], and then press 3. STANDARD Select this for the standard picture setting. BRIGHT Select this to make the TV picture brighter. SOFT Select this to make the TV picture softer. PERSONAL Select this to personalize your picture color by adjusting the brightness, contrast, tint and color (saturation). 2 Press 5/a to select a setting, and then press ENTER. 3 If you select [PERSONAL] in step 1, proceed to steps 4-7. 34 En
-
 1
1 -
2
-
3
-
4
-
5
-
6
-
7
-
8
-
9
-
10
-
11
-
12
-
13
-
14
-
15
-
16
-
17
-
18
-
19
-
20
-
21
-
22
-
23
-
24
-
25
-
26
-
27
-
28
-
29
-
30
-
31
-
32
-
 33
33 -
 34
34 -
 35
35 -
 36
36 -
 37
37 -
 38
38 -
 39
39 -
 40
40 -
 41
41 -
 42
42 -
 43
43 -
44
-
45
-
46
-
47
-
48
-
49
-
50
-
51
-
52
-
53
 |
 |
